Table of Contents
Website Chat Widget Quick Start
The Website Chat Widget allows website visitors to Contact you via live chat or through other Messaging Channels you have connected.
Connecting a Website Chat Widget
Watch the video below for a step-by-step guide on How to Connect Website Chat to respond.io.
Step 1: Go to Settings > Channels
Step 2: Click Add Channel > Website Chat > Connect
Step 3: Fill in the website(s) where the Widget will be added.
Refer to the following on how websites can be whitelisted.
- If the user adds
https://app.respond.iothen onlyhttps://app.respond.iowill be whitelisted. Any other subdomain or root should not work. - If the user adds
https://*.respond.io, then all subdomains including the root domain will be whitelisted. - If the user adds
https://respond.io, then only the root domain will be whitelisted.
Step 4: Select a Theme Color for the Widget using the interactive color picker.
Step 5: Select an Icon for the Widget to show on the website. If you prefer to upload a customized icon, you can upload a square icon with a recommended size of 256px x 256px.
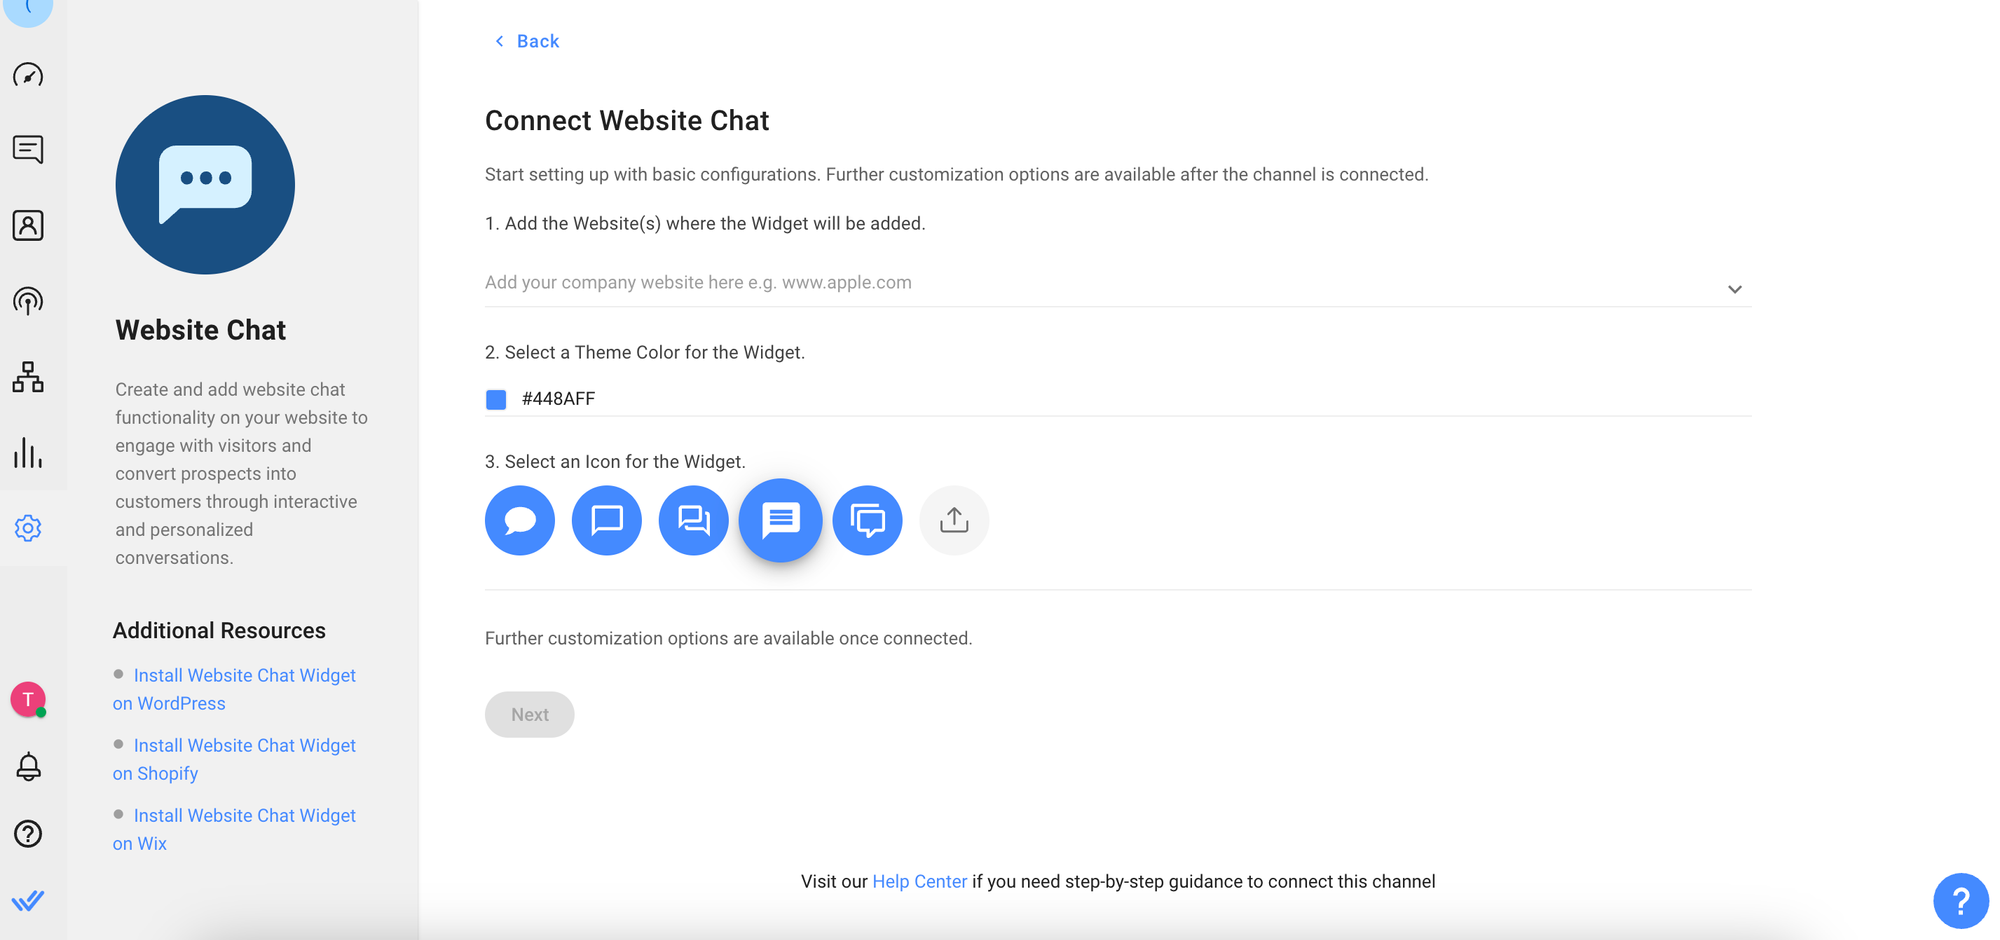
Step 6: Click Next > Add script to your preferred website. Alternatively, you can send the installation instructions to someone else via email.
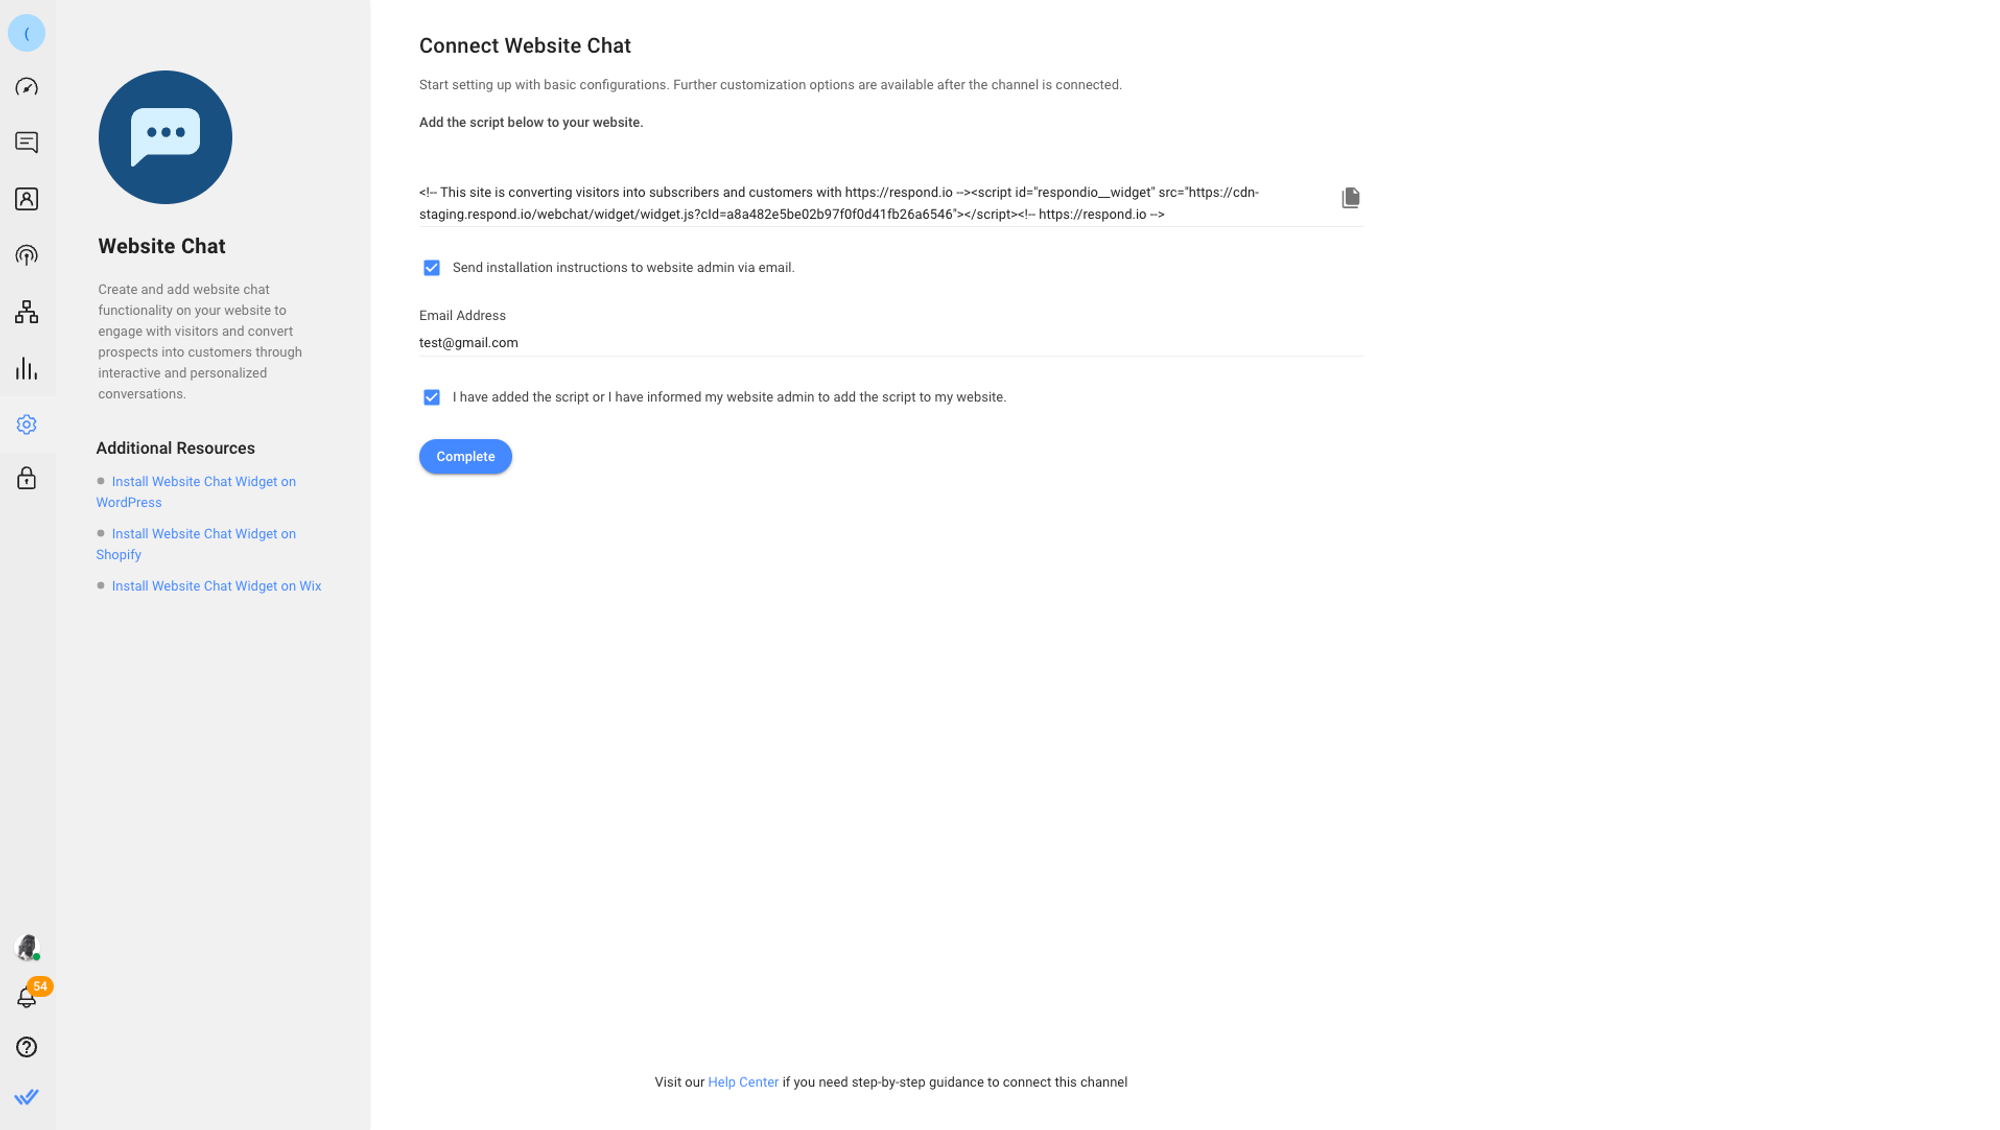
Installing the Chat Widget
Depending on what system you use to create and manage your website, we have created a step-by-step guide to walk you through installing a Chat Widget onto your website.
For other platforms or services, navigate to the HTML source of the page. Paste the script before the </body> tag.
<body>
...
...
...
<Paste Script Here>
</body>
If you require assistance, you can choose to forward the script along with installation instructions to your website administrator. Select the respective checkbox and enter the email address of someone who can help you install the chat plugin.
Customizing the Chat Widget
Step 1: In your Workspace, go to Settings > Channel
Step 2: Locate the Website Chat Channel > click Customize
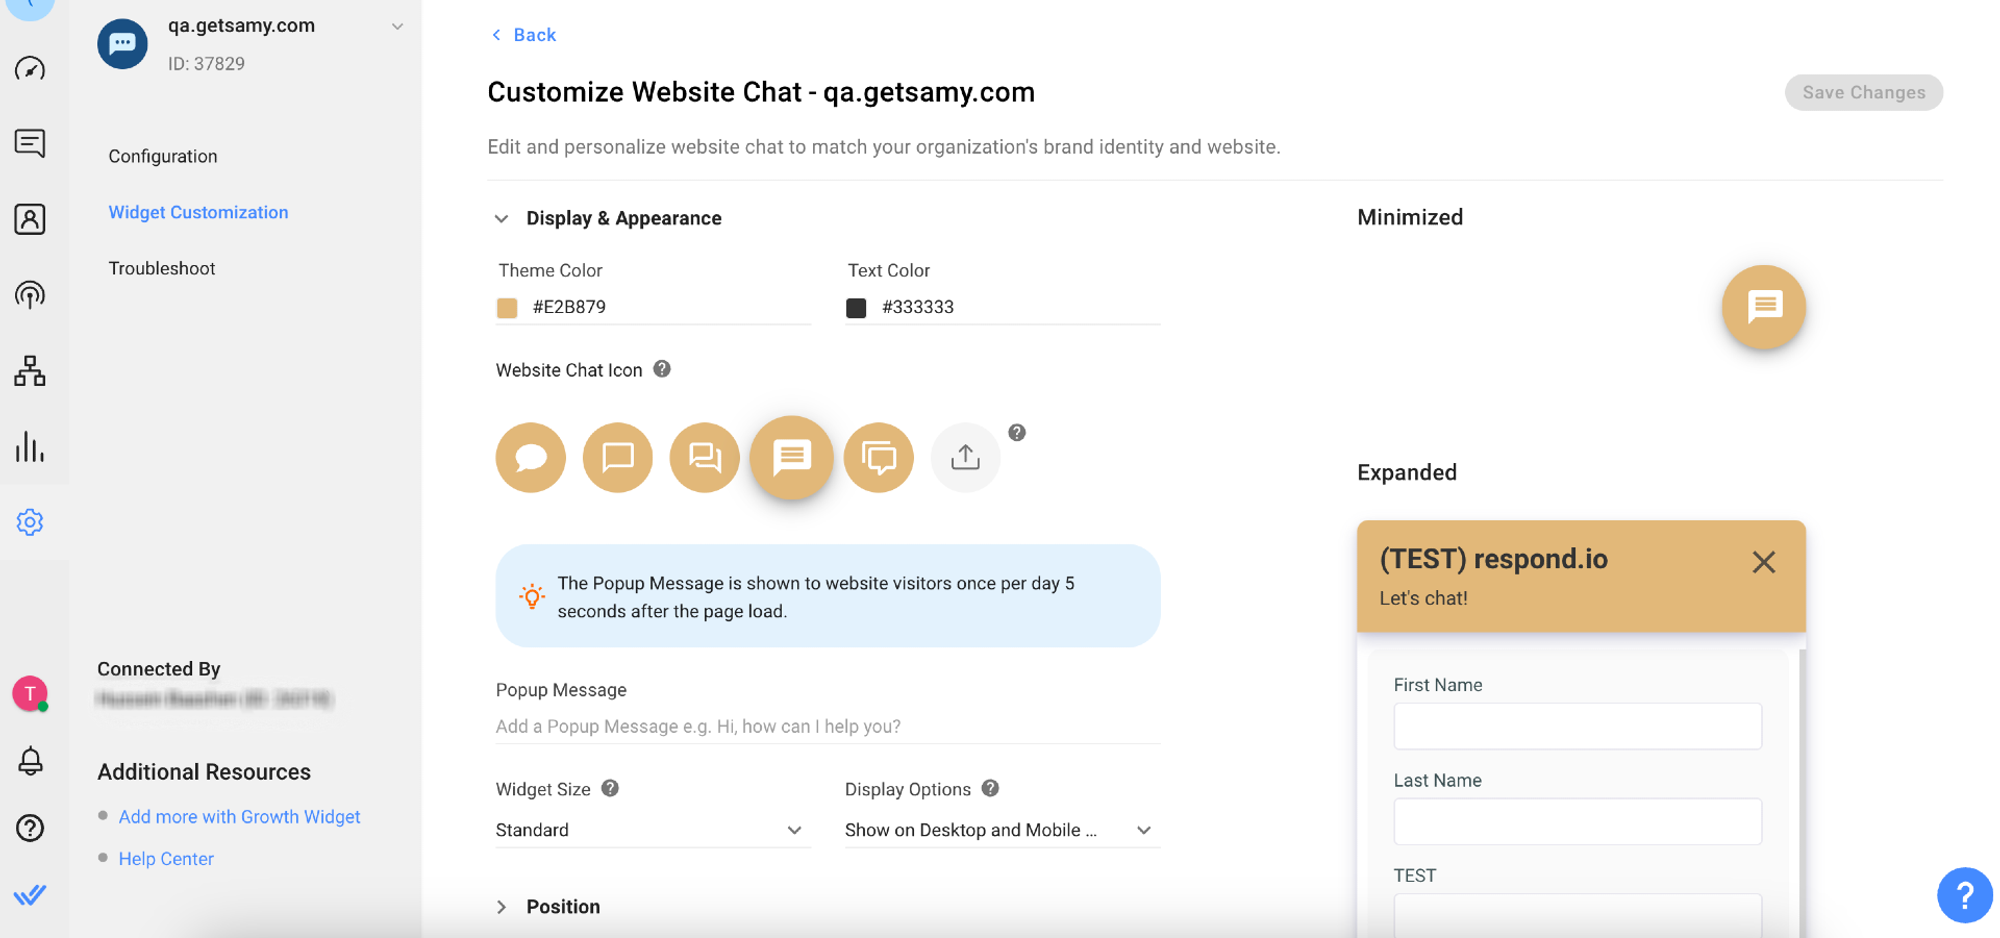
Display & Appearance
You may customize the following to change the display appearance of the widget on the website.
Field | Description |
Theme Color | The chosen color will be used as the primary color of your widget. |
Text Color | The chosen color will be used as the primary text color of your widget. |
Website Chat Icon | The selected icon is used inside the widget bubble together with the Theme Color. You can upload a custom icon if necessary. |
Popup Message | The Popup Message is shown to website visitors once per day 5 seconds after the page load. If not defined, no popup message will appear to the website visitors. |
Validation for Website Chat Icon:
- Maximum file size: 1MB
- Maximum file dimension: 256 x 256 px
- Shape: Square
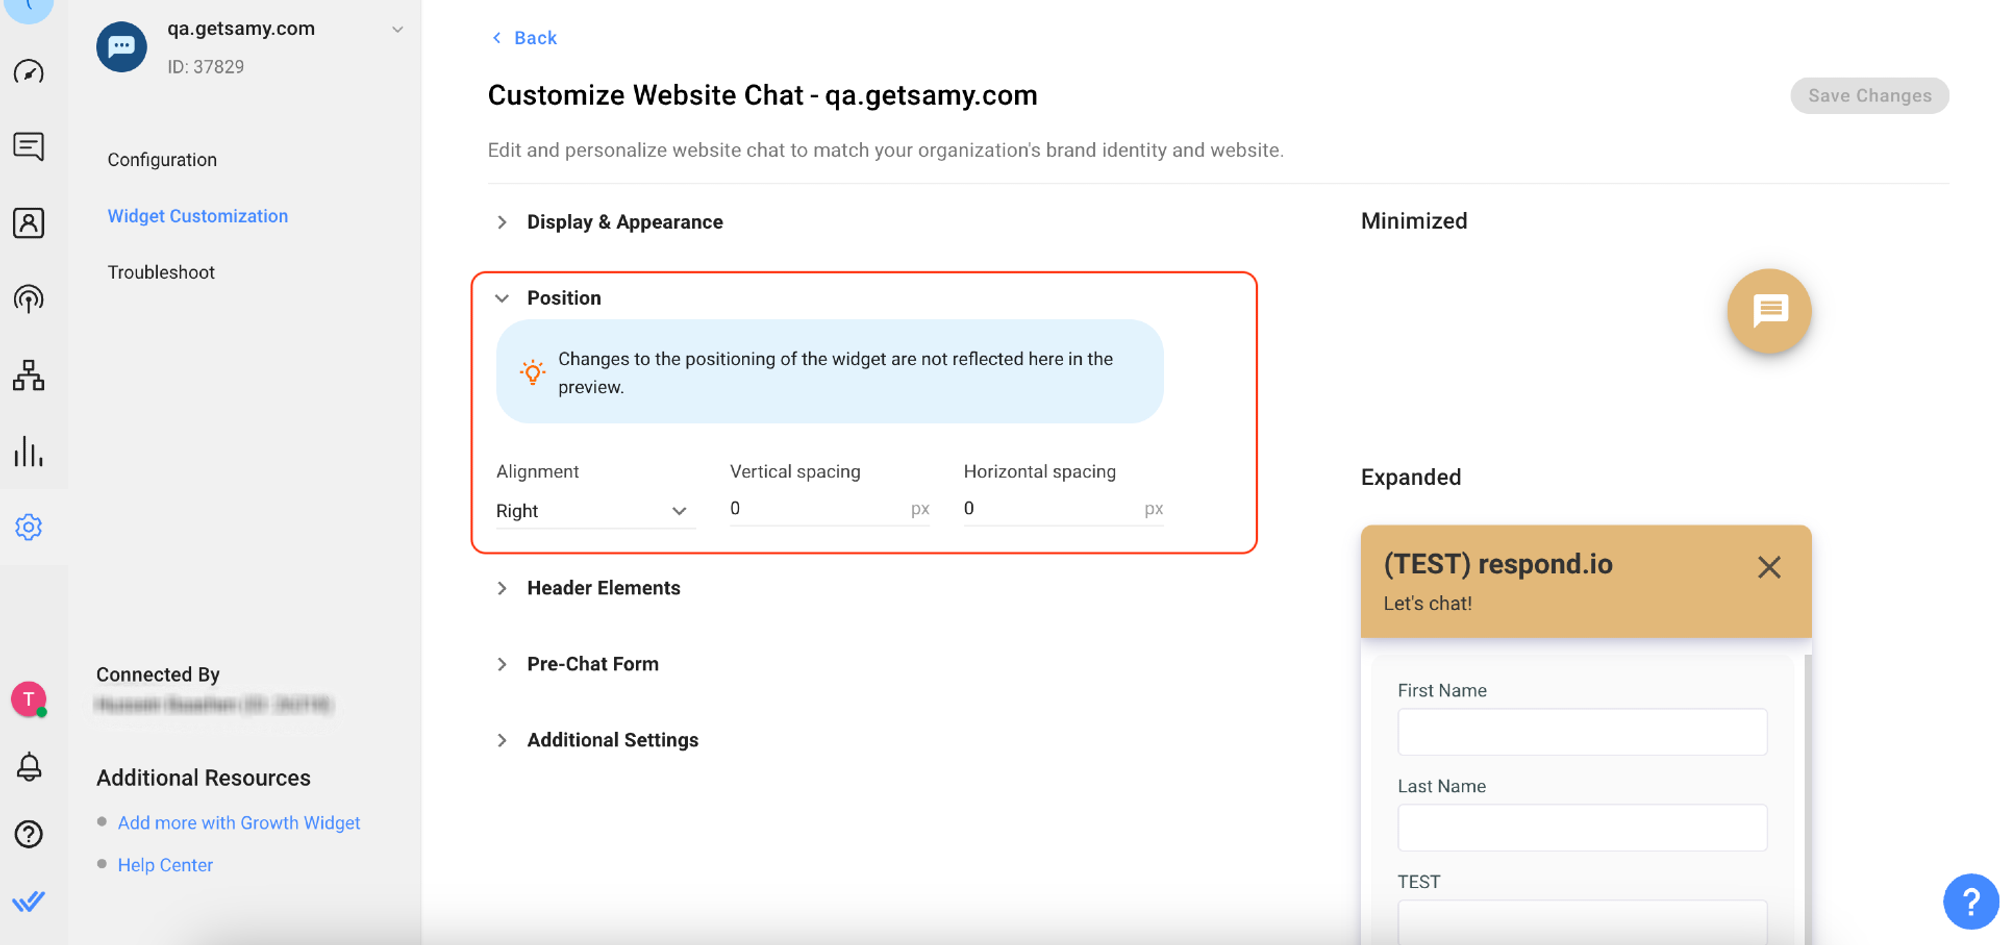
Position
Field | Description |
Align To | Users can choose to specify a position whether to display the widget on the left or right of the platform. |
Vertical Spacing | Users can specify the amount of vertical spacing between the website chat widget and the bottom of the screen. |
Horizontal Spacing | Users can specify the amount of horizontal spacing between the website chat widget and the side of the screen. |
Widget Size | Users can choose the size of the widget from Small, Standard or Large. |
Display Options | Users can choose to display this widget on the desktop, mobile devices or both. |
Header Elements

Field | Description |
Title | The Title will show at the top of your chat widget. |
Tagline | The Tagline will be displayed under the title. |
Website Chat Logo | Drop your logo image here so it will show at the top of the Website Chat. The format can either be in PNG, SVG or JPG and the file size is not more than 4.0 MB. |
Channel Icons | This option will enable Contacts to contact you through their preferred Channel providing the options are given. You can add up to six Channels and it will be shown at the top of the Website Chat Widget. |
Channel Icons Color | The Channel Icons can be displayed in white or colored form on your chat widget. Select White or Colored to go with the Theme Color of your chat widget. |
Validation for Website Chat Logo:
- Maximum file size: 4MB
- Maximum file dimension: 1024 x 1024 px
- Shape: Square
Channel Icons
If the Website Chat Widget has never been configured before, connected Channels with adequate information will be listed by default as Widget Channel links.
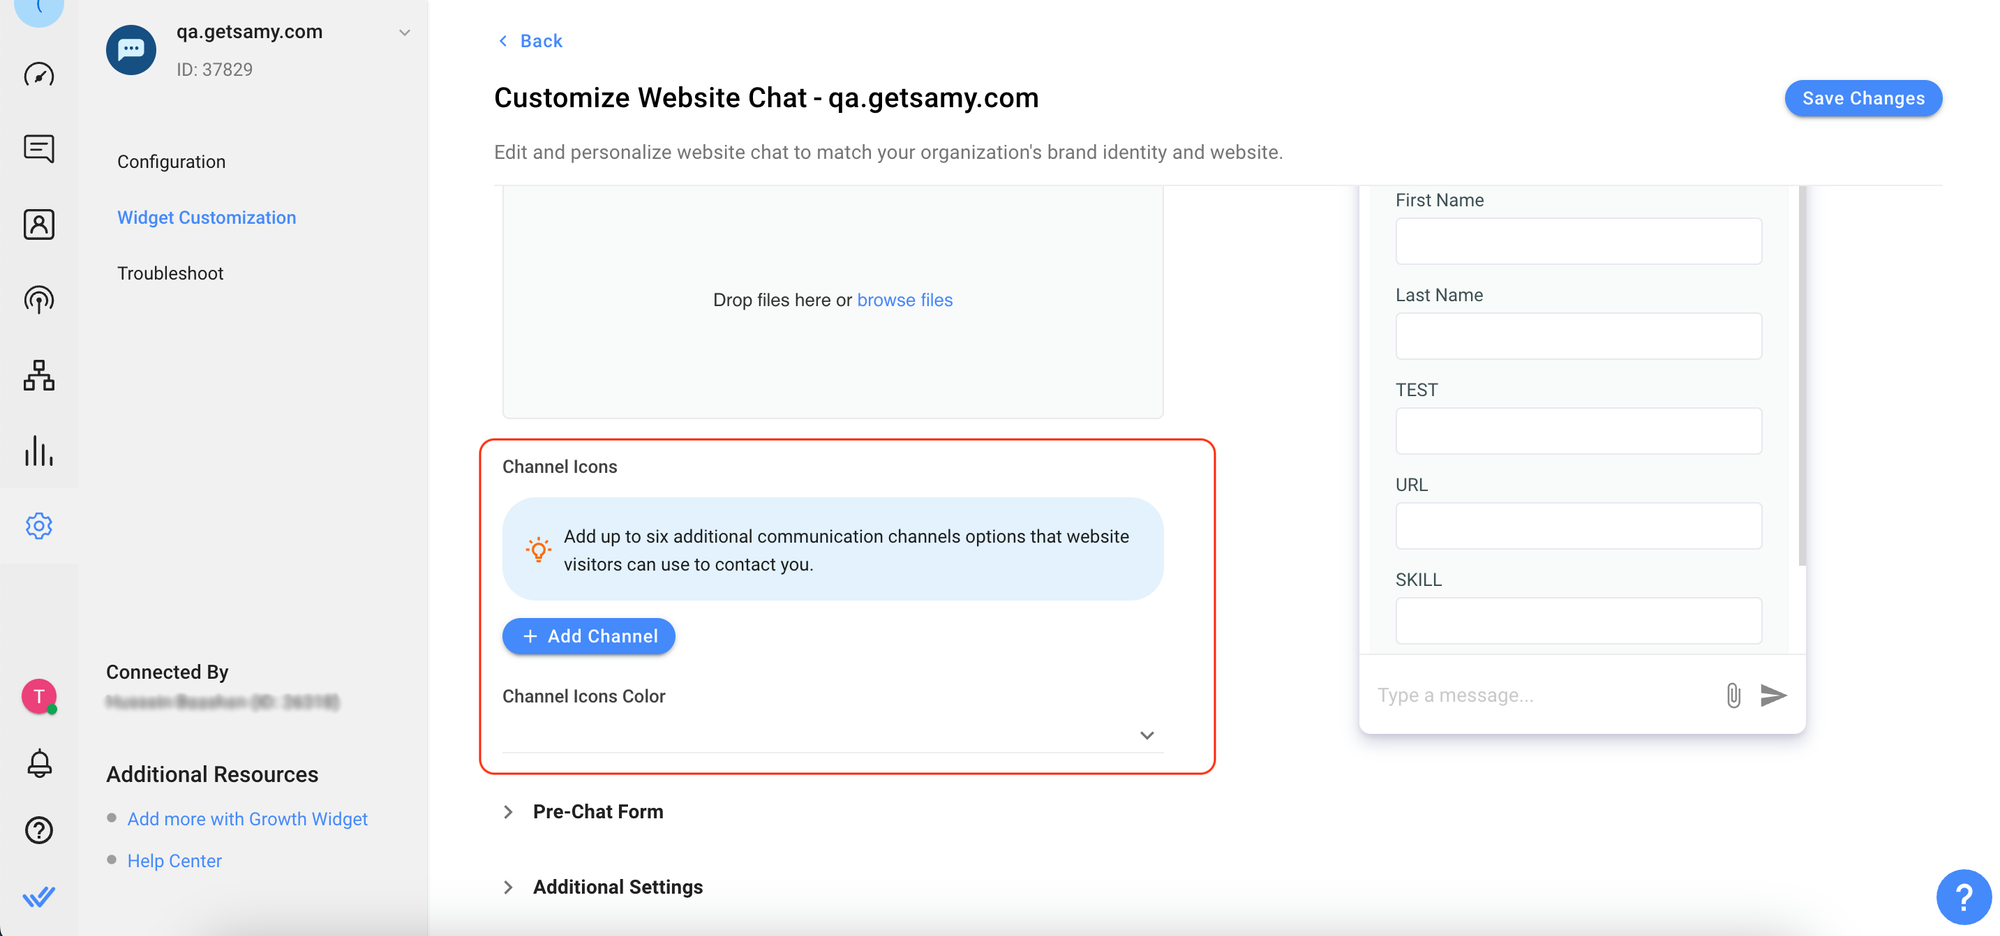
You may add the widget Channel links and specify the necessary information for the selected Channel.
Here is the list of Input Field required for each of the Channel Links supported.
Channel Links | Input Field Required |
WhatsApp Phone Number | |
Facebook Messenger | Facebook Page ID |
Telegram | Telegram Bot Name |
Twitter ID | |
LINE | LINE ID |
Viber | Viber Public Account Name |
SMS | SMS Phone Number |
Email Address | |
Phone Call | Phone Number |
Custom Link | URL Address and Icon |
Custom QR | QR Image and Icon |
Validation for Channel Icon:
- Maximum file size: 1MB
- Maximum file dimension: 256 x 256 px
- Shape: Square
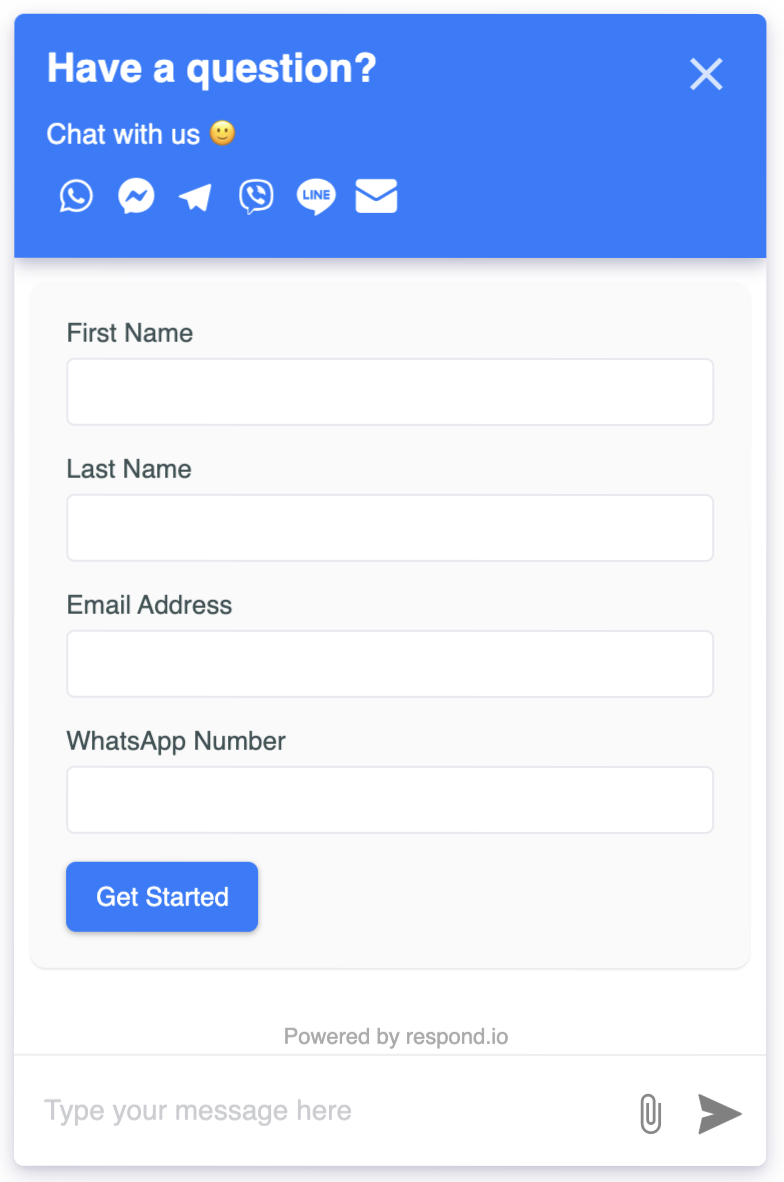
Pre-Chat Form
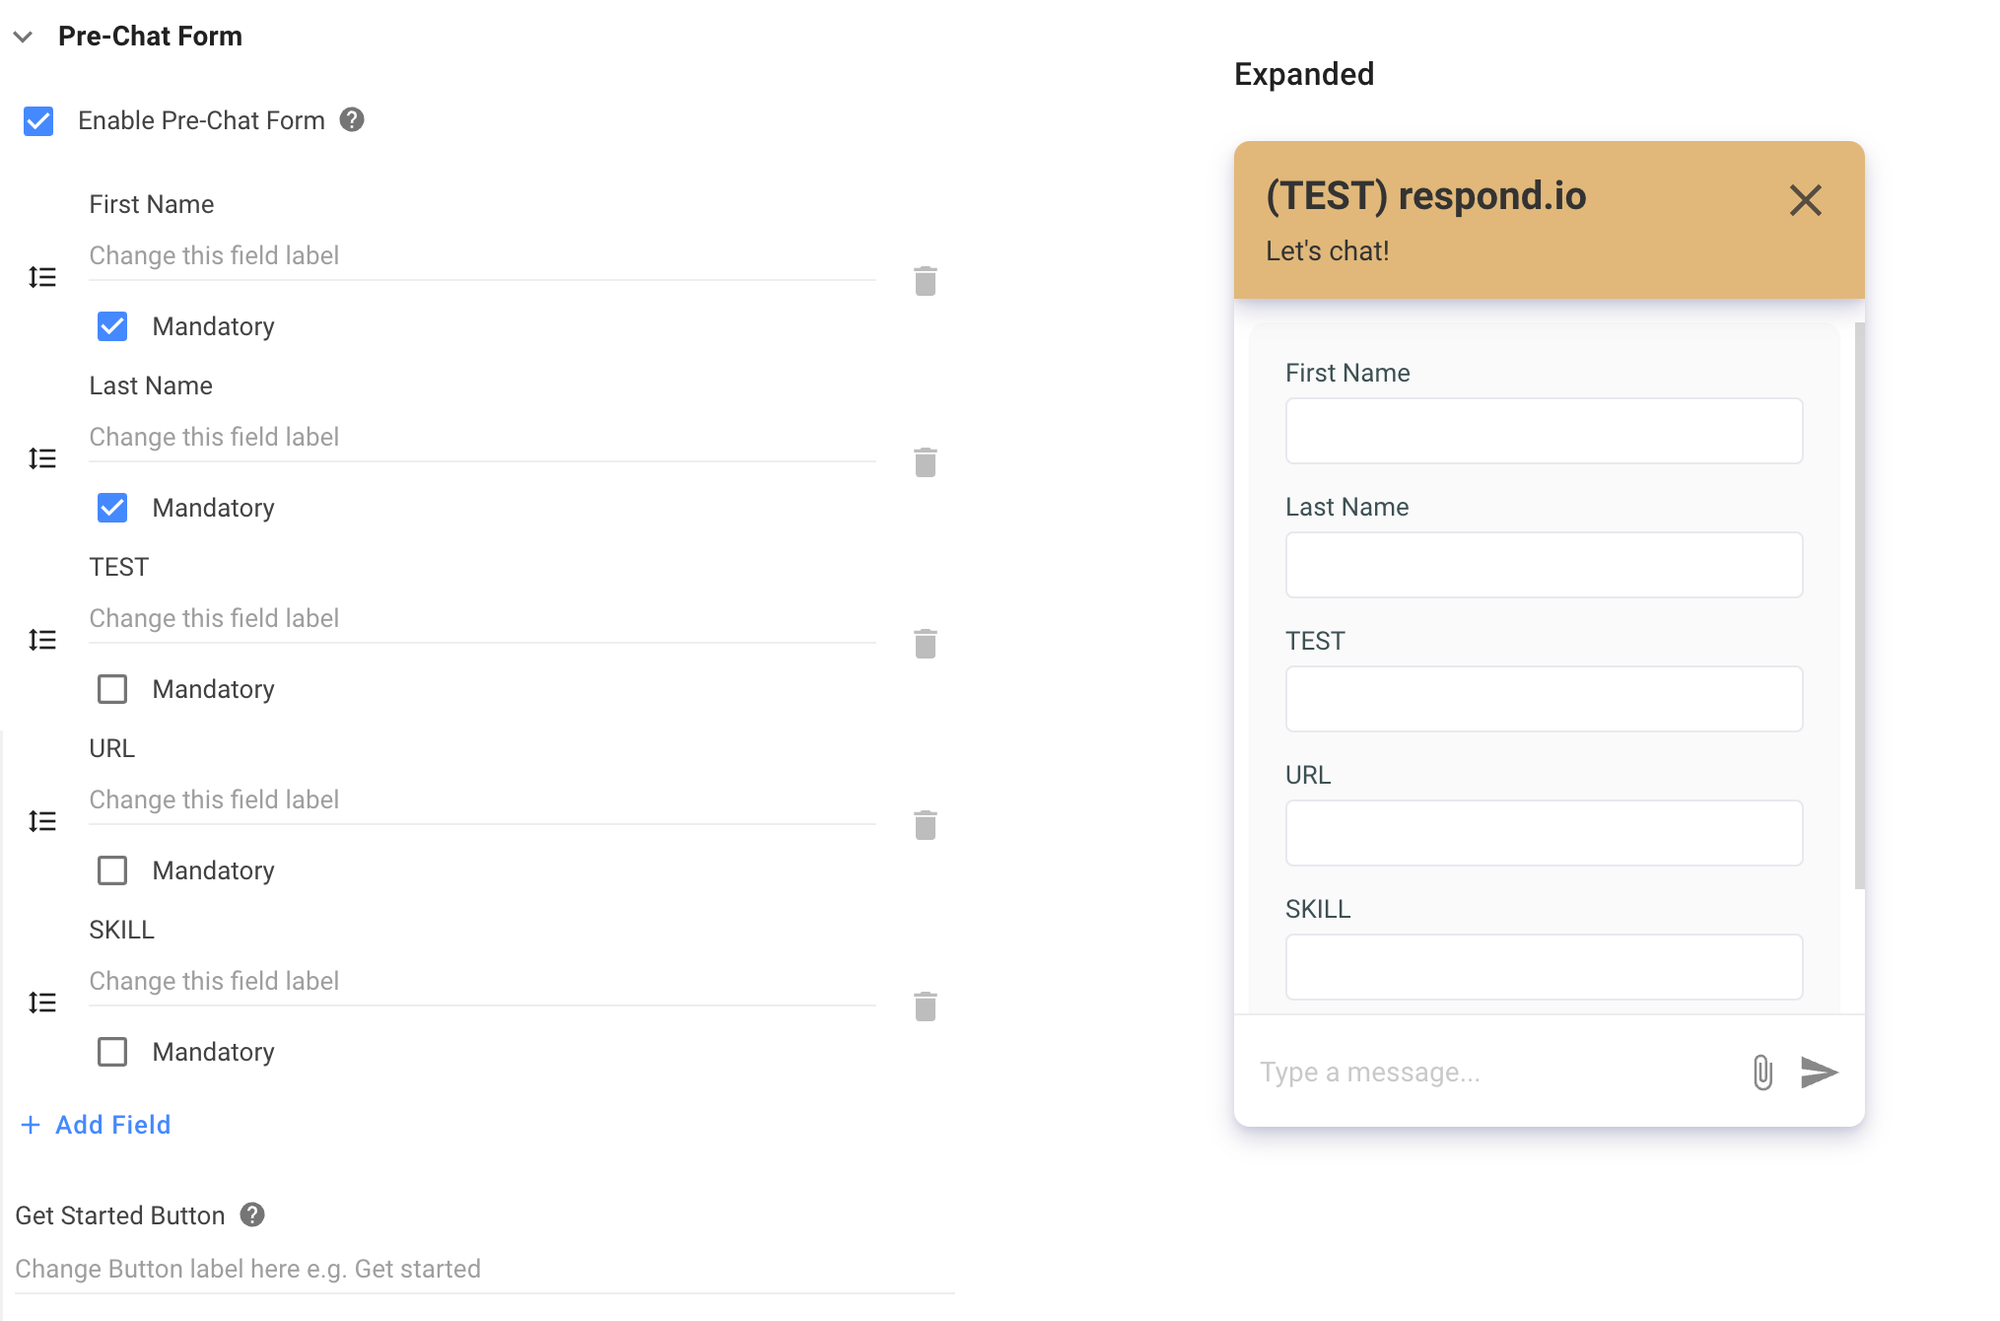
Enabling this option will add a pre-chat form to your Website Chat. If enabled, your website visitors will be presented with a form to fill out before they start the chat.
With this option enabled, you can include additional custom fields when necessary. In addition to that, you can also customize the label for the default fields on how they appear to your Contacts.
Additional Settings
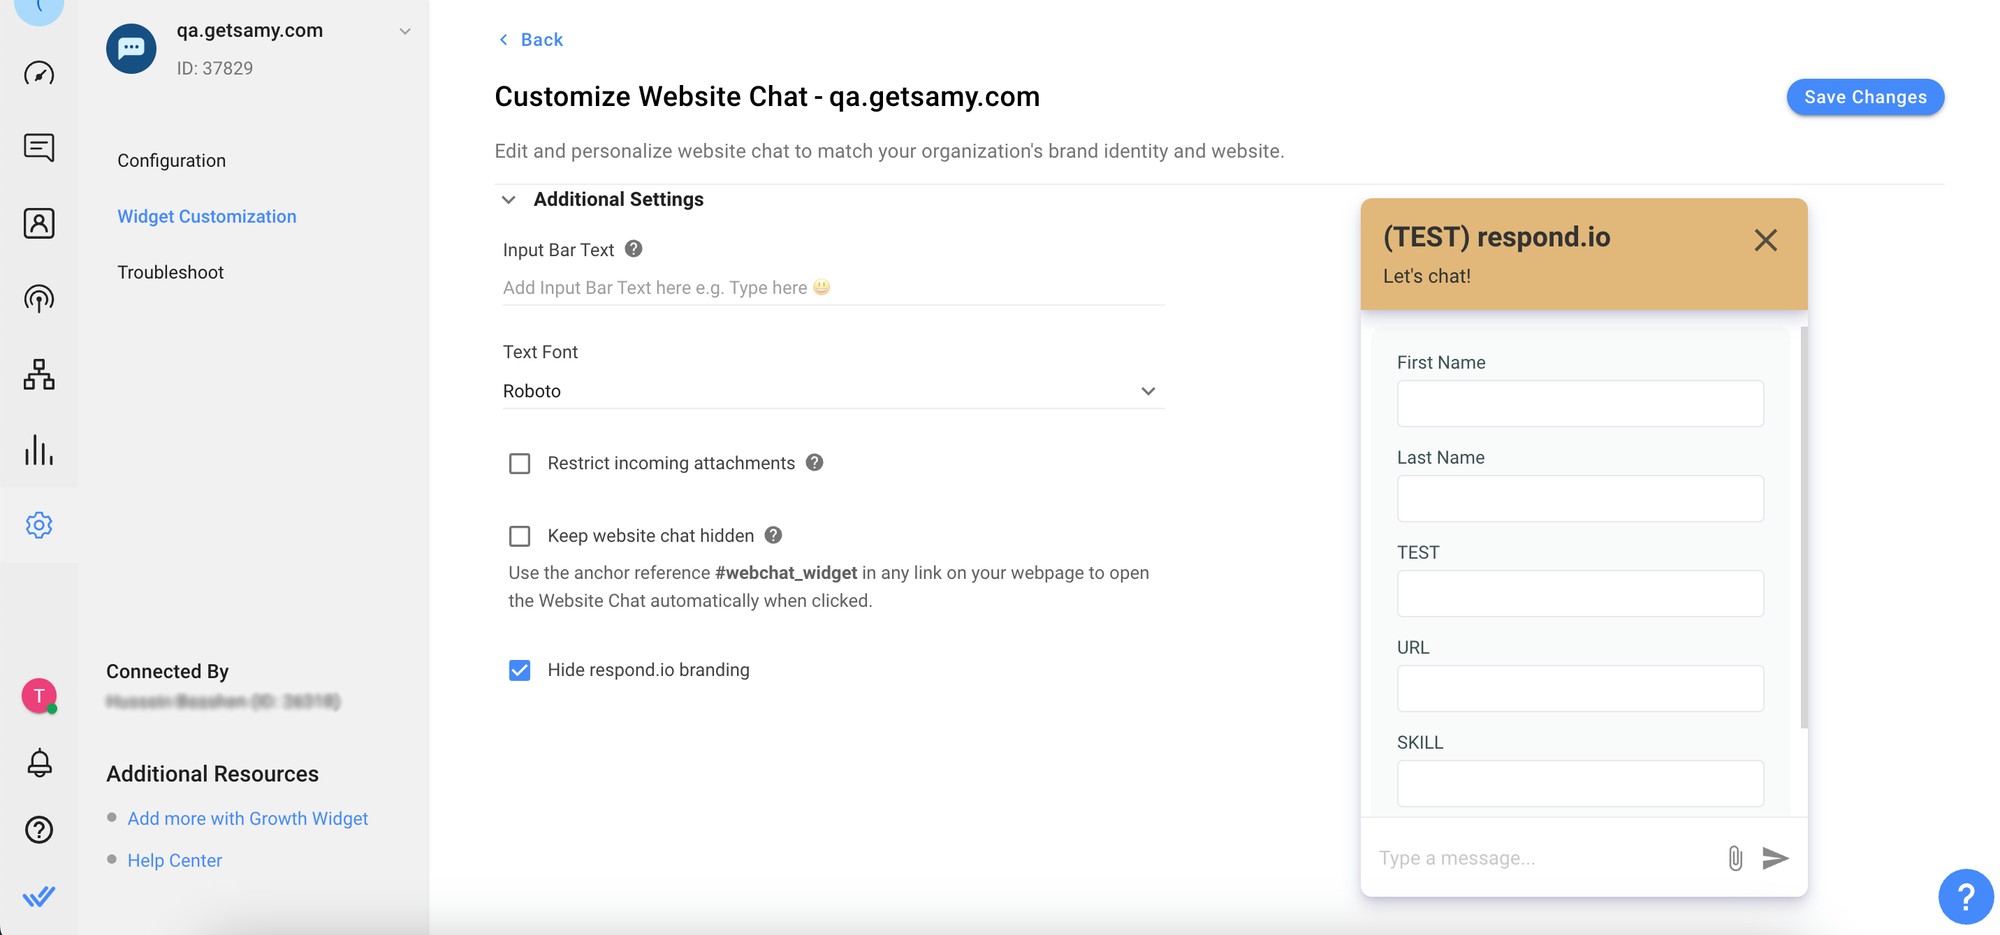
Field | Description |
Input Bar Text | This text will function as a placeholder in the typing area. |
Text Font | The font that will be used to display the font in the website chat widget. |
Restrict Incoming Attachments
When this option is checked, the website visitor does not have an option to attach an attachment in the website chat widget.
Keep website chat hidden
When using this option the widget will be completely hidden. Until the Anchor Reference has been clicked or when the chat is opened via the programmatic API.
#webchat_widget
Using the above anchor you can create a button on your page, to open the widget once clicked.
Hide Respond.io Branding
Using this option you can remove the respond.io Branding from your Widget.
Channel Configuration
Step 1: Click Settings > Channels
Step 2: Locate the Website Chat > click Manage
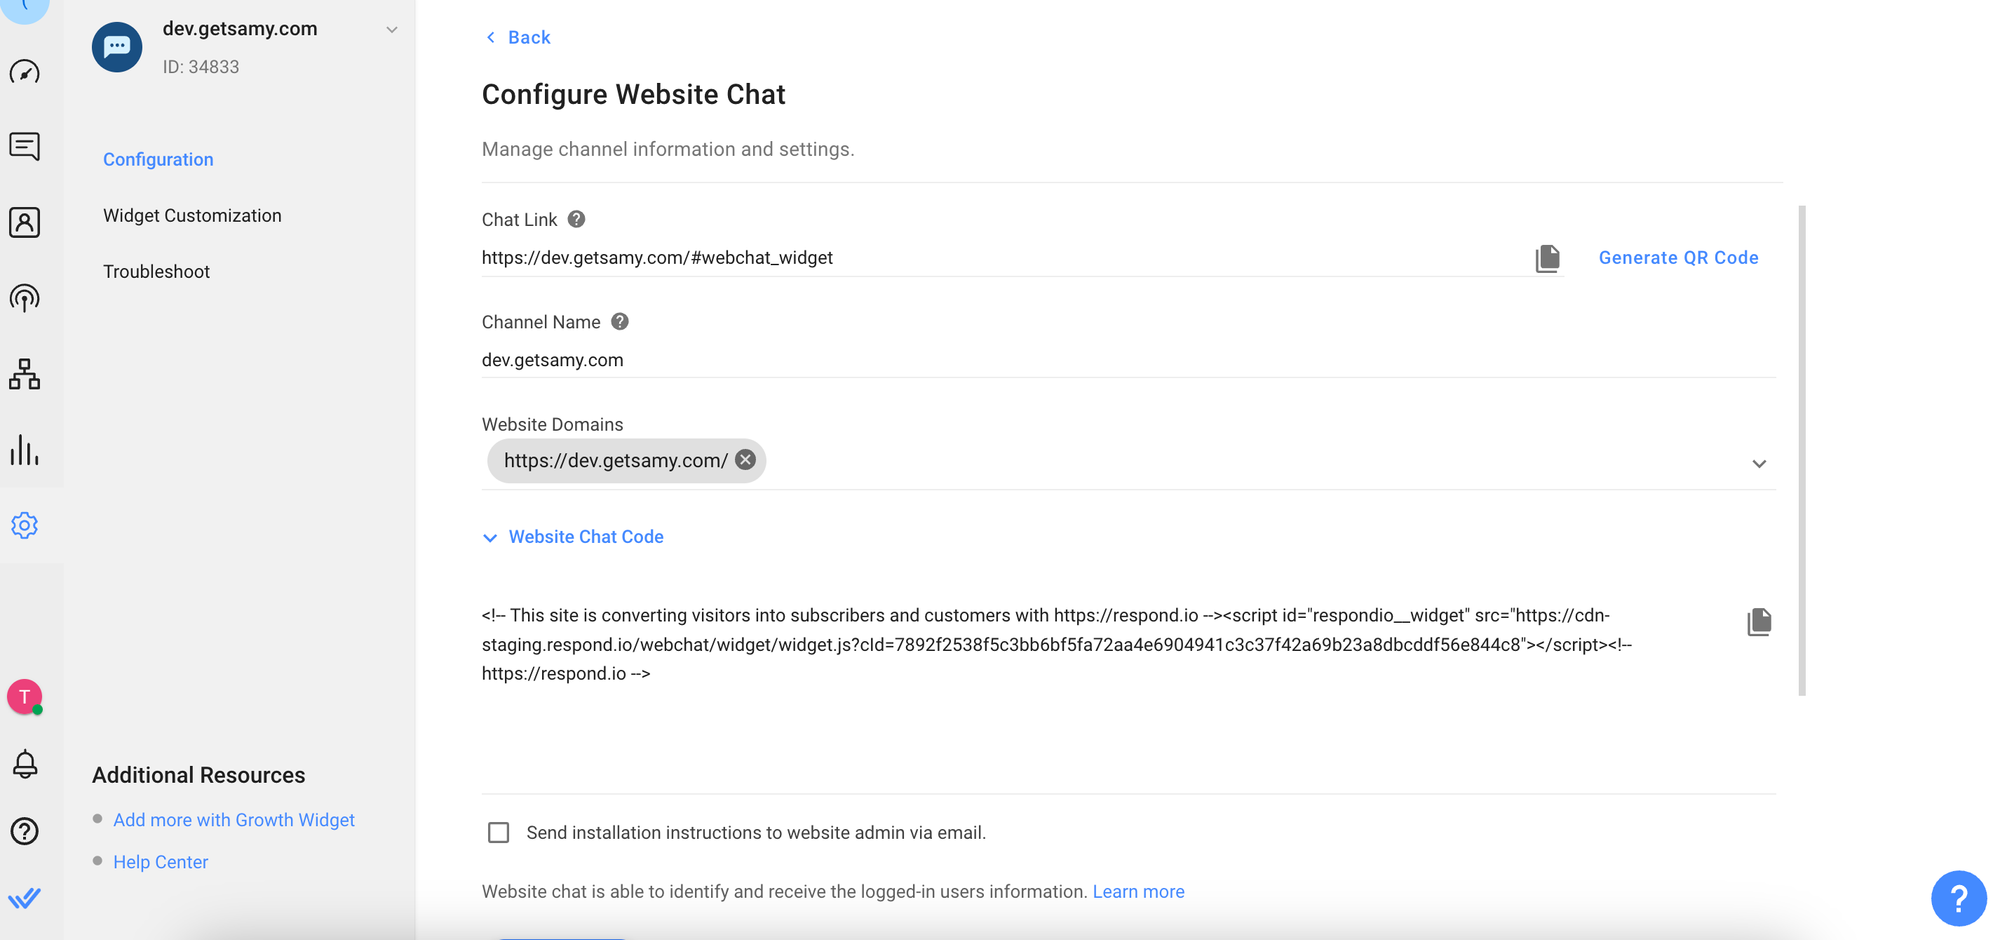
Step 3: In the Website Chat Configuration page you will see the following configurations:
- Chat Link - The URL link for your Contact to reach your Channel.
- Channel Name - The Channel Name can be changed and is used internally to identify the Channel.
- Website Domains - Website(s) that are connected to your Widget.
- Website Chat Code - The code you can paste in your website’s HTML source if you need to retrieve the generated code snippet.
Step 4: Click Save Changes to update the Website Chat Configuration page
Identifying Logged-in Users
The logged-in users of your website can be identified by adding a simple JavaScript code to your website code. Once the identifier passed is matched with an existing Contact, the current conversation will be resumed.
<script>
    window.__respond_settings = {
	    identifier: 'customer@example.com',
	    firstName: 'Jane',
	    lastName: 'Doe',
	    phone: '60123456789',
	    email: 'customer@example.com',
	    profilePic: '<https://static.independent.co.uk/s3fs-public/thumbnails/image/2015/07/08/14/pic.jpg>',
	    countryCode: 'MY',
	    language: 'en',
			// Custom Fields
	    custom_fields: {
		    // slugs of custom fields
	      number: 123,
	      description: 'some text',
	    },
  };
</script>


<script id="respondio__widget" src="https://cdn-staging.respond.io/webchat/widget/widget.js?cId=ac37d6ced587cab720c5b05a1bc209c331c66c19b1e7e6069e5807491fb2a7dc"></script>
Guide on how to use the code
- Edit the code (given below) to send respond.io the identifier of the currently logged-in user. This can be the email address or Contact ID or based on any other Contact field. Please note that an
identifieris a required field. - Paste the code right in the
headtag of every page where you want the website chat to appear.- The script for identifying logged-in users must be placed above the website chat code that can be found in the website chat configuration dialog.
- You can also send respond.io Contacts Fields associated with your Contacts so we will store the Contact field during the Contact creation process. The field name (or slug) can be found in the Contact Fields module.
- Please note that if you are using this feature, the pre-chat form will be ignored which means Contacts do not need to fill up their information before initiating a conversation.
The example above is passing an email address as identifier and during Contact creation process, all the Contact fields passed will be stored.
Programmatic Control (API for Users)
The Website Chat Widget can be opened and closed via your Website JavaScript code. This allows you to create a custom "Chat with us" button on your Website, and trigger the Website Chat Widget to open when a visitor clicks on the button.
Actions
- Open chat
- Description: Opens the chat widget.
- Syntax:
$respond.do("chat:open")
- Close chat
- Description: Closes the chat widget.
- Syntax:
$respond.do("chat:close")
Event Listeners
- Chatbox was opened
- Description: Handles the chat widget opened event (triggers your
callbackfunction). - Syntax:
$respond.on("chat:opened", callback)
- Description: Handles the chat widget opened event (triggers your
- Chatbox was closed
- Description: Handles the chat widget closed event (triggers your
callbackfunction). - Syntax:
$respond.on("chat:closed", callback)
- Description: Handles the chat widget closed event (triggers your
State Check Methods
- Is chat open?
- Description: Returns
trueif the chat widget is opened, elsefalse. - Syntax:
$respond.is("chat:open")
- Description: Returns
- Is chat closed?
- Description: Returns
trueif the chat widget is closed, elsefalse. - Syntax:
$respond.is("chat:closed")
- Description: Returns
FAQ and Troubleshooting
Why aren't my messages getting delivered to Contacts?
There could be a few reasons why the messages aren’t getting delivered:
- Contact has left the website.
- Contact's inactivity may exceed the timeout period.
- Contact's client may have internet connection issues.
Why isn’t my Widget appearing on my website?
- Make sure the code is installed correctly. Refer to the instructions here on how to install the website chat widget.
- Be sure to whitelist the website where the widget is to be installed. Refer to Step 3 of Connecting Website Chat Widget on how to whitelist your domain.