Table of Contents
- How many files I can import at a time?
- Why am I unable to start a new import?
- What does the “Session expired” error mean?
- What if there are two Contacts with the same identifier in the CSV file?
- What if there are two existing Contacts with the same identifier in the Workspace?
- Are Tags compulsory for Contact imports?
- Why are some existing Contacts not identified by the phone number identifier?
Contact Import (How to)

- How many files I can import at a time?
- Why am I unable to start a new import?
- What does the “Session expired” error mean?
- What if there are two Contacts with the same identifier in the CSV file?
- What if there are two existing Contacts with the same identifier in the Workspace?
- Are Tags compulsory for Contact imports?
- Why are some existing Contacts not identified by the phone number identifier?
What is Contact Import?
Contact import allows you to add and update multiple Contacts on the platform.
Contact import is useful for the following reasons:
- Sync a Contact List to the platform
Syncing your Contact List with the platform helps you identify Contacts when they message you. - Bulk update Contacts on the platform
Update the information of multiple existing Contacts on the platform instead of updating them one by one. - Initiate a conversation with the Contact
Start conversations with Contacts in your Contact List without needing them to send you the first message.
Importing Contacts
The Contact Import process is divided into 3 parts: Upload CSV file, Mapping and Review.
Part 1: Initiate a Contact Import
To import contacts, you need to upload a CSV file. Each row in your CSV file represents a contact and each column represents a contact field.
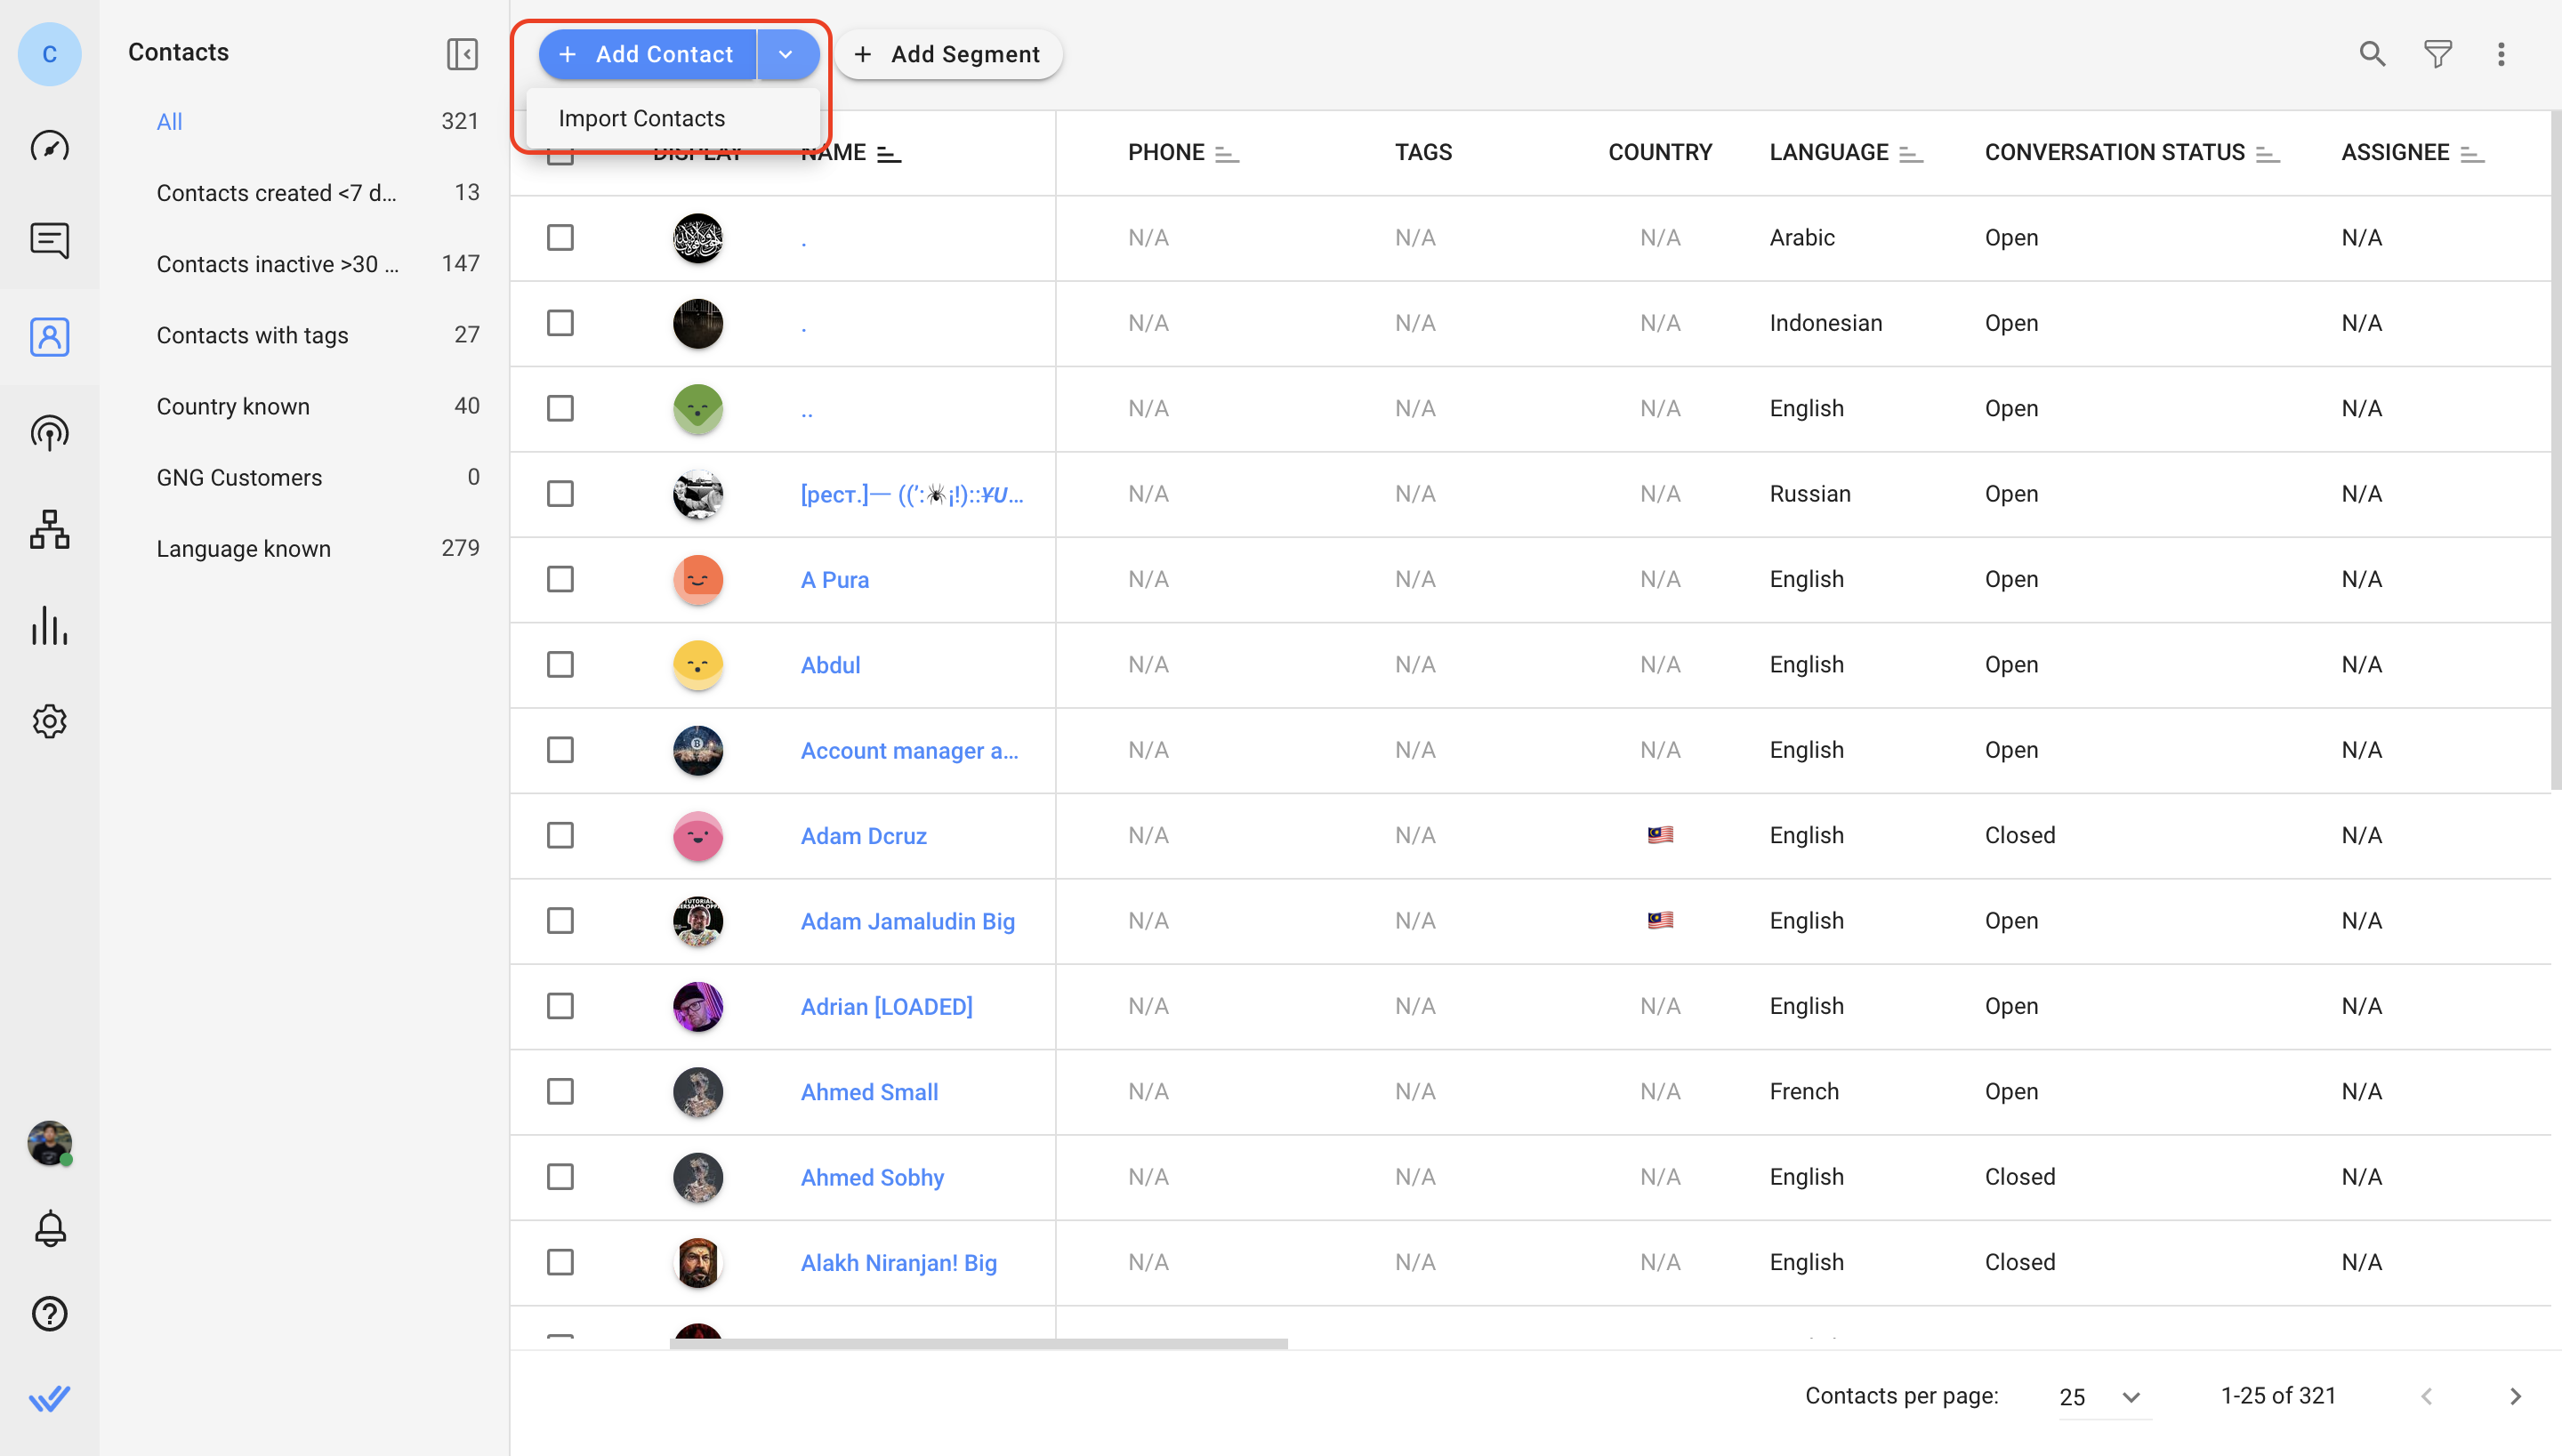
Step 1: In the Contacts Module, click on the arrow in the Add Contact button > Import Contacts.
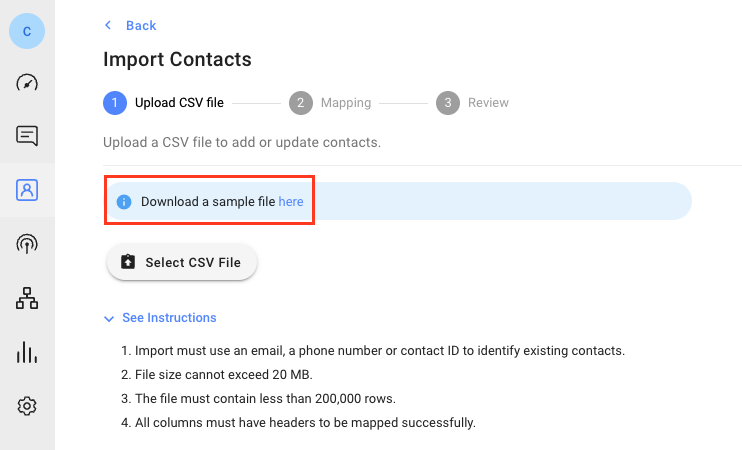
Step 2: Upload a CSV file with the Contacts and details that you would like to import.
Ensure the CSV file fulfills the following requirements:
- Only CSV files are accepted for import.
- File size must be less than 20MB.
- File must contain a least one row.
- File must contain less than 200,000 rows.
- A First Name column is required to add new Contacts.
- At least one column must be mapped to an identifier (except for Add All Contacts Despite Duplicates import option).
- All phone numbers in the CSV file must include the country code and it is recommended to use the "+" sign, e.g. +60189988776.
- Recommended format for Date field: "YYYY-MM-DD". e.g. 2023-10-25
To see an example of a populated CSV file, download the sample by clicking on the hyperlink.
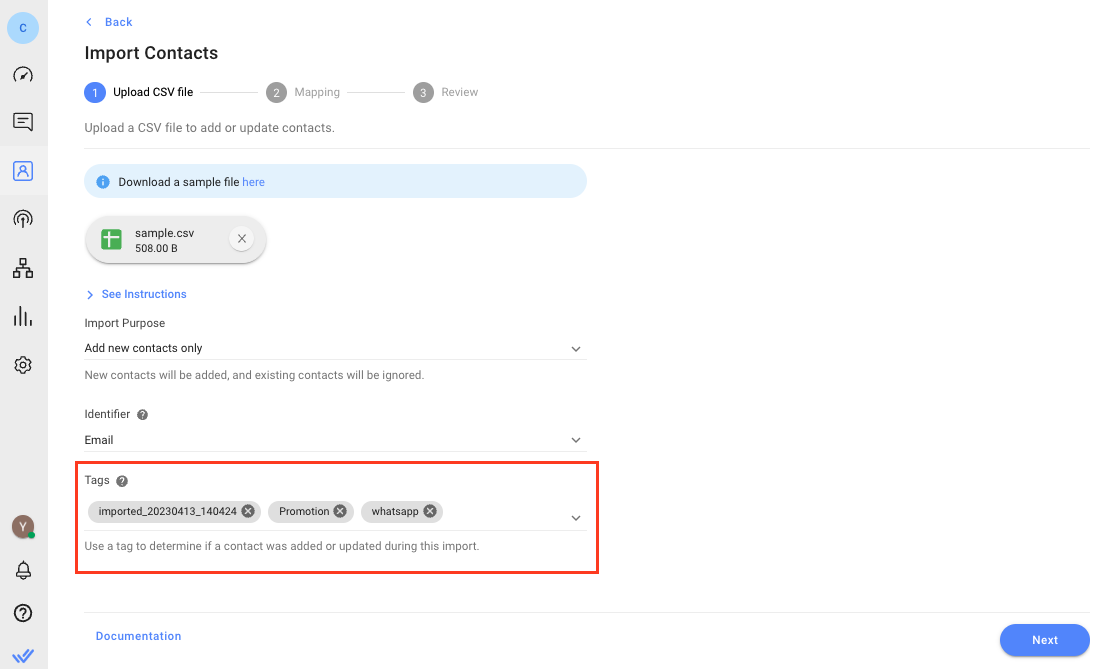
Step 3: Select the import purpose for this file.
Import Purpose | Action |
Add new contacts only | Adds only new Contacts in the CSV file to the Workspace. |
Update existing contacts only | Updates only existing Contacts in the Workspace with values from the file. |
Add & update contacts | Updates existing Contacts and add new Contacts to the Workspace. |
Add all contacts despite duplicates | All Contacts in the file will be treated as new Contacts. You can review and merge duplicate Contacts manually on the platform. |
Step 4: Select an Identifier to recognize existing Contacts. The identifier can be a phone number or email. If your import purpose is Update Existing Contacts Only, you can also select Contact ID as an identifier.
Step 5: Add Tags for all Contacts that are being added to or updated on the Workspace as needed. Then, click Next.
Part 2: Map CSV Headers to Contact Fields
Map the column headers in the CSV file to Contact Fields in your Workspace. This determines which Contact Field will be updated with a column’s values. If a column header in the file perfectly matches a Contact Field name (e.g. Phone Number), it will be mapped automatically.
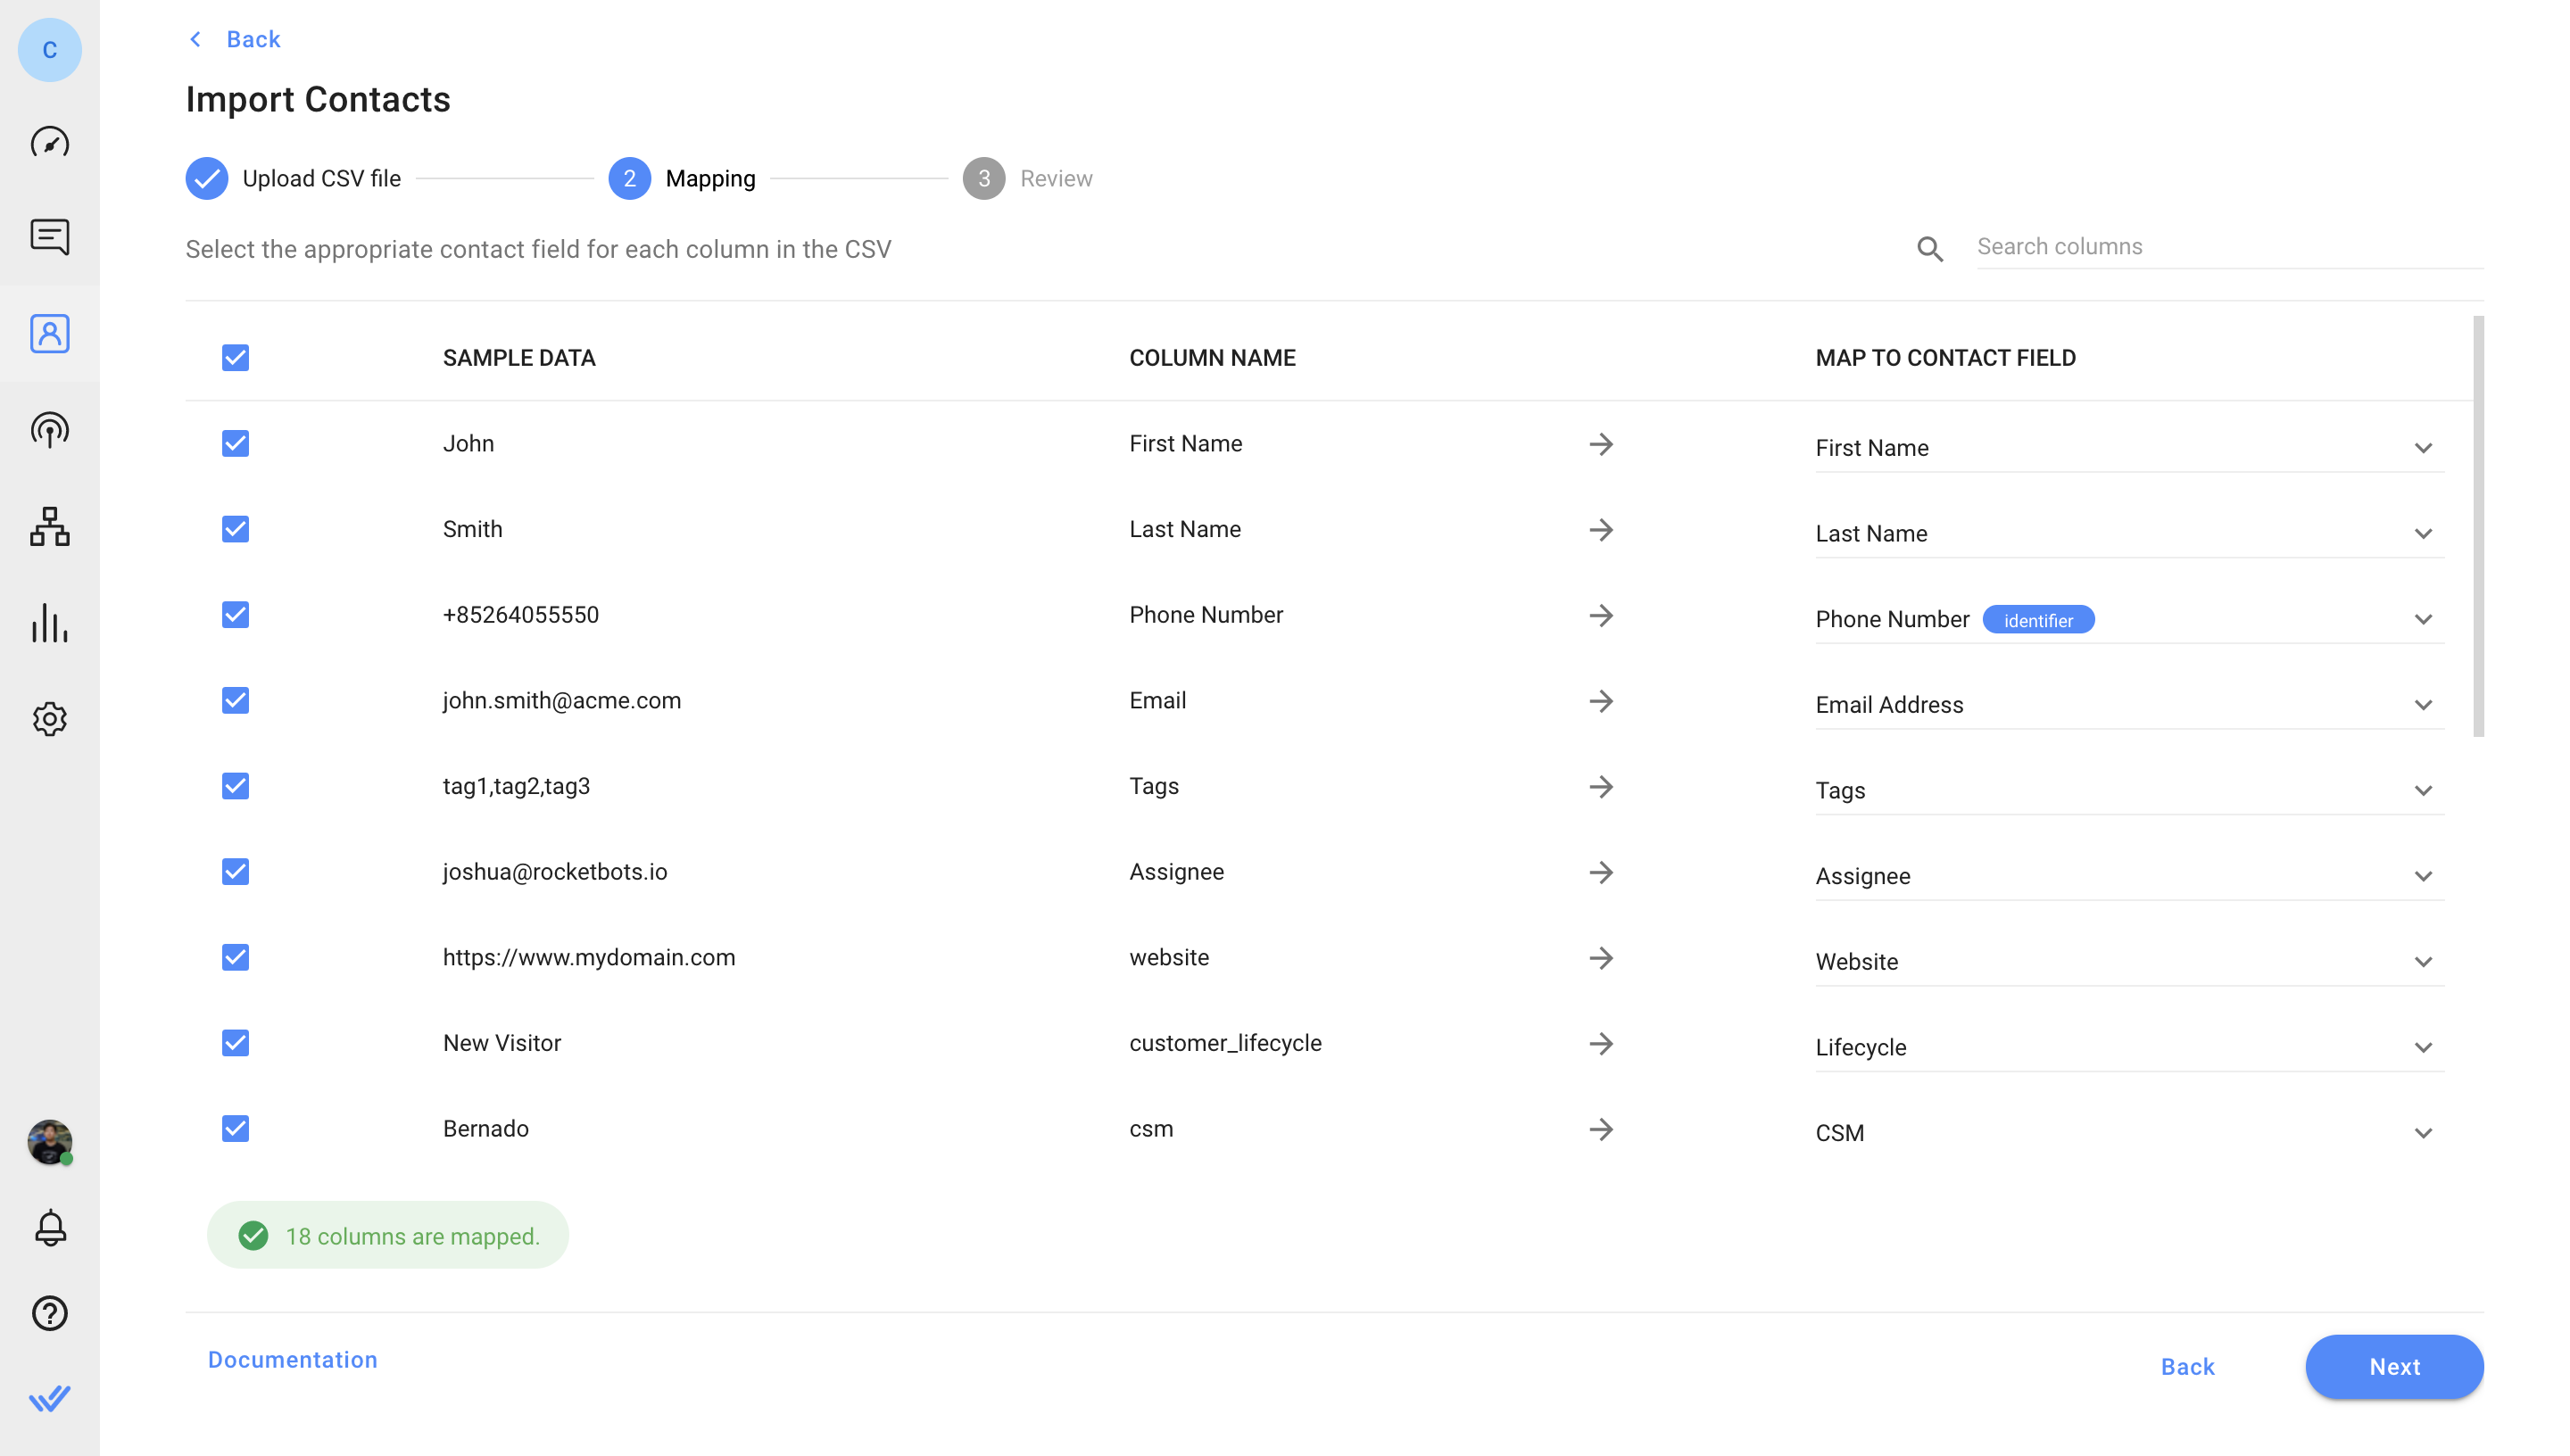
Ensure that the defined identifier is mapped. Each Contact Field can only be mapped once.
If you wish to skip a column so its values are not imported, uncheck the checkbox on its left. A minimum of one column must be selected to proceed with the import.
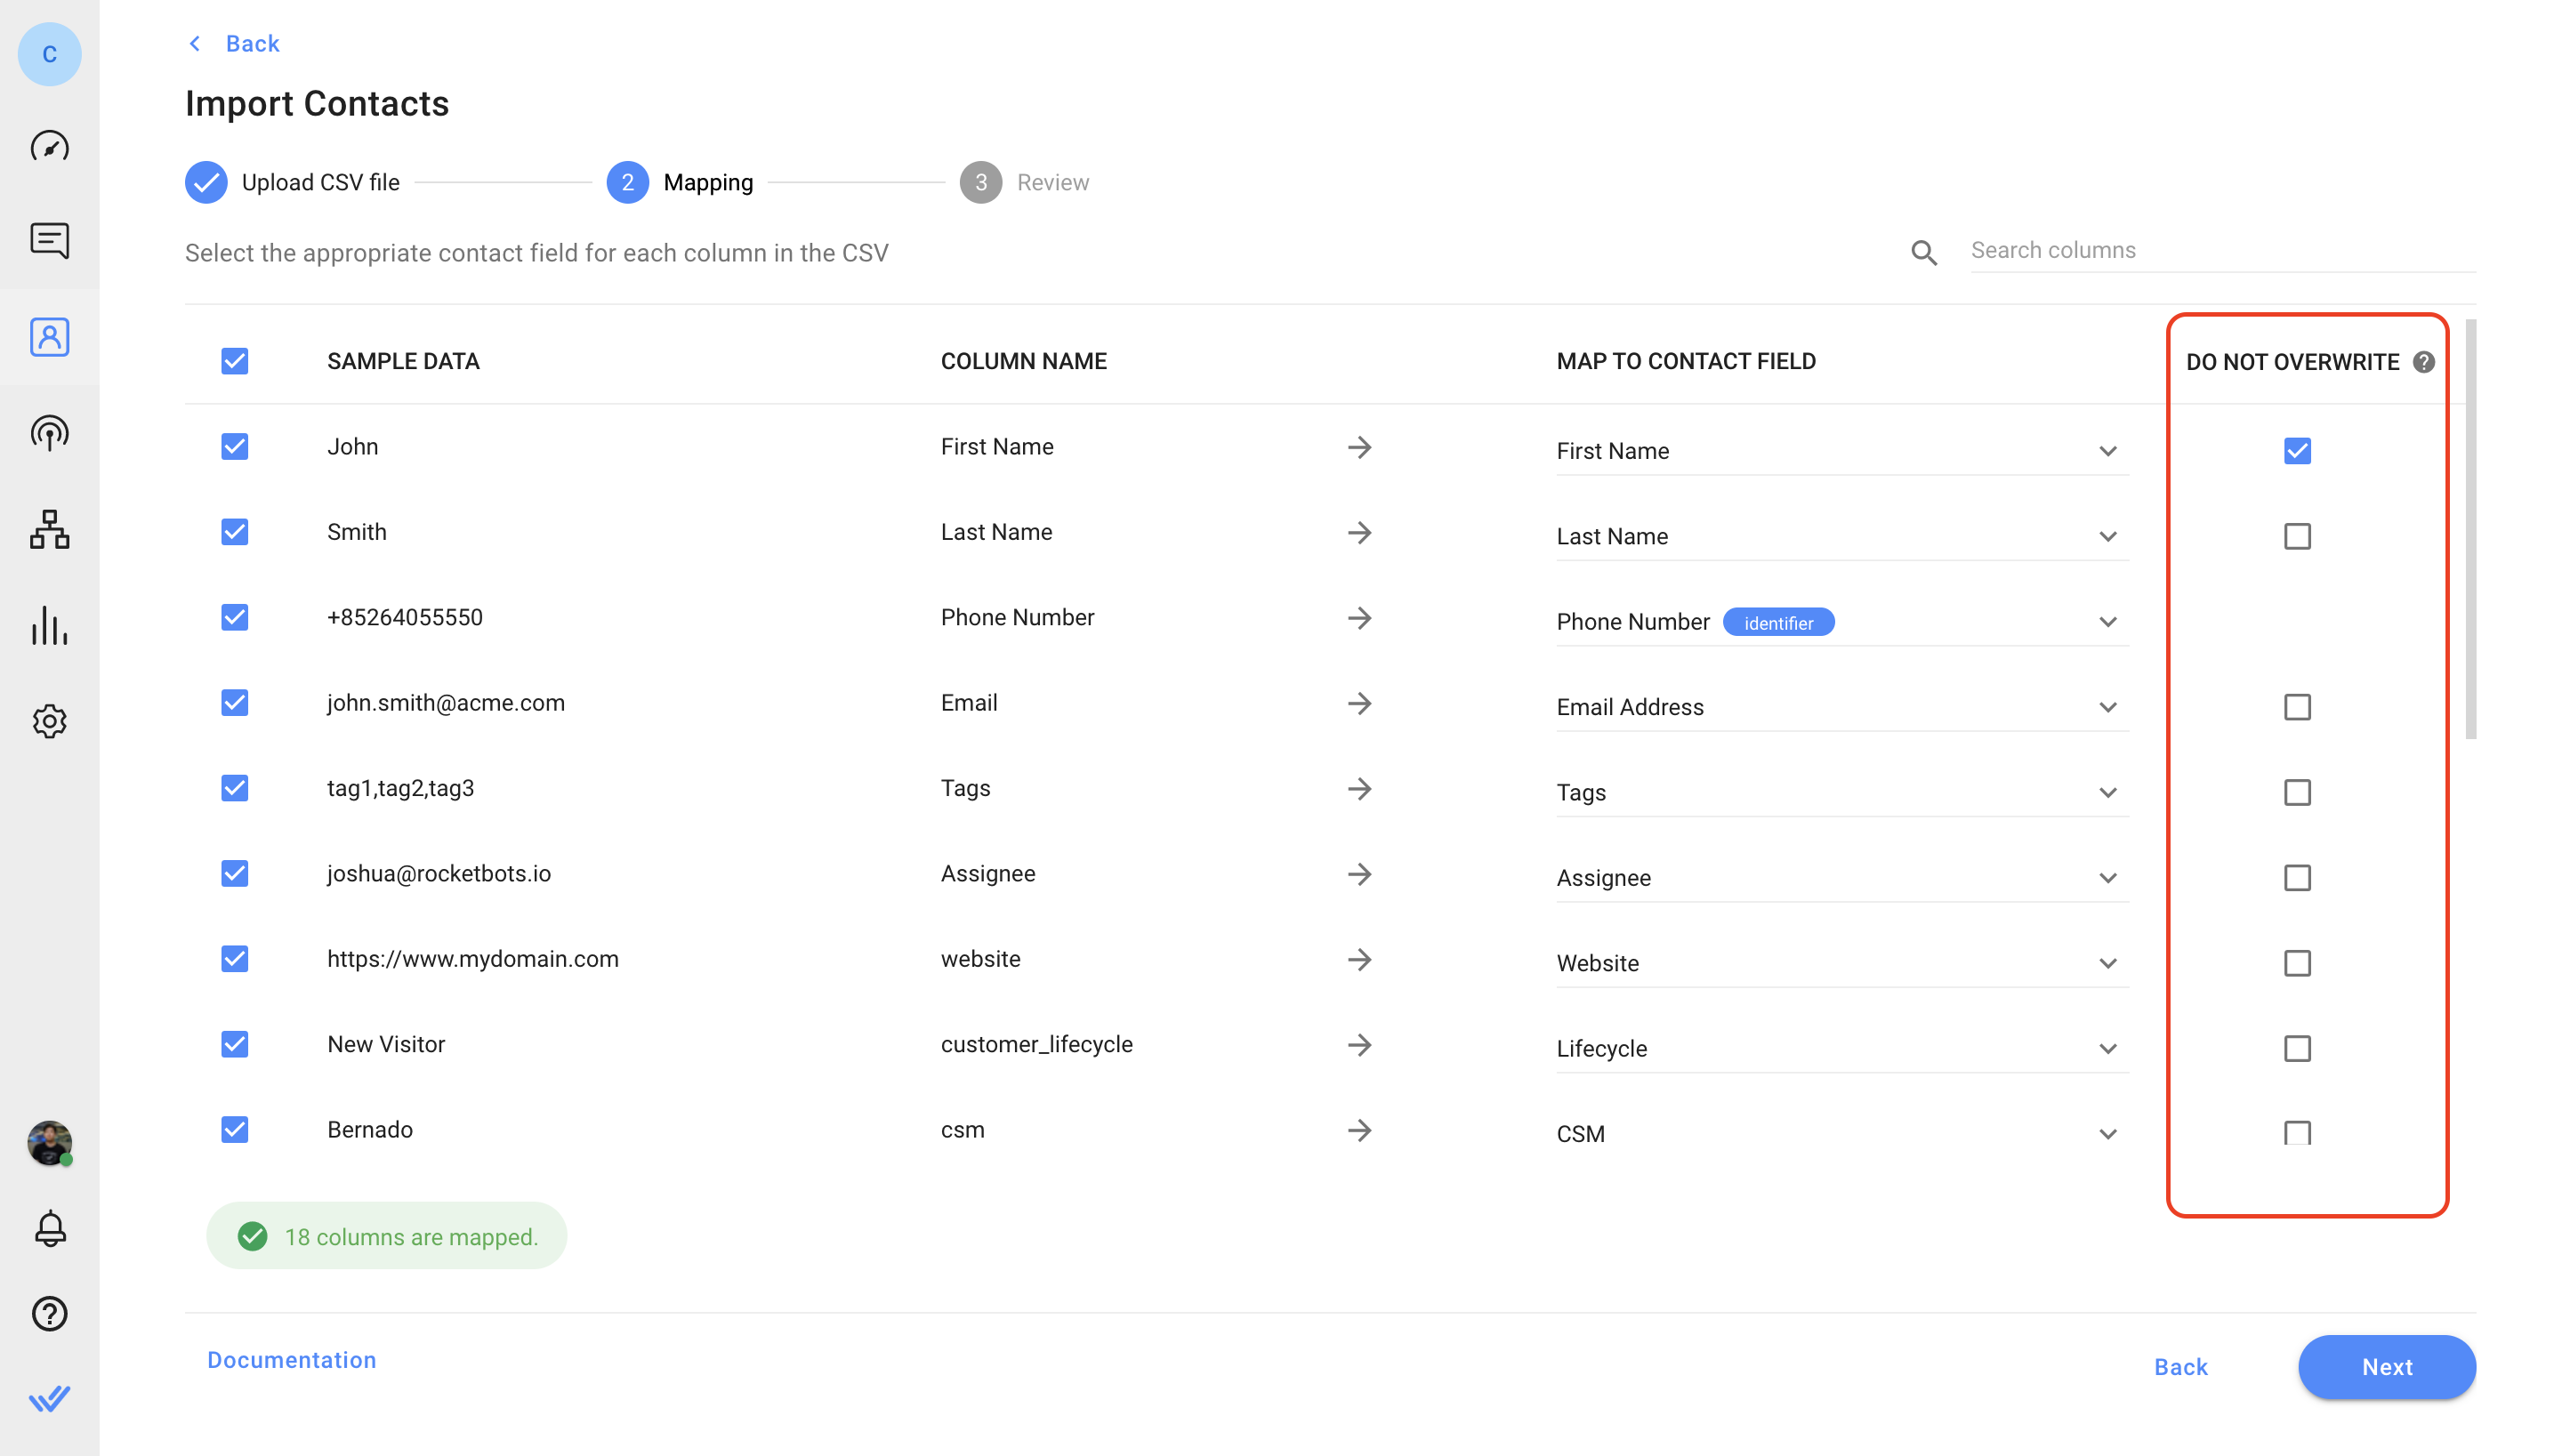
“Do Not Overwrite” Checkbox and its Functions
If you have selected the Update existing contacts only or Add & update contacts Import Purpose option, a Do Not Overwrite option will appear.
When Do Not Overwrite is checked:
- Fields with existing values will not be overwritten, values will be added only when the field is empty.
- New tags will be added without removing existing tags.
Example:
Contact A in your Workspace has the email contactabc@email.com. In the uploaded CSV file, Contact A is identified by their phone number and has the email address contact123@email.com.
If the checkbox is unchecked (default), the existing value will be overwritten and Contact A’s email will be updated to contact123@email.com.
If the checkbox is checked, the existing value will not be overwritten and Contact A’s email will remain as contactabc@email.com.
Part 3: Review Import
The number of Contacts that will be added and updated after the import, or skipped due to errors, will be reported. Once ready, click Import to proceed.
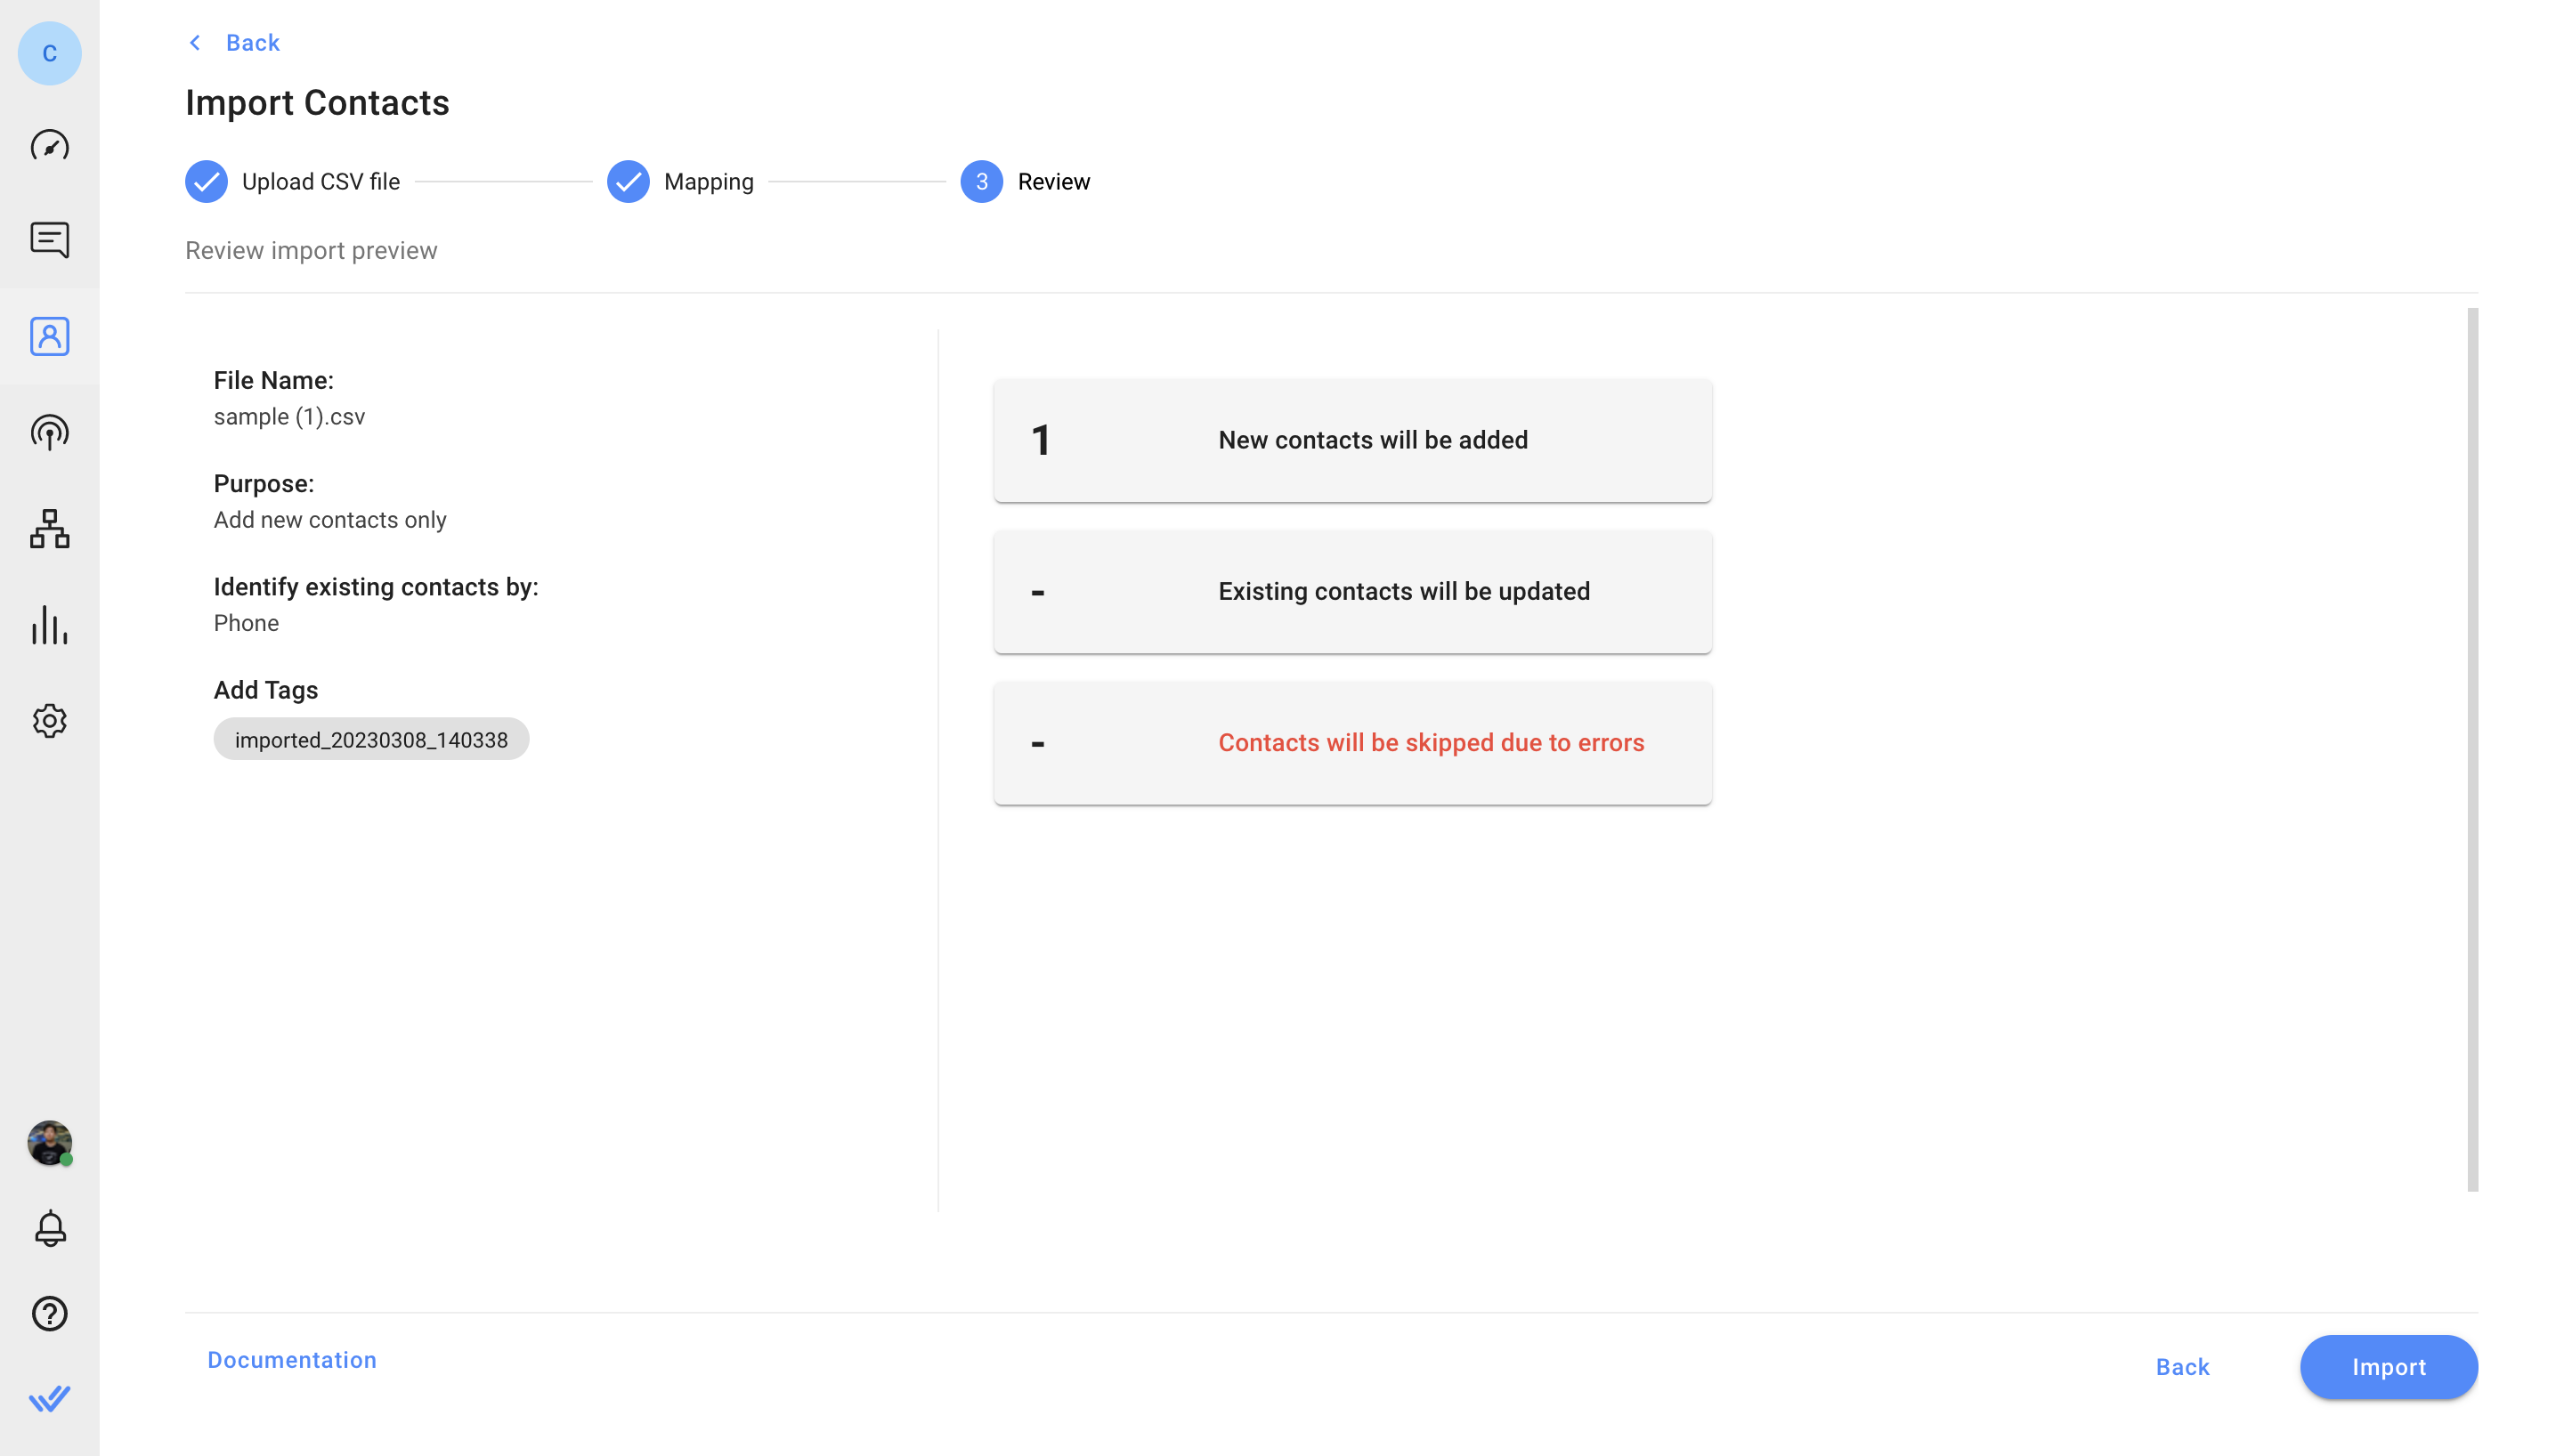
Once the file has been validated, click Import to proceed. A dialog box will appear to confirm that the import has started.
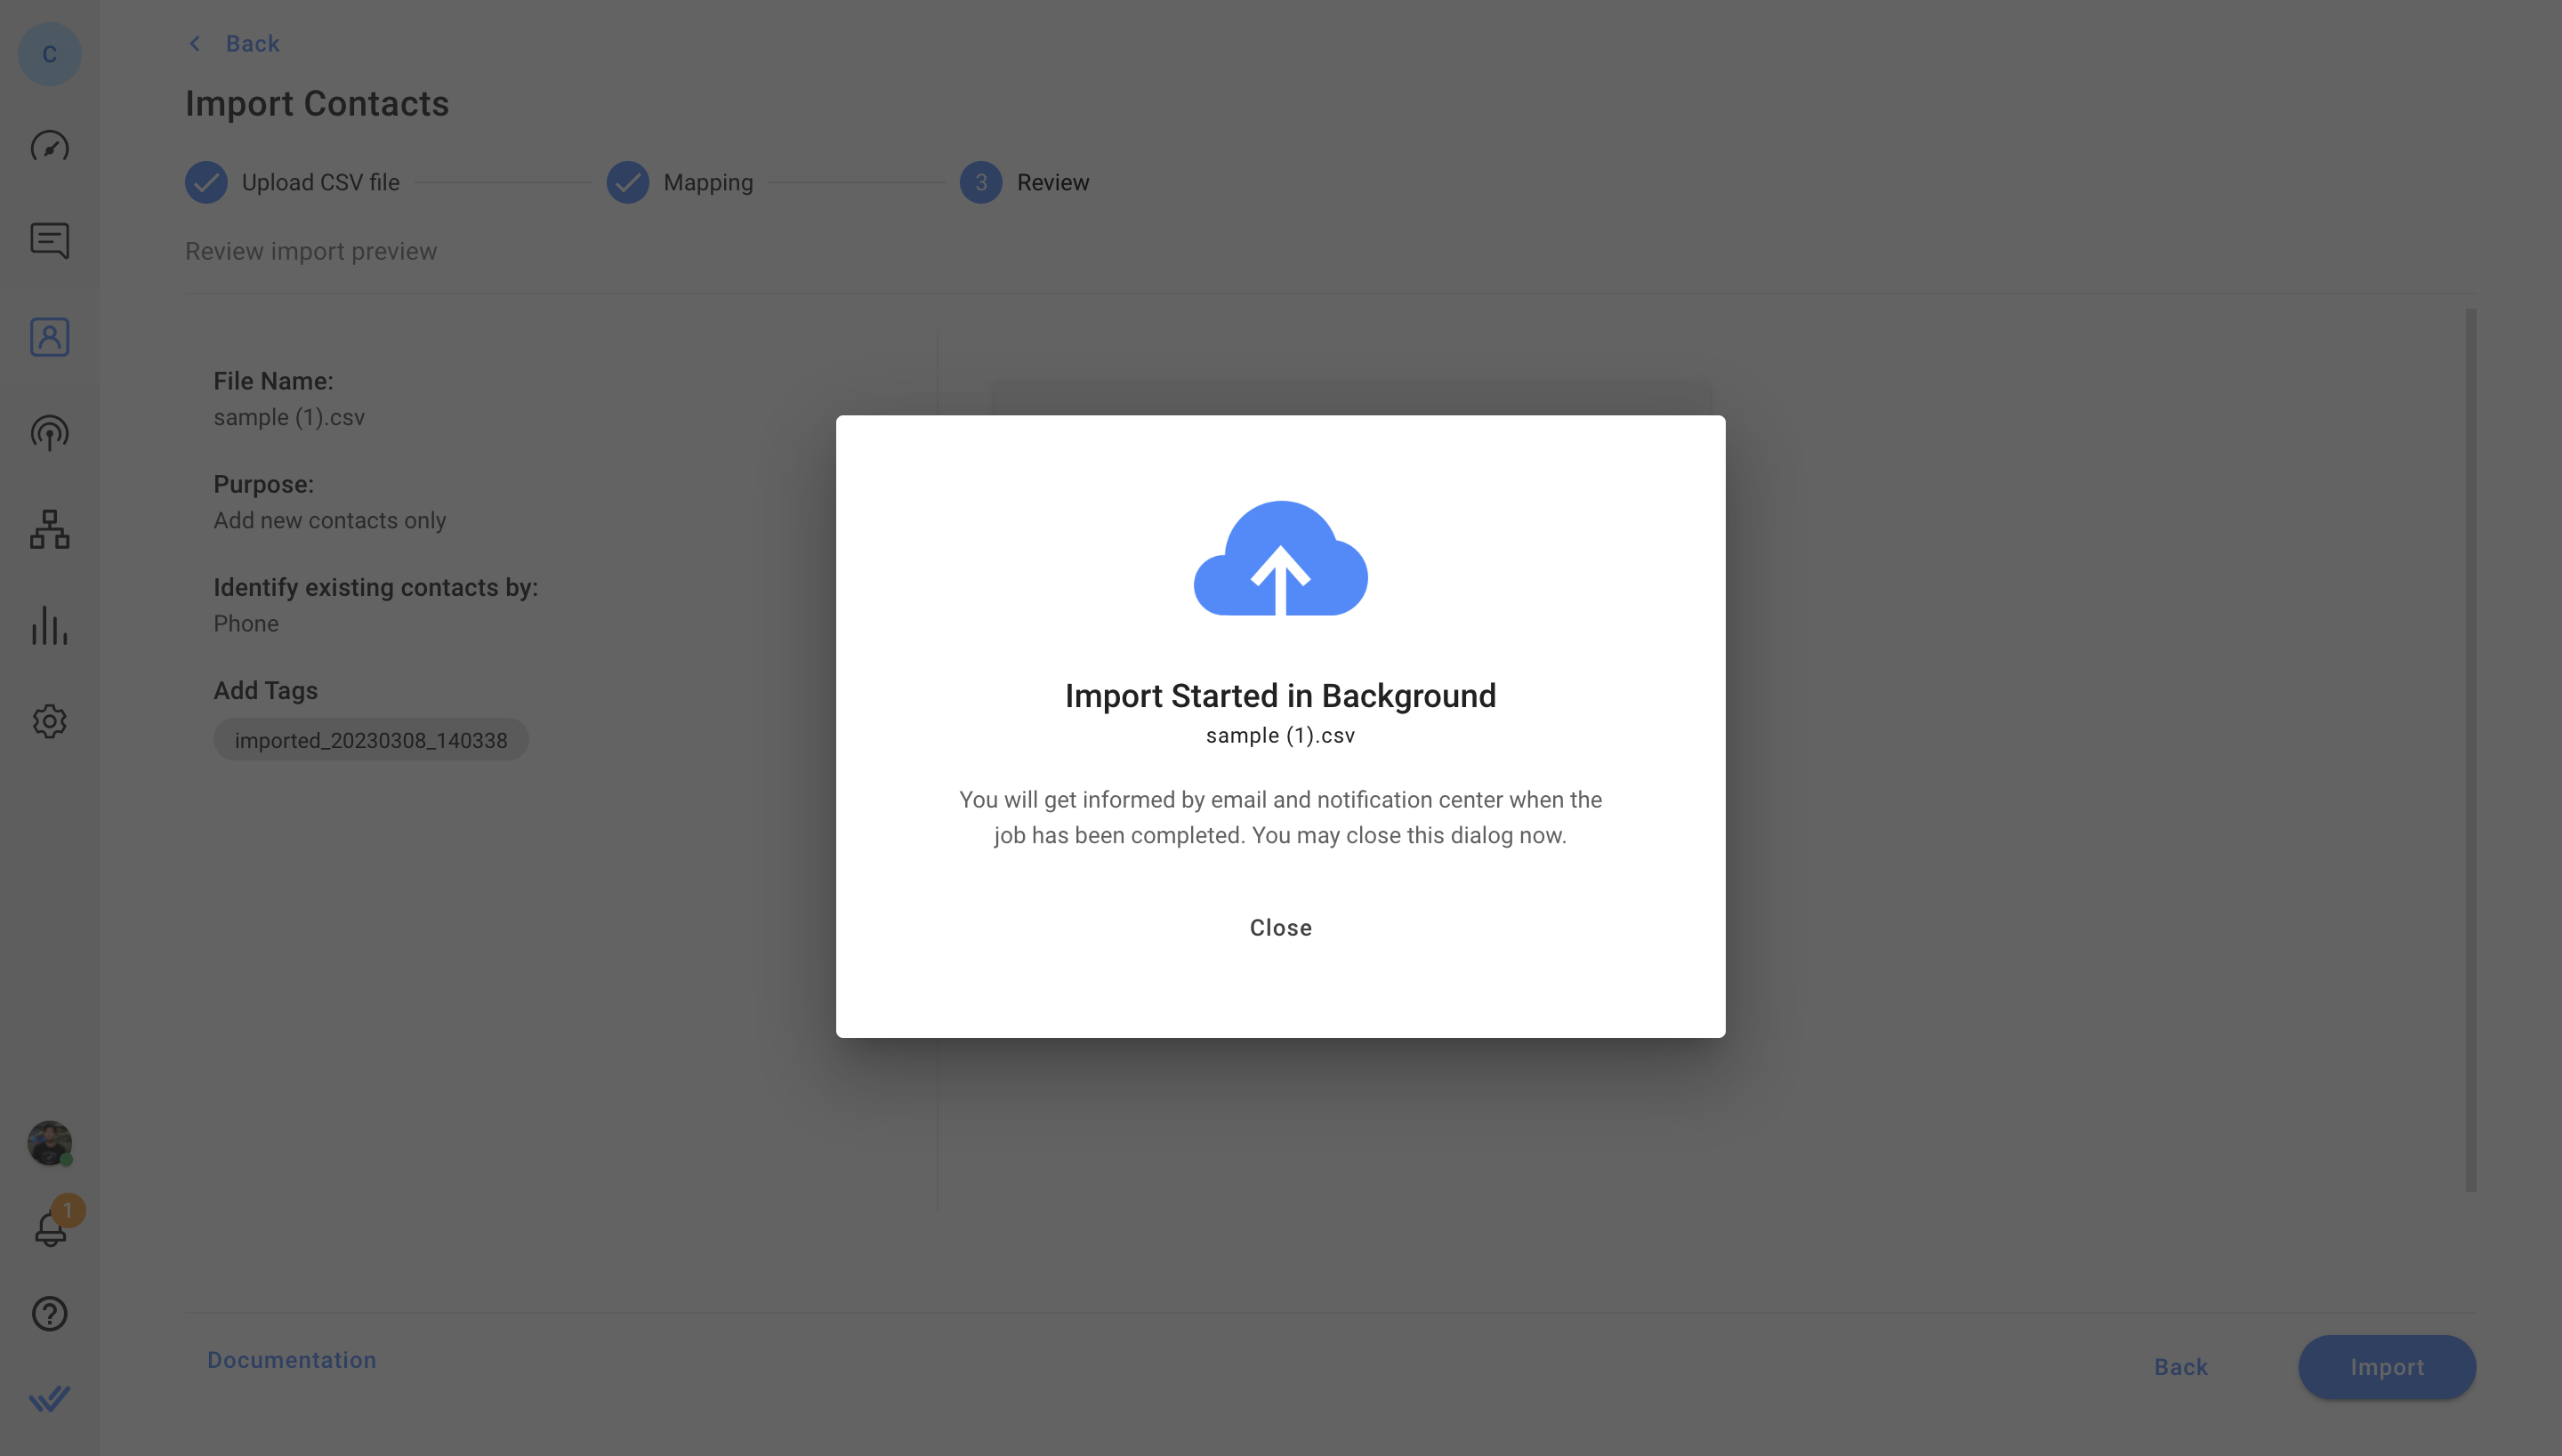
Check Import Result
You will be notified via email and the notifications center on the platform when the import job has been completed.
You can download the results file from your email or the Import History table in Settings > Data Import. This file will be available for 7 days. The results file will contain 2 additional columns: Import Status and Errors.
The Import Status column can have one of 4 possible statuses:
Import Status | Result |
Imported | Contact was added successfully. |
Updated | Contact was updated successfully. |
Skipped | Contact was skipped based on import purpose (e.g. new Contact in an Update Existing Contacts Only import). |
Error | Contact wasn’t imported due to error(s). |
The Errors column will flag rows with errors detected during the import. Contacts in these rows were not imported. To import these Contacts, resolve the errors and retry.
FAQ and Troubleshooting
How many files I can import at a time?
You can only import one file per import.
Why am I unable to start a new import?
Only one import job can be in progress at a time. Kindly wait until the import job is completed before starting a new one.
What does the “Session expired” error mean?
You have a 1-hour window to proceed with an import job. If an import is not started within 1 hour at the Review stage, it will be automatically canceled and you will need to restart the import process.
What if there are two Contacts with the same identifier in the CSV file?
Both Contact rows in the CSV file will be flagged in the Errors column of the error file. Their values will not be added to or updated on the Workspace.
What if there are two existing Contacts with the same identifier in the Workspace?
If multiple contacts share an identifier value in the Workspace (e.g. duplicate Contact profiles or a shared email address or phone number used by two Contacts), an error will be indicated in the row with the same value in the CSV file.
Are Tags compulsory for Contact imports?
No, they are not. You can add, update and remove Tags as you wish.
An import Tag will be automatically generated for every import to identify which Contacts were added or updated during the import. This Tag is optional and can be removed.
Why are some existing Contacts not identified by the phone number identifier?
The phone number format has to be identical in the CSV file and Workspace for the number to be identified. If the same phone number has different formats (e.g. one is missing an area code), the existing Contact cannot be identified and the Contact in the file will be treated as a new Contact.
If you are trying to update existing Contacts only, this Contact will be skipped.
If you are trying to upload new Contacts, a new Contact profile will be created for this Contact.