Table of Contents
- Getting Here
- Workflows Module
- Creating a New Workflow
- Creating a New Workflow from a Selected Template
- List of Workflow Templates
- Saving a Workflow
- Testing a Workflow
- Publishing a Workflow
- Stopping a Workflow
- Stopping Workflow(s) for a Contact
- Editing a Workflow
- Cloning a Workflow
- Deleting a Workflow
- Exporting a Workflow
- Importing a Workflow
- Workflows Module Listing
- The Workflow Builder
- FAQ and Troubleshooting
- What will happen to my Contacts if I stop a published Workflow?
- Why did my Workflow end before it was completed?
- If I manually close an ongoing conversation with an enrolled Contact on the platform, will the Workflow end?
- Can a Contact re-enter the same Workflow they are currently enrolled in it?
- What if a Contact triggers more than one Workflow at the same time?
- I have updated a Contact Field value but the old value is still being applied. Why is Workflows not applying the updated value?
- Why is the reply from the Contact not being saved in the Contact Field that I have selected?
- How do I turn off the Dialogflow Bot?
- Why am I encountering the "Workflow loop detected" error when trying to publish my Workflow?
- Why can't I stop a Workflow from the Inbox module?
- What is the Workflow limitation for the Business plan on respond.io?
- Why did I encounter the error "Invalid JSON schema, please submit a valid JSON file" when importing a Workflow?
Workflows Overview
 Updated
by Sana
Updated
by Sana
- Getting Here
- Workflows Module
- Creating a New Workflow
- Creating a New Workflow from a Selected Template
- List of Workflow Templates
- Saving a Workflow
- Testing a Workflow
- Publishing a Workflow
- Stopping a Workflow
- Stopping Workflow(s) for a Contact
- Editing a Workflow
- Cloning a Workflow
- Deleting a Workflow
- Exporting a Workflow
- Importing a Workflow
- Workflows Module Listing
- The Workflow Builder
- FAQ and Troubleshooting
- What will happen to my Contacts if I stop a published Workflow?
- Why did my Workflow end before it was completed?
- If I manually close an ongoing conversation with an enrolled Contact on the platform, will the Workflow end?
- Can a Contact re-enter the same Workflow they are currently enrolled in it?
- What if a Contact triggers more than one Workflow at the same time?
- I have updated a Contact Field value but the old value is still being applied. Why is Workflows not applying the updated value?
- Why is the reply from the Contact not being saved in the Contact Field that I have selected?
- How do I turn off the Dialogflow Bot?
- Why am I encountering the "Workflow loop detected" error when trying to publish my Workflow?
- Why can't I stop a Workflow from the Inbox module?
- What is the Workflow limitation for the Business plan on respond.io?
- Why did I encounter the error "Invalid JSON schema, please submit a valid JSON file" when importing a Workflow?
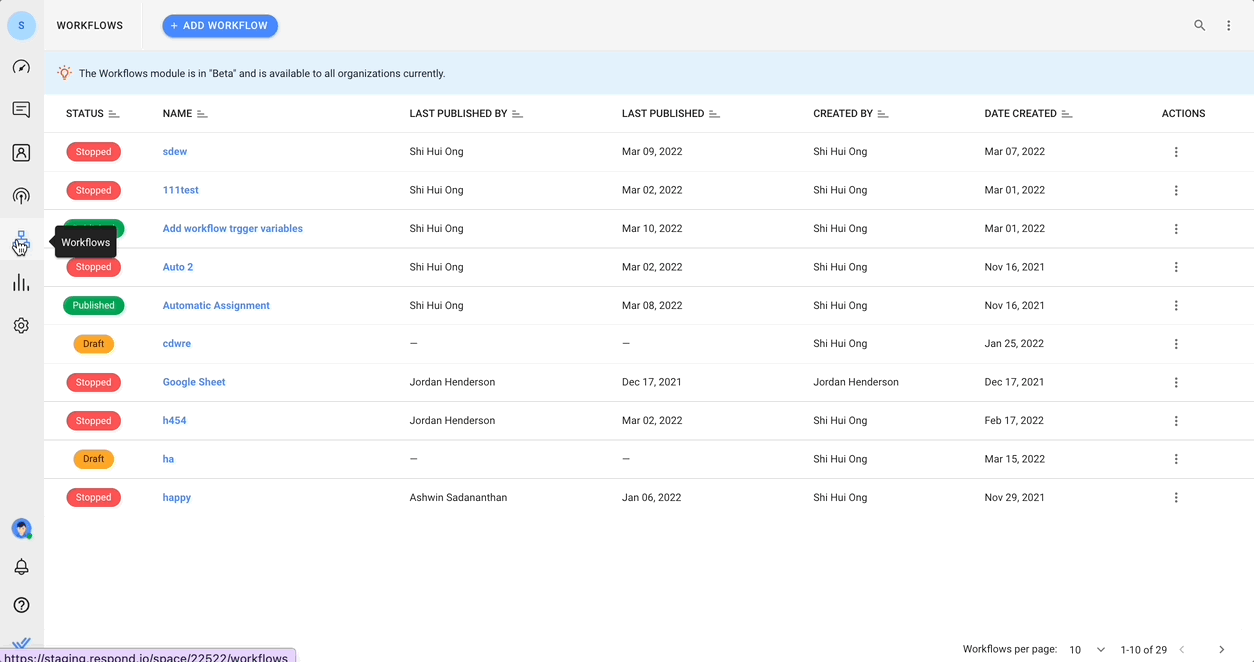
Getting Here
You can access this module by selecting Workflows from the side navigation menu.
The Workflows Module is a visual Workflow builder used to automate processes. Workflows can incorporate elements like Contact data to build automation such as automated messaging, auto-assignment and more. A Workflow consists of a Trigger and one or more Steps.
Workflows Module
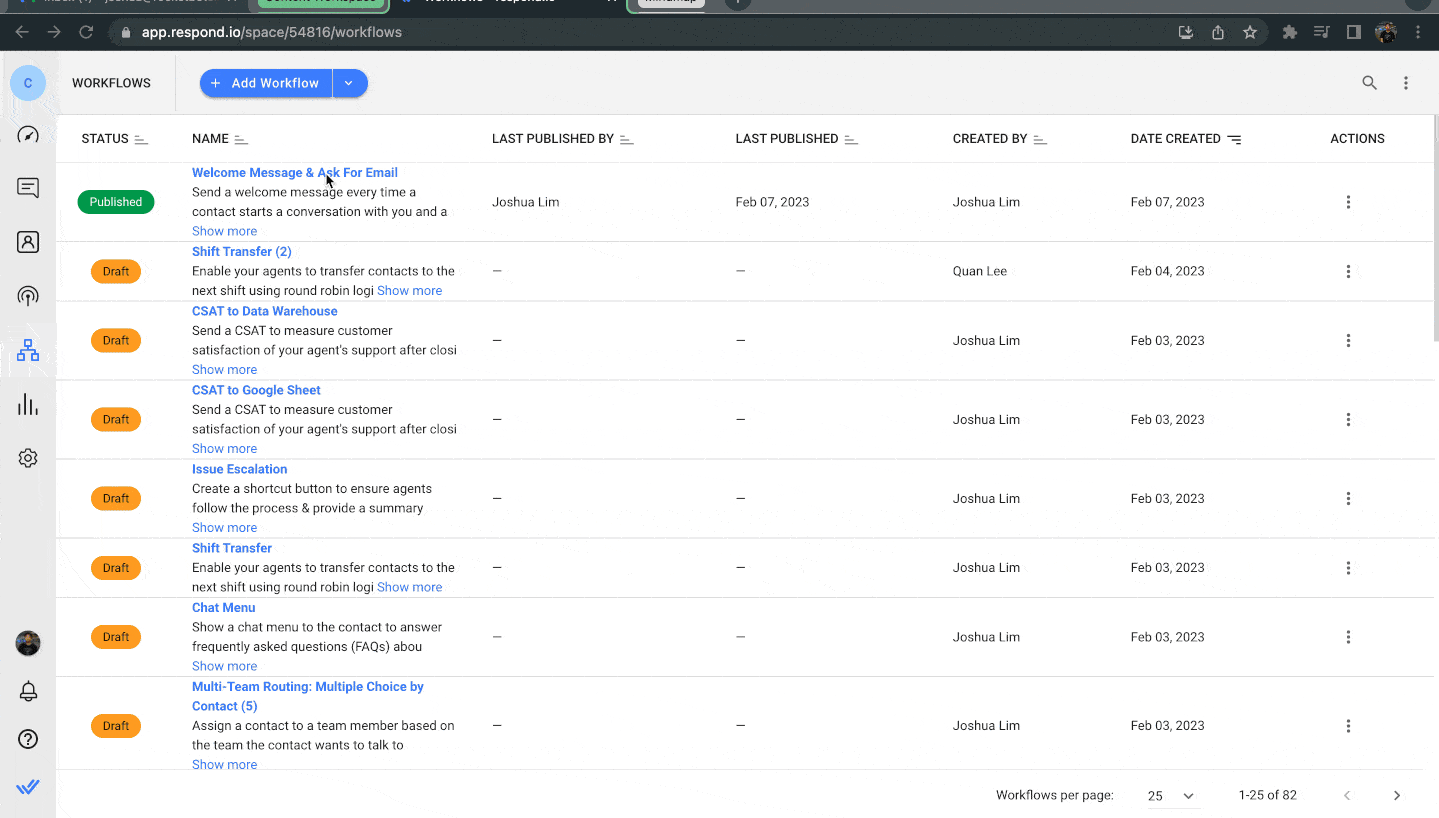
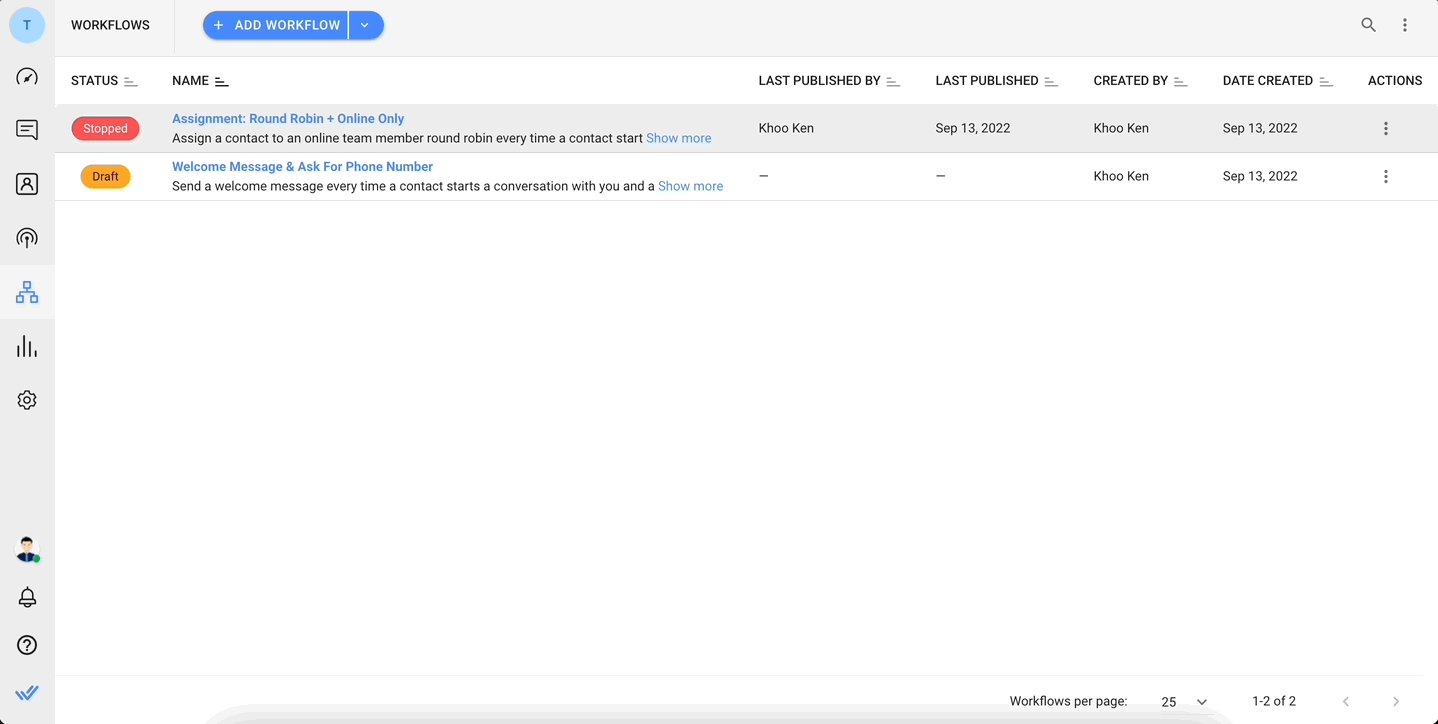
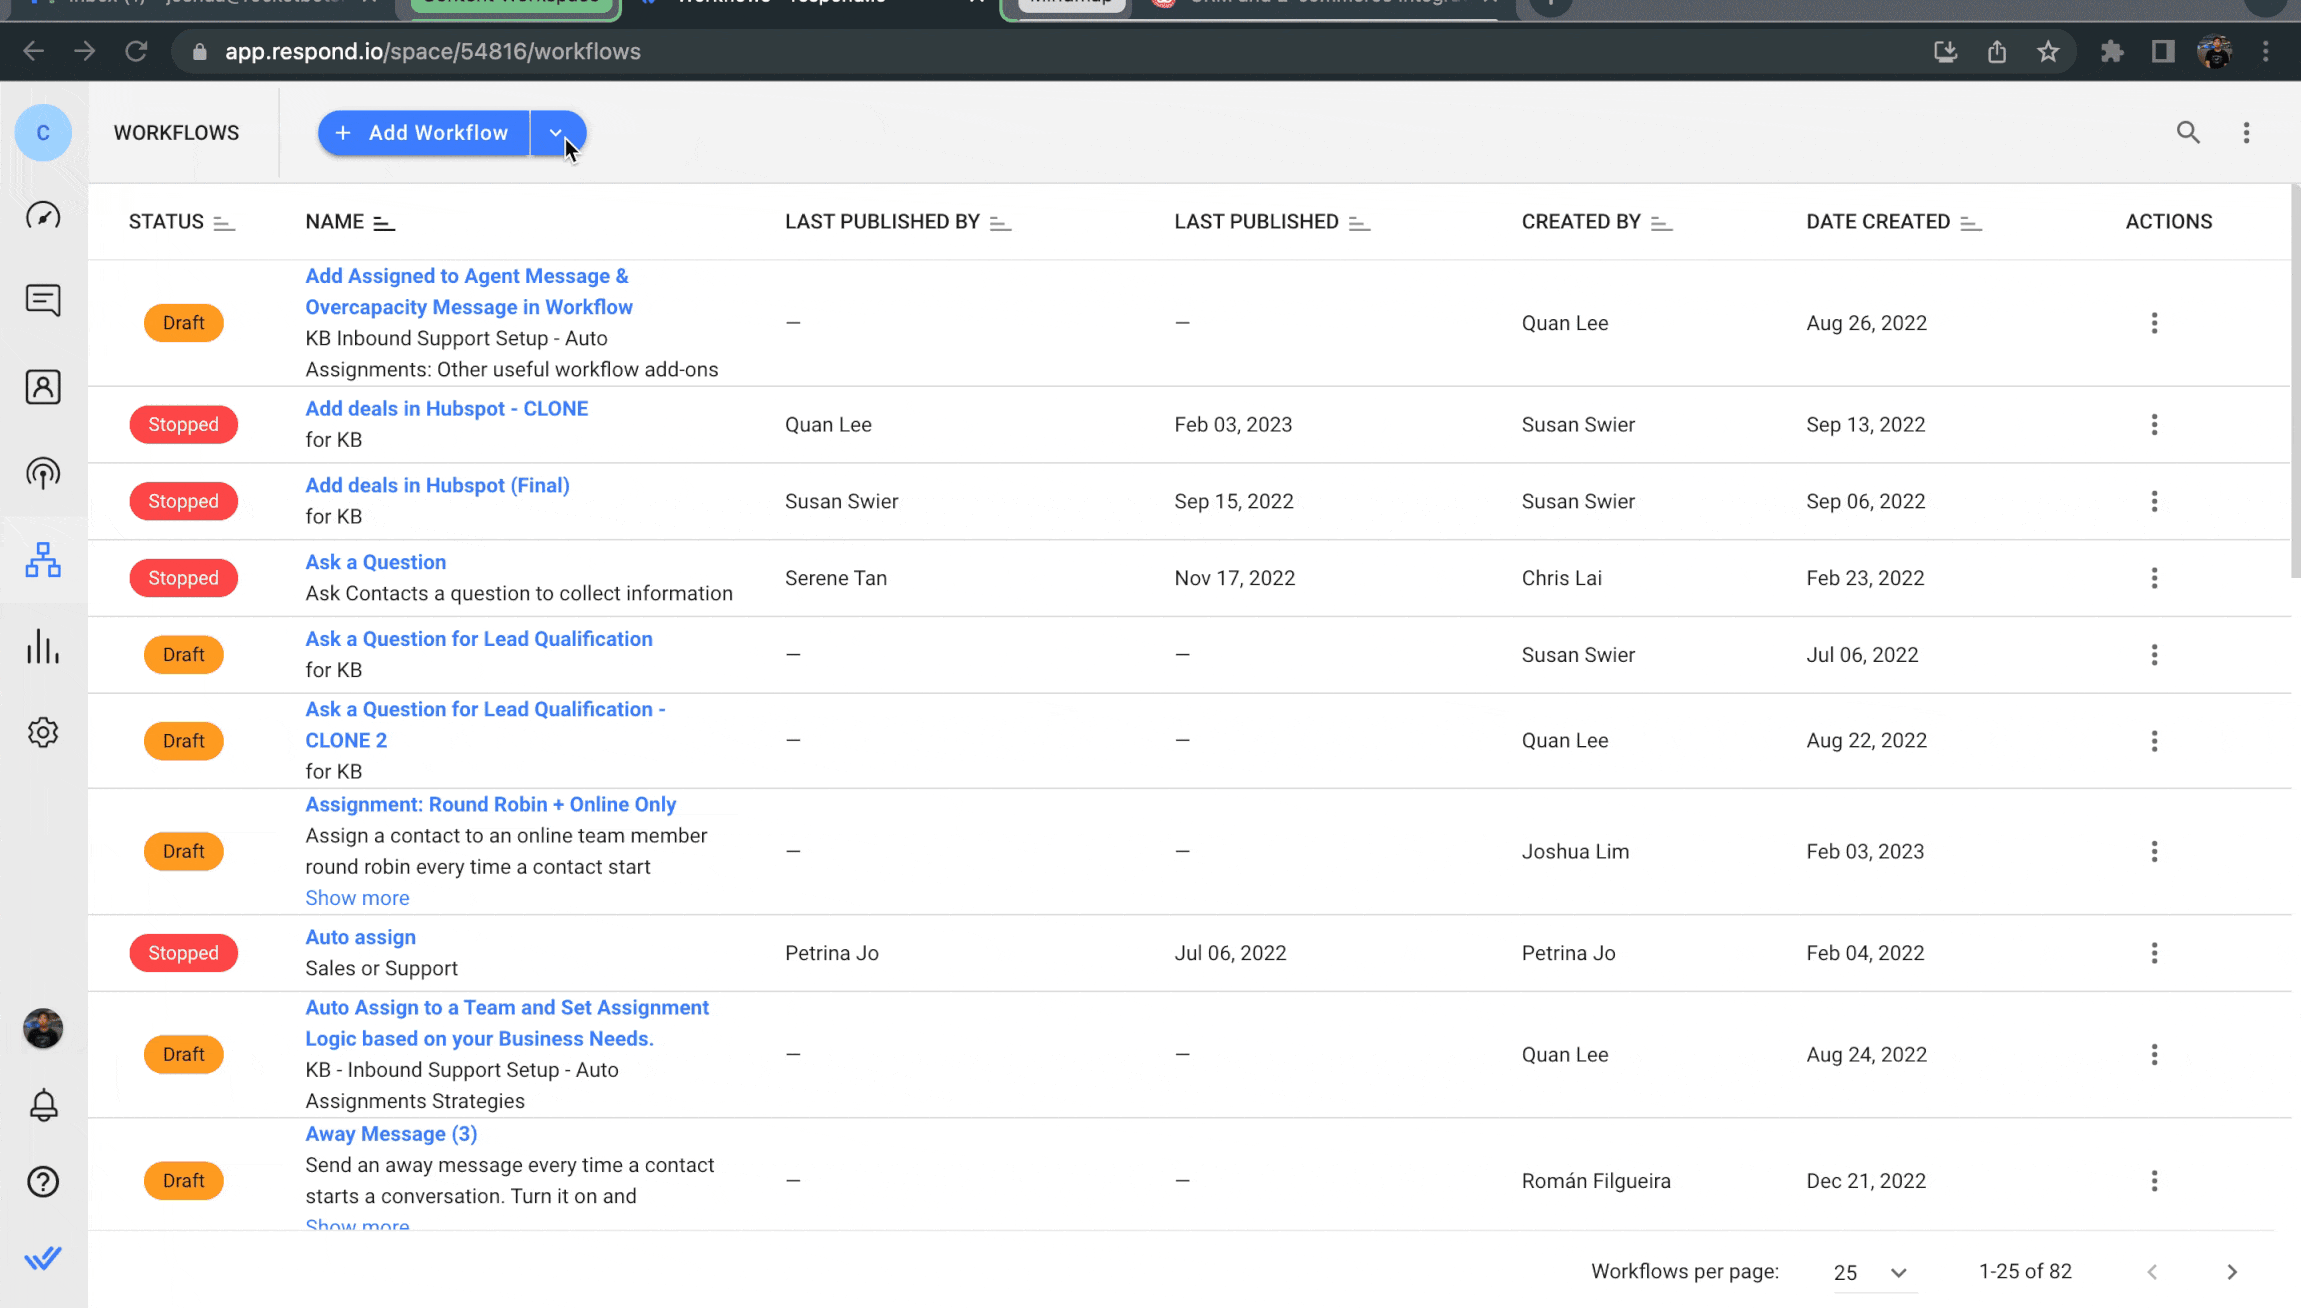
The main page of the Workflows Module is a listing page. It provides an overview of the Workflows in your Workspace.
Below are the actions that can be performed in Workflows:
- Creating a New Workflow
- Creating a New Workflow from a Selected Template
- Saving a Workflow
- Testing a Workflow
- Publishing a Workflow
- Stopping a Workflow
- Stopping a Workflow for a Contact
- Editing a Workflow
- Cloning a Workflow
- Deleting a Workflow
- Exporting a Workflow
- Importing a Workflow
Creating a New Workflow
To create a Workflow:
- Navigate to the Workflows main page.
- Click + Add Workflow.
- Name the Workflow.
- Click Create. The Workflow Builder will be displayed.
- Start building the Workflow by selecting a Trigger. You can then add steps along with the necessary configurations or conditions.
- Once completed, click Save. The Workflow created will be in Draft status.
Creating a New Workflow from a Selected Template
Create a Workflow from the list of templates:
- Navigate to the Workflows main page.
- Click the + Add Workflow button.
- Click Use Template on the preferred template.
- Click the Use Template button. The pre-built Workflow will be created. Update the steps highlighted in red.
- Once completed, click Save. The Workflow created will be in Draft status.
List of Workflow Templates
Workflow Template Name | Description |
Collect Contact Email with AI | Automate the collection of Email addresses using AI Agent and update their information on the platform seamlessly. Transition Contacts to agents when technical issues occur. |
Collect Contact Phone Number with AI | Automate the collection of Phone numbers using AI Agent and update their information on the platform seamlessly. Transition Contacts to agents when technical issues occur. |
Assignment: AI Agent | Assign contact to an AI agent every time a contact starts a conversation and hand it over to human agents should the need arise. |
Assignment: Least Open Contacts | Assign a Contact to the team member with the least open Contacts every time a Contact starts a conversation. |
Assignment: Round Robin | Assign a Contact to a team member round robin every time a Contact starts a conversation. |
Assignment: Round Robin + Online Only | Assign a Contact to an online team member round robin every time a Contact starts a conversation. |
Assignment: Unassign After Conversation Closes | Unassign Contact from a team member every time a conversation is closed. |
Away Message | Send an away message every time a Contact starts a conversation. Turn it on and off by toggling the workflow on and off. |
Away Message with Business Hours | Send an away message every time a Contact starts a conversation outside your business hours. |
Click to Chat Ads: Appointment Scheduling | Provides contact a link to your business calendar to enable them to schedule an appointment. |
Routing: New & Returning Contacts | Identify new and returning Contacts to route them differently every time a Contact starts a conversation. |
Welcome Message | Send a welcome message every time a Contact starts a conversation with you. |
Welcome Message & Ask For Email | Send a welcome message every time a Contact starts a conversation with you and ask for the email if you don't have it. |
Welcome Message & Ask For Phone Number | Send a welcome message every time a Contact starts a conversation with you and ask for the phone number if you don't have it. |
Assignment: Sales and Support AI Agents | Assign a contact to a Sales or Support AI agent based on contact choice every time a contact starts a conversation and handover to human agents should the need arise. |
Click to Chat Ads: Assignment | Assign a Contact to a team member with expertise in handling as inquiries every time a Contact starts a conversation from a Click to Chat ad. |
Click to Chat Ads: Share Product Information + Route to Sales | Send product information and direct interested contacts to Sales agents for contacts coming from CTC ads. |
Issue Escalation | Create a shortcut button to ensure agents follow the process & provide a summary when escalating issues to 2nd level support teams like Finance and Technical Support. |
Multi-Level Chat Menu (Main Menu) | Create an extensive chat menu with a wide range of interactive options for contacts to explore before assigning to an agent. Combine this with the Multi-Level Chat Menu (Sub) template to reveal more relevant options that interest contact or to return back to the Main Menu. |
Multi-Level Chat Menu (Sub Menu) | Show contacts a Sub Menu triggered from the Main Menu to answer FAQs and provide an option for contacts to return to the Main Menu. |
Multi-Team Routing: Multiple Choice by Contact | Assign a Contact to a team member based on the team the Contact wants to talk to every time a Contact starts a conversation. |
Multi-Team Routing: Shifts | Assign a Contact to a team member based on the current shift (business hours) every time a Contact starts a conversation. |
Request Consent: Privacy | Get a Contact's privacy consent before continuing the conversation. |
Shift Transfer | Enable your agents to transfer Contacts to the next shift using round robin logic & ensure agents provide a conversation summary. |
Simple Chat Menu | When contacts first message your business, you can automatically respond with a chat menu, offering self-service options for common inquiries and an option to speak to an agent. Show a chat menu to the Contact to answer frequently asked questions (FAQs) about products, services & your company and understand their interests before assigning to a live agent when required. |
Welcome Message: Channel Specific | Send a different welcome message to Contacts for each channel. |
CSAT to Data Warehouse | Send a CSAT to measure customer satisfaction of your agent's support after closing a conversation and send the data to a data warehouse for analysis. |
CSAT to Google Sheets | Send a CSAT to measure customer satisfaction of your agent's support after closing a conversation and send the data to a google sheet for analysis. |
Routing: VIP Contacts | Get contact data from a data warehouse to identify VIP contacts and route them for specialized service every time a contact starts a conversation. |
Broadcast Response: Assign to Agent | Assign Contacts to Agents based on their broadcast response. |
Sales Call Report | Create a Shortcut for Sales agent to share a report on their call with Contacts. |
Unsubscribe from Broadcasts | Identify Contacts who unsubscribe from broadcast messages before sending the Contact a confirmation message and mark the Contact as opted out from receiving future broadcast messages. |
Contact Routing: Ask Language Preference | Ask for Contact’s preferred language, update their language preference on the platform, and connect them with the appropriate team of Agents. |
Contact Routing: By Language | Identify the preferred language of incoming Contacts automatically and direct them to the suitable team of Agents. |
Saving a Workflow
A Workflow can be saved by clicking the Save button in the Top Bar of the Workflow Builder.
- You can save a Workflow only when all Step configuration errors have been resolved.
Resolving Workflow Errors
If a Step in the Workflow is configured incorrectly, the ⚠ sign will appear in the Top Bar. Hover over the icon to see which Steps have configuration errors. Click on the Step in the dropdown list to identify it in the Workflow builder and open its settings in the configuration drawer.
Testing a Workflow
You can test your workflow before publishing it by clicking the Test button in the Top Bar of the Workflow Builder. This button is enabled once you have resolved any errors in your workflow.
- On the Test Workflow dialog, select a channel from the Channel dropdown list to test your workflow.
- If your workflow trigger (e.g. Conversation Opened) has trigger variables, the Trigger Variable (optional) dropdown displays on the dialog. You can select the required dummy values for testing. You can also leave the fields empty; they will be considered null and the workflow will be tested using null values.The dummy values for workflow triggers you provide while testing the workflow do not apply to the workflow once it's published. Once published, the date and time defined in the Date & Time Step will be used for validation. Learn more about Workflow Trigger Variables here.
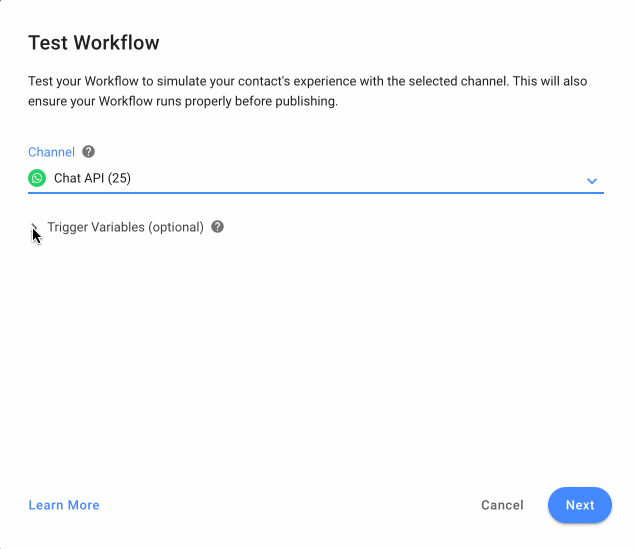
- Click Next.
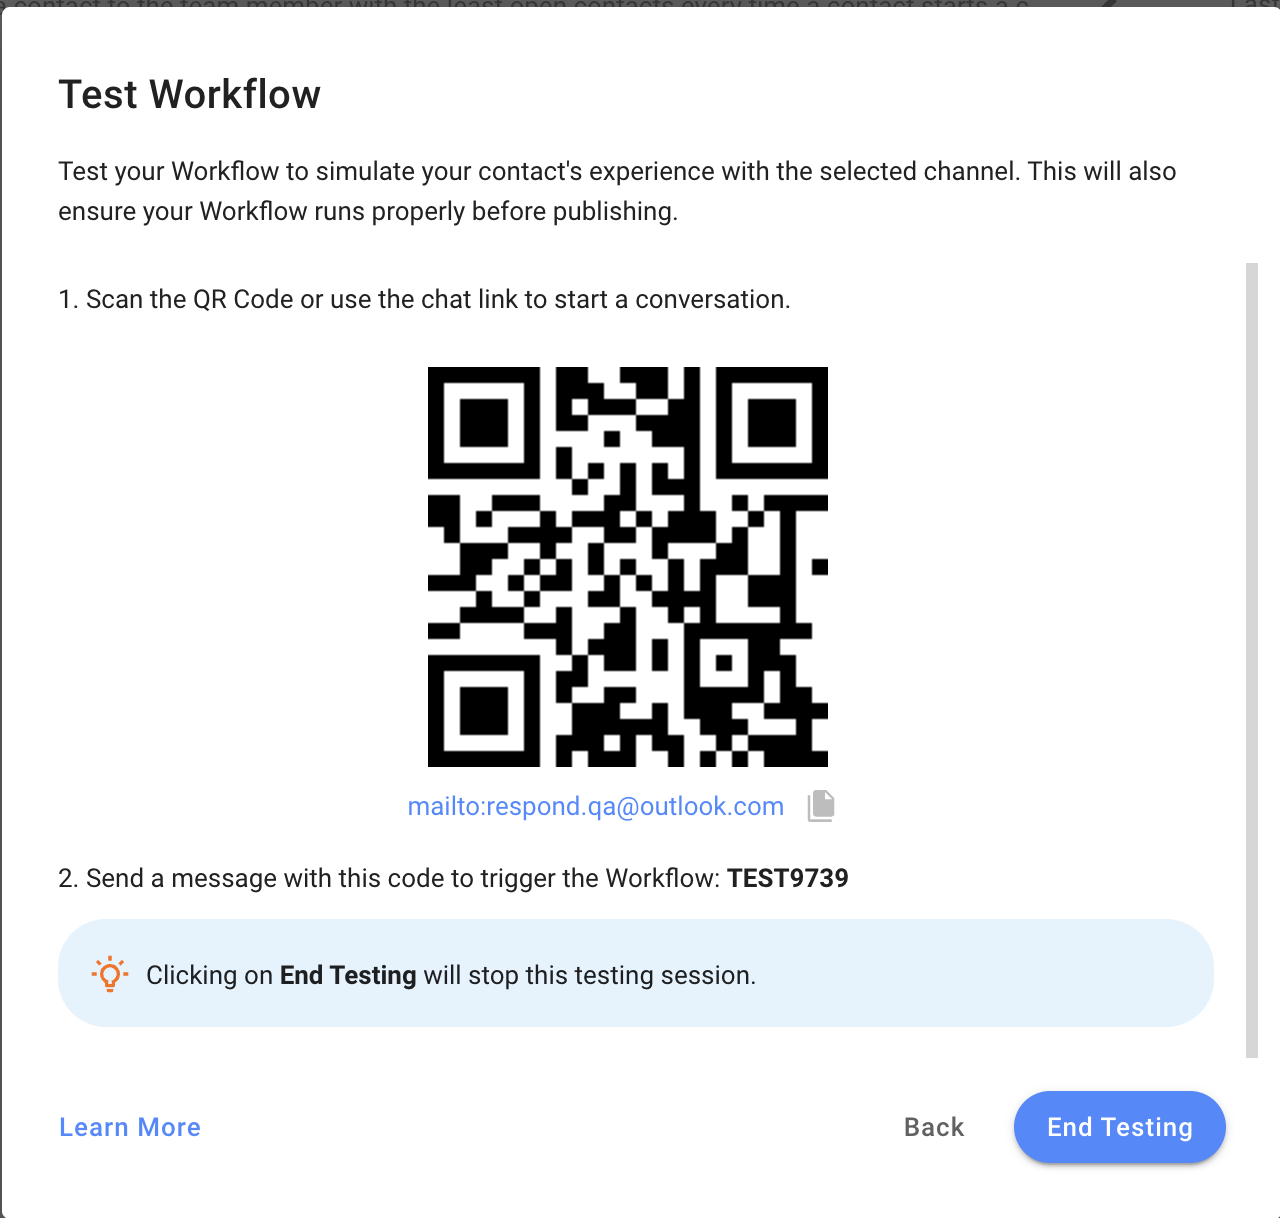
- On the Test Workflow dialog, the QR code and chat link for the selected channel are displayed. Scan the QR code using a mobile device or click the link to open the chat in your browser.
- Send the code (e.g. TEST1234) on the opened channel to trigger the workflow for testing.You can send the code as many times as you need to trigger the workflow so you can test it. The code cannot be used once the End Testing button is clicked.
- Click End Testing to close the Test Workflow dialog when you are done testing.
Publishing a Workflow
To start a Workflow, you need to publish it. A Workflow can be published from two places:
- From the Actions menu in the Workflows listing page
- With the Publish button inside the Workflow Builder
The Workflow will run once it is published. Contacts who meet the trigger criteria will enter the Workflow. To edit a published Workflow, you need to first stop the Workflow.
Stopping a Workflow
A Workflow can be stopped from two places:
- From the Actions menu in the Workflows listing page
- With the Stop Button inside the Workflow Builder
Once a Workflow is stopped, it can be edited.
Stopping Workflow(s) for a Contact
You can stop the desired workflows one by one or all workflows for the Contact in one go:
Inbox Module
Navigate to the Workflows icon, in the Ongoing Workflows tab, click Stop on the desired Workflow or select Stop all to stop all the workflows.
Workflows Module
Access the Workflow Settings from the Action menu in the Workflow overview page or within the Workflow builder by clicking the settings icon and toggle on Allow users to stop this Workflow for a Contact.
Editing a Workflow
You can edit a Workflow by clicking the Actions menu on the Workflows listing page, and then clicking Open in Builder. You can edit the Workflow from the Workflow Builder.
Cloning a Workflow
You can create a Workflow by cloning an existing one. Click the Actions menu on the Workflows listing page and click Clone.
When a Workflow is cloned, the trigger and Steps are copied over to the new Workflow. The name of the new Workflow will also follow the name of the original Workflow and appended with clone at the end. You can still make necessary changes before publishing it.
Deleting a Workflow
You can delete a Workflow by clicking the Actions menu on the Workflows listing page and clicking Delete. Click Delete again on the pop up message to confirm the deletion.
- When a Workflow is deleted, all existing Contacts in the Workflow journey will be ejected.
Exporting a Workflow
You can export a Workflow by clicking the Actions menu on the Workflows listing page, and then clicking Export Workflow.
The Workflow will be downloaded as a JSON file.
It can then be imported to another Workspace or Organization.
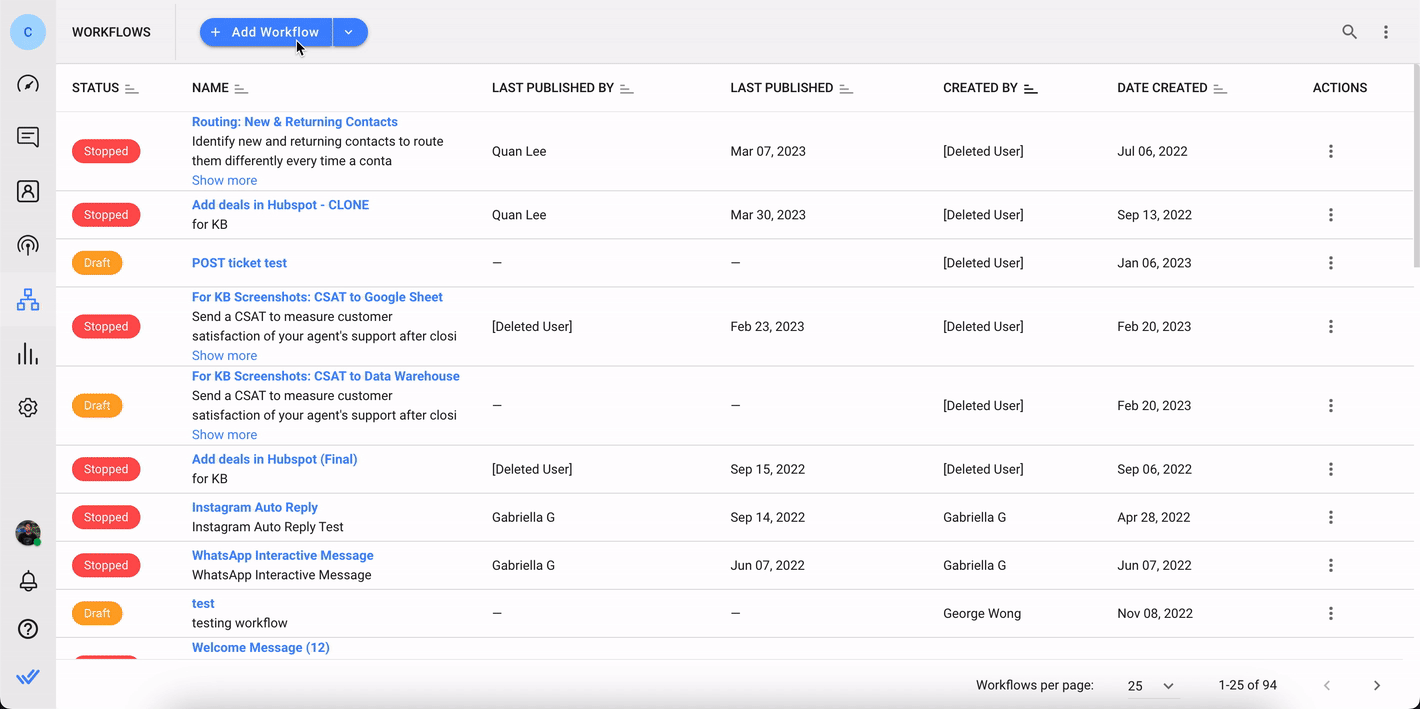
Importing a Workflow
You can import a Workflow by clicking the dropdown arrow beside the + Add Workflow button on the Workflows listing page, and then clicking Import Workflow.
Click Browse file to select your Workflow and click the Import button.
To import your Workflow successfully, please make sure:
- The file is in a JSON format and was created on the respond.io platform
- All the values in the JSON file are correctly listed and formatted
- The file cannot exceed 400 KB
- The file cannot contain more than 100 Workflow steps
Imported Workflows inherit the name and description from the import file. If the name already exists, the name of the imported Workflow will be appended with a number starting at (2) and increase by 1 for duplicates.
E.g. Welcome Message (2), Welcome Message (3), Welcome Message (4).
- You cannot import a Workflow that contains a trigger but no Step.
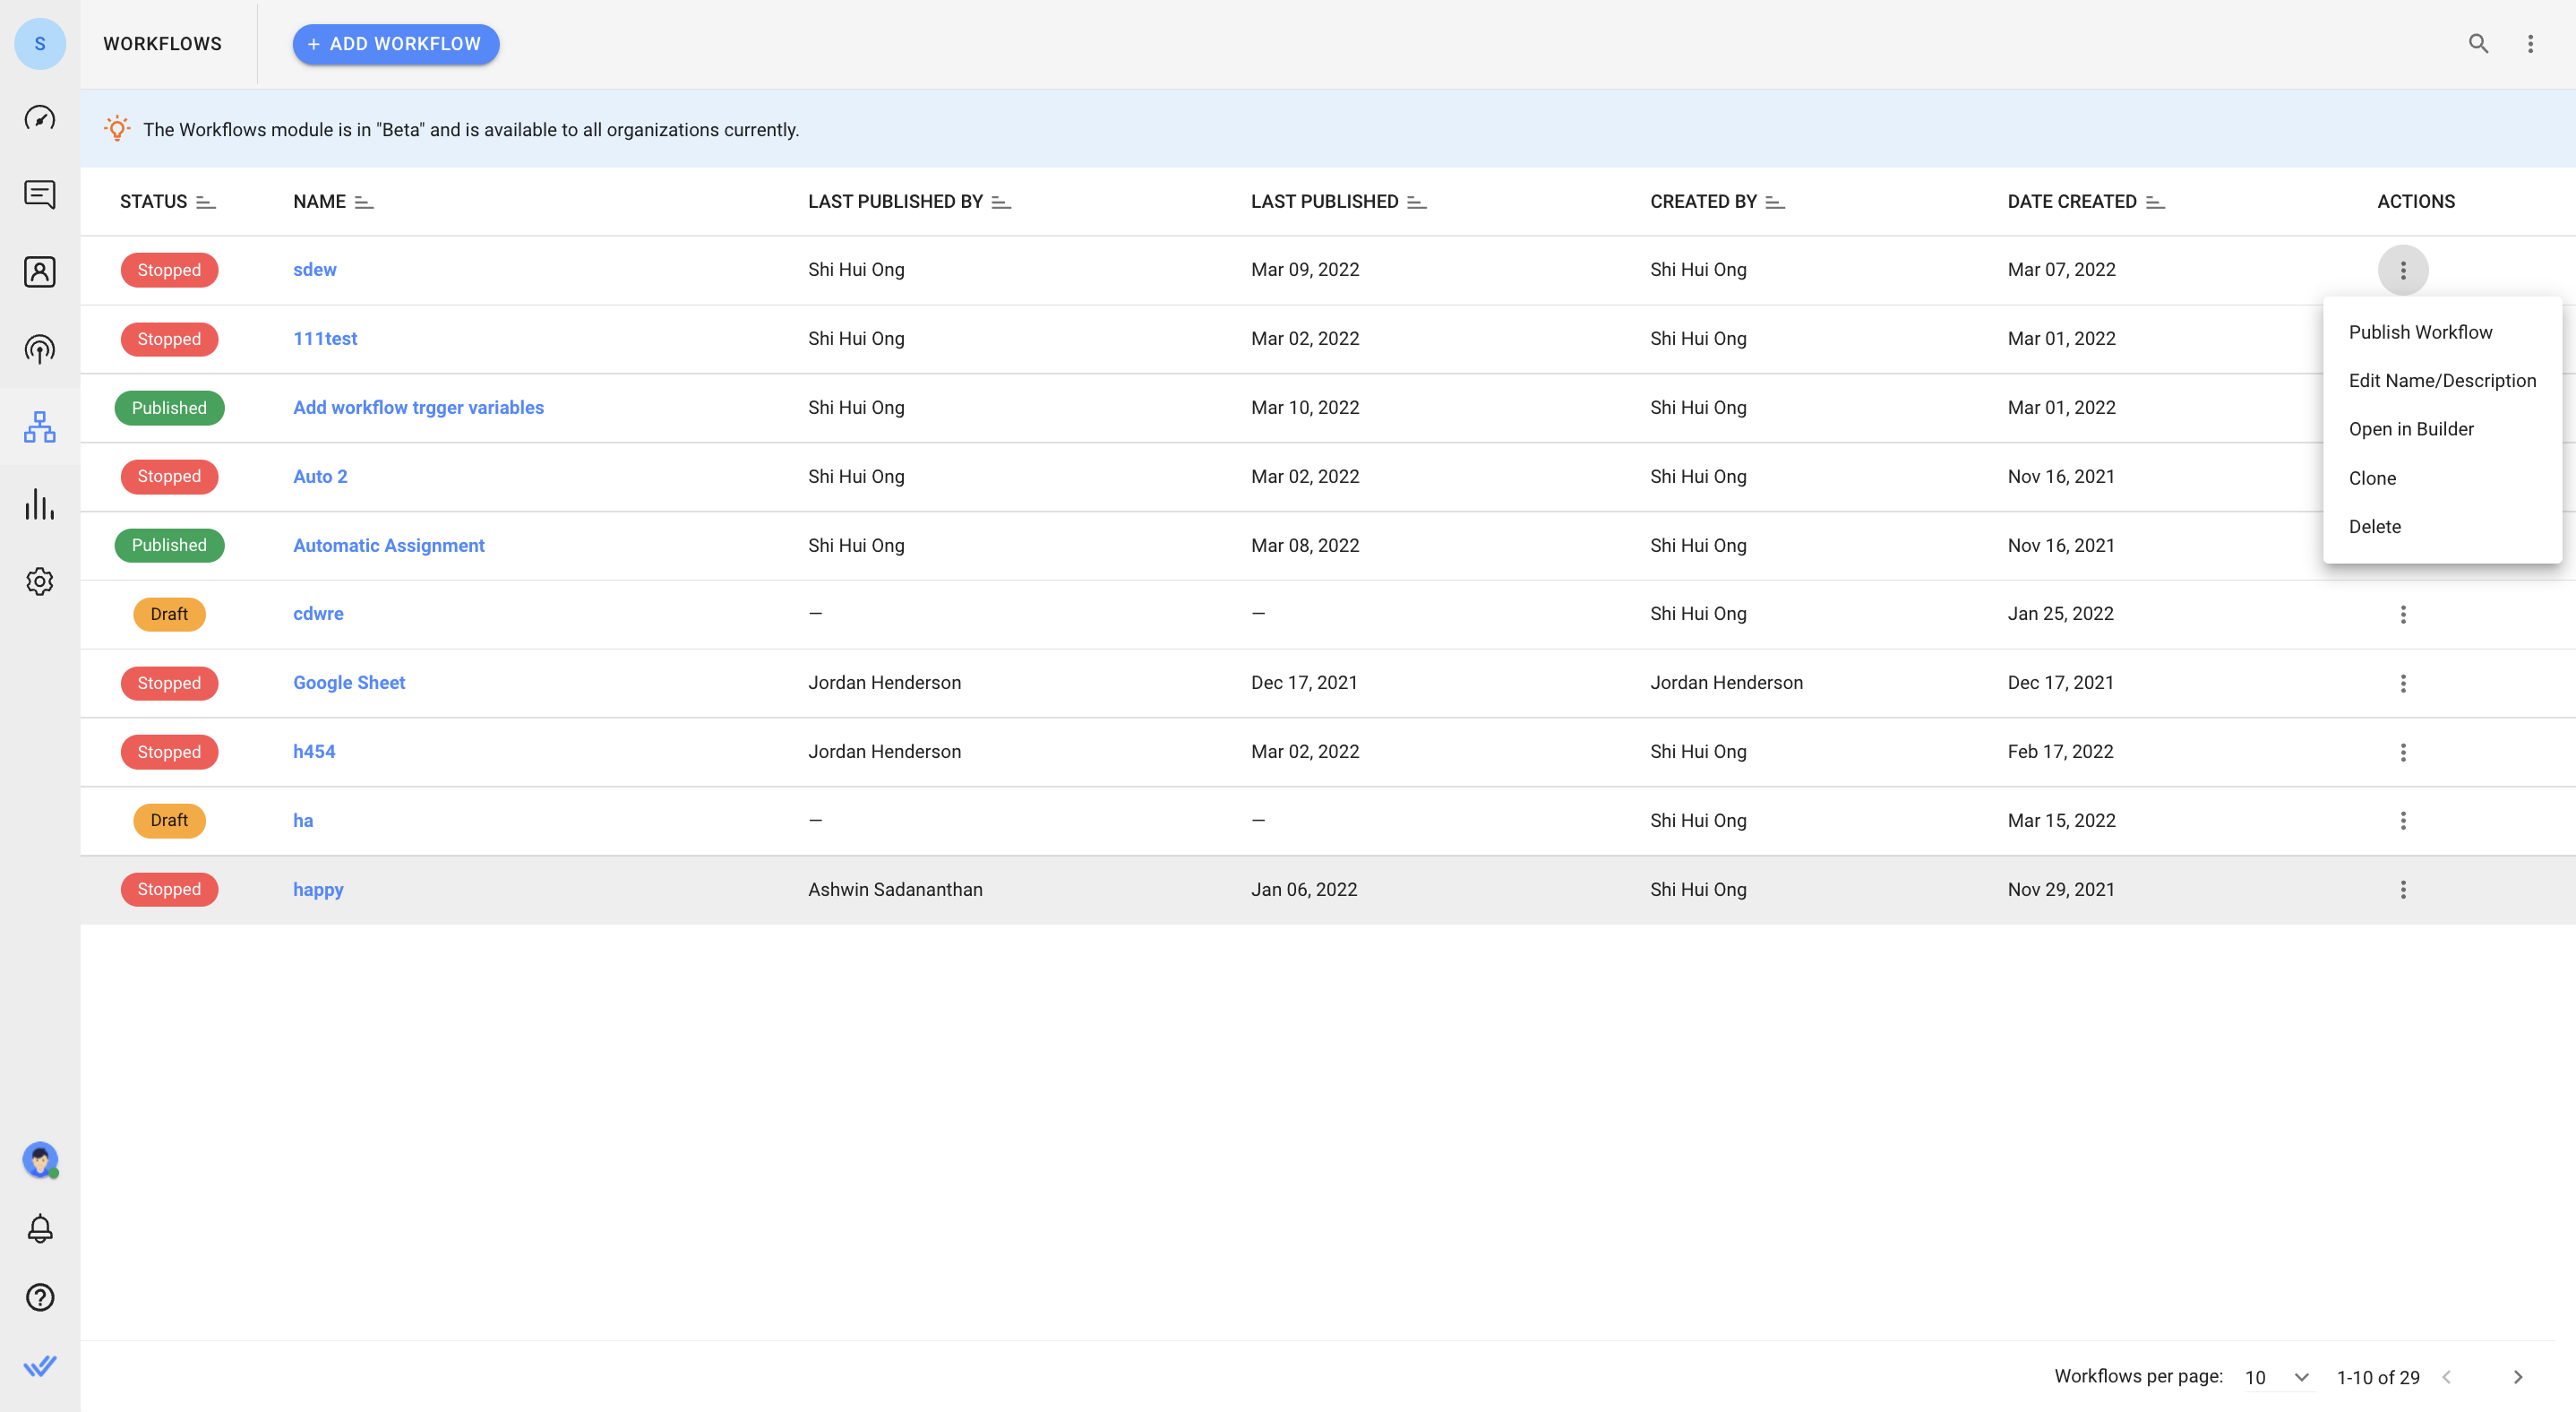
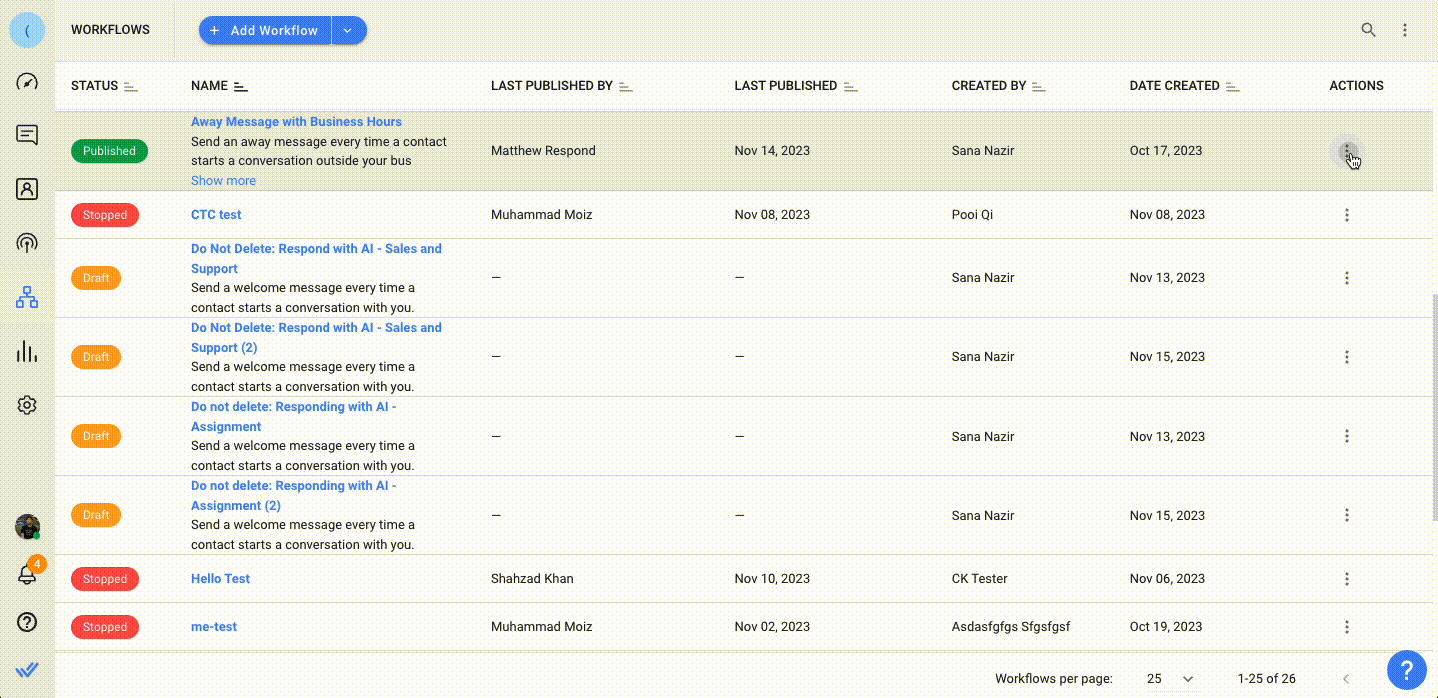
Workflows Module Listing
Workflow Columns
Each Workflow will have the following associated information in its columns.
Workflow Status
The Workflow Status is used to determine if the Workflow is currently running. There are three possible statuses:
- Draft: A Workflow that has never been published
- Published: A Workflow that is currently implemented
- Stopped: A previously published Workflow that has been stopped
Other Columns
Each Workflow has additional columns detailed below.
Header | Description |
Name | Displays the name and description |
Last Published By | Displays the last User who published it |
Last Published | Displays the last published date |
Created By | Displays the User who created it |
Date Created | Displays the date it was created |
Actions Menu
The last column in the Workflows row contains the Actions Menu. The following actions can be performed here:
Action | Description |
Publish Workflow | Only shown when Workflow is in Draft or Stopped |
Stop Workflow | Only shown when Workflow is Published |
Edit Name/Description | Allows editing of Workflow name or description |
Open in Builder | Opens the Workflow in the Builder |
Clone | Creates a duplicate Workflow in Draft Status |
Export | Exports the Workflow in a JSON file |
Workflow Settings | Opens a dialog to configure settings to stop a workflow for a Contact |
Delete | Deletes the Workflow |
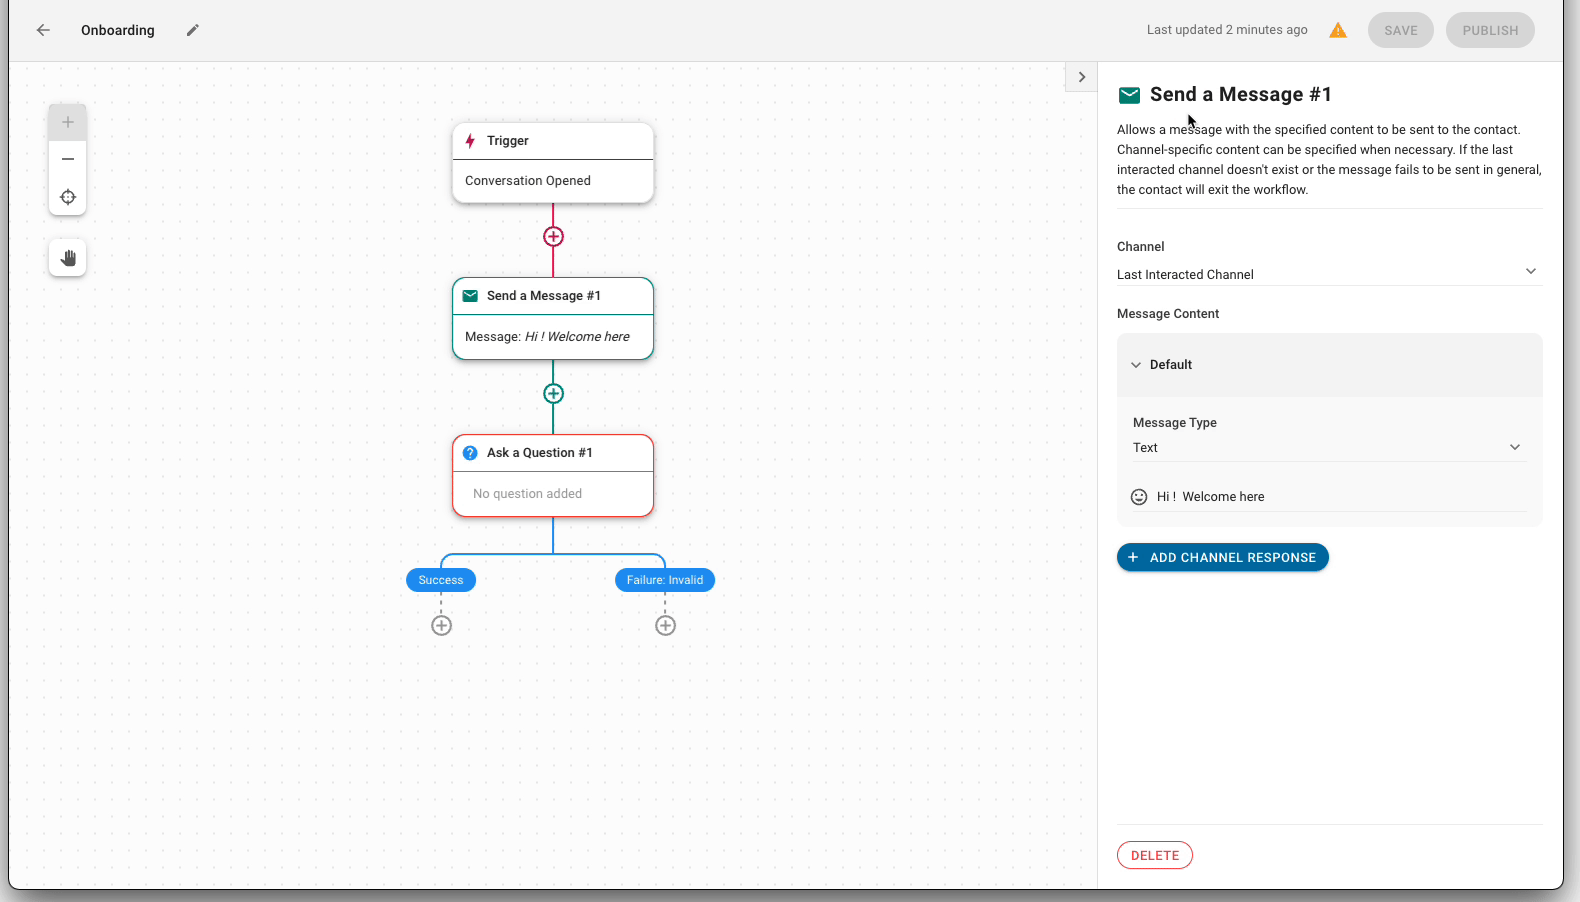
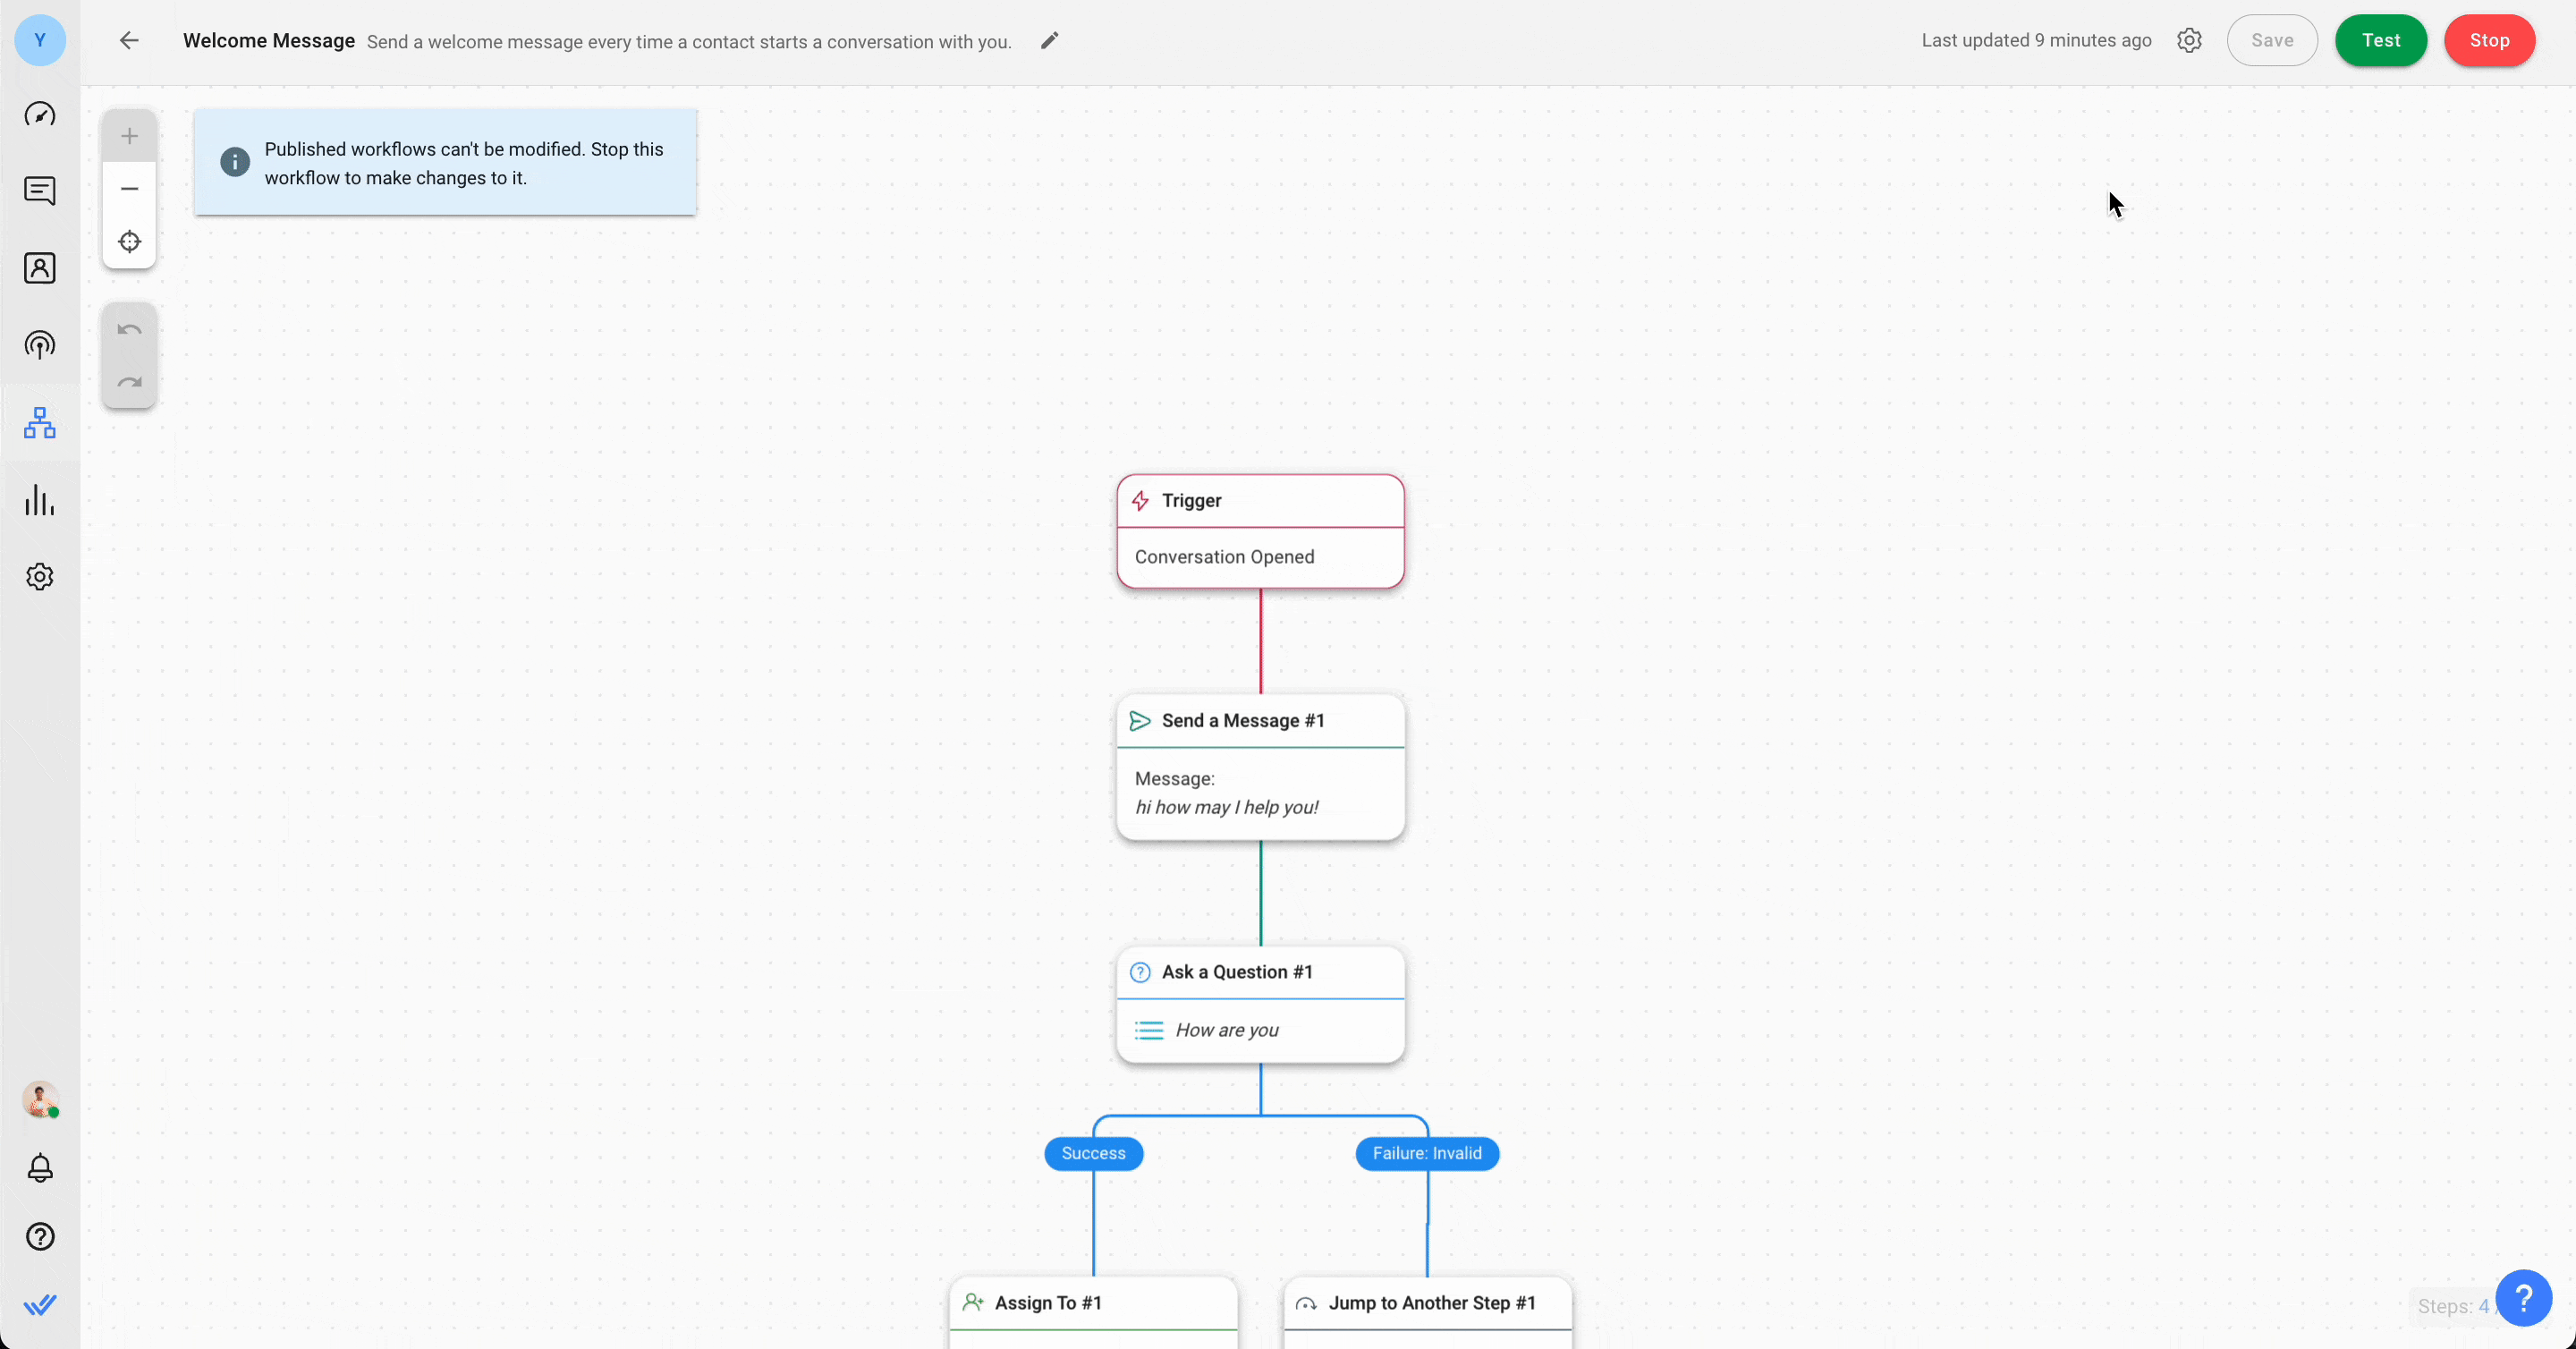
The Workflow Builder
To open the Workflow Builder, you need to create a Workflow or edit a Workflow. The Workflow Builder is a visual editor where Steps can be added, removed and configured. It consists of four main sections:
- Top Bar
- Assistive Tools
- Canvas
- Configuration Drawer
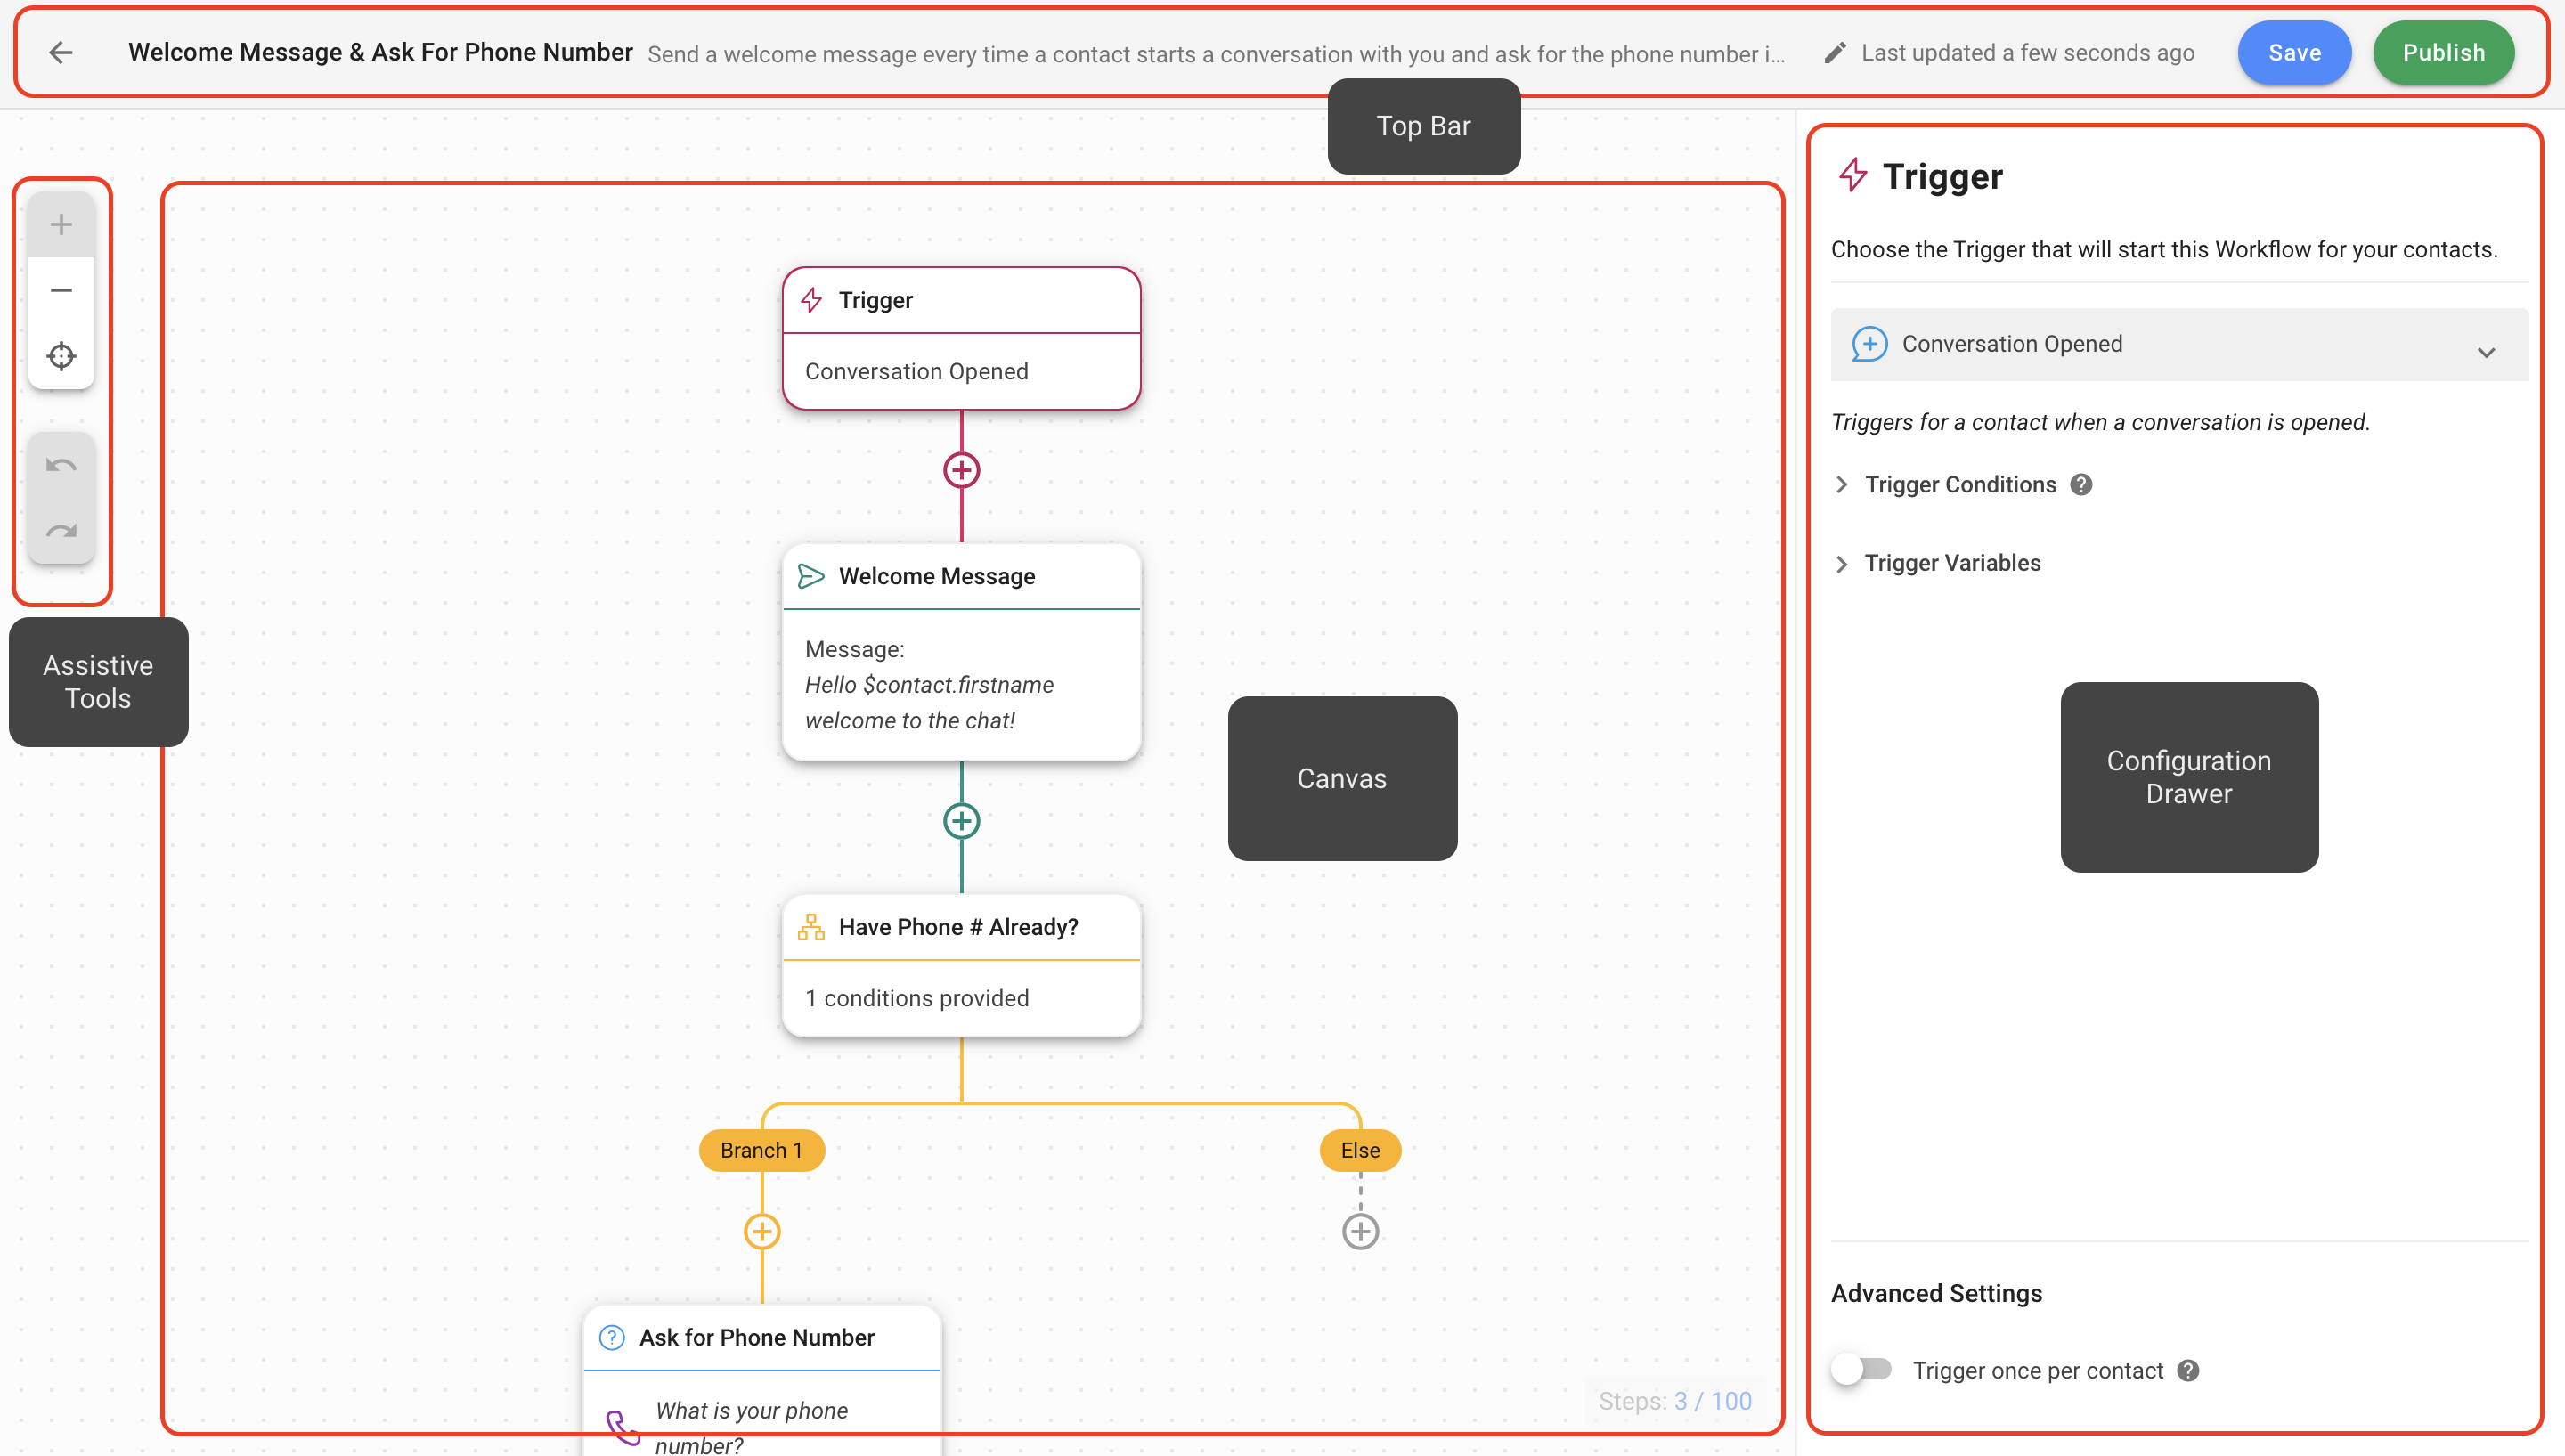
The Top Bar
The top bar is used to manage key Workflow items like its name, description, errors in step configuration and status. The elements of the top bar are as below.
Name | Displays Name and allows editing of Name or Description |
Error Indicator | Indicates a step configuration error |
Workflow Settings | Allow users to stop Workflow for a Contact and set exit conditions to stop a Workflow for a Contact |
Save Button | Allows Workflow to be saved |
Status Button | Allows Workflow to be published or stopped |
Workflow Settings
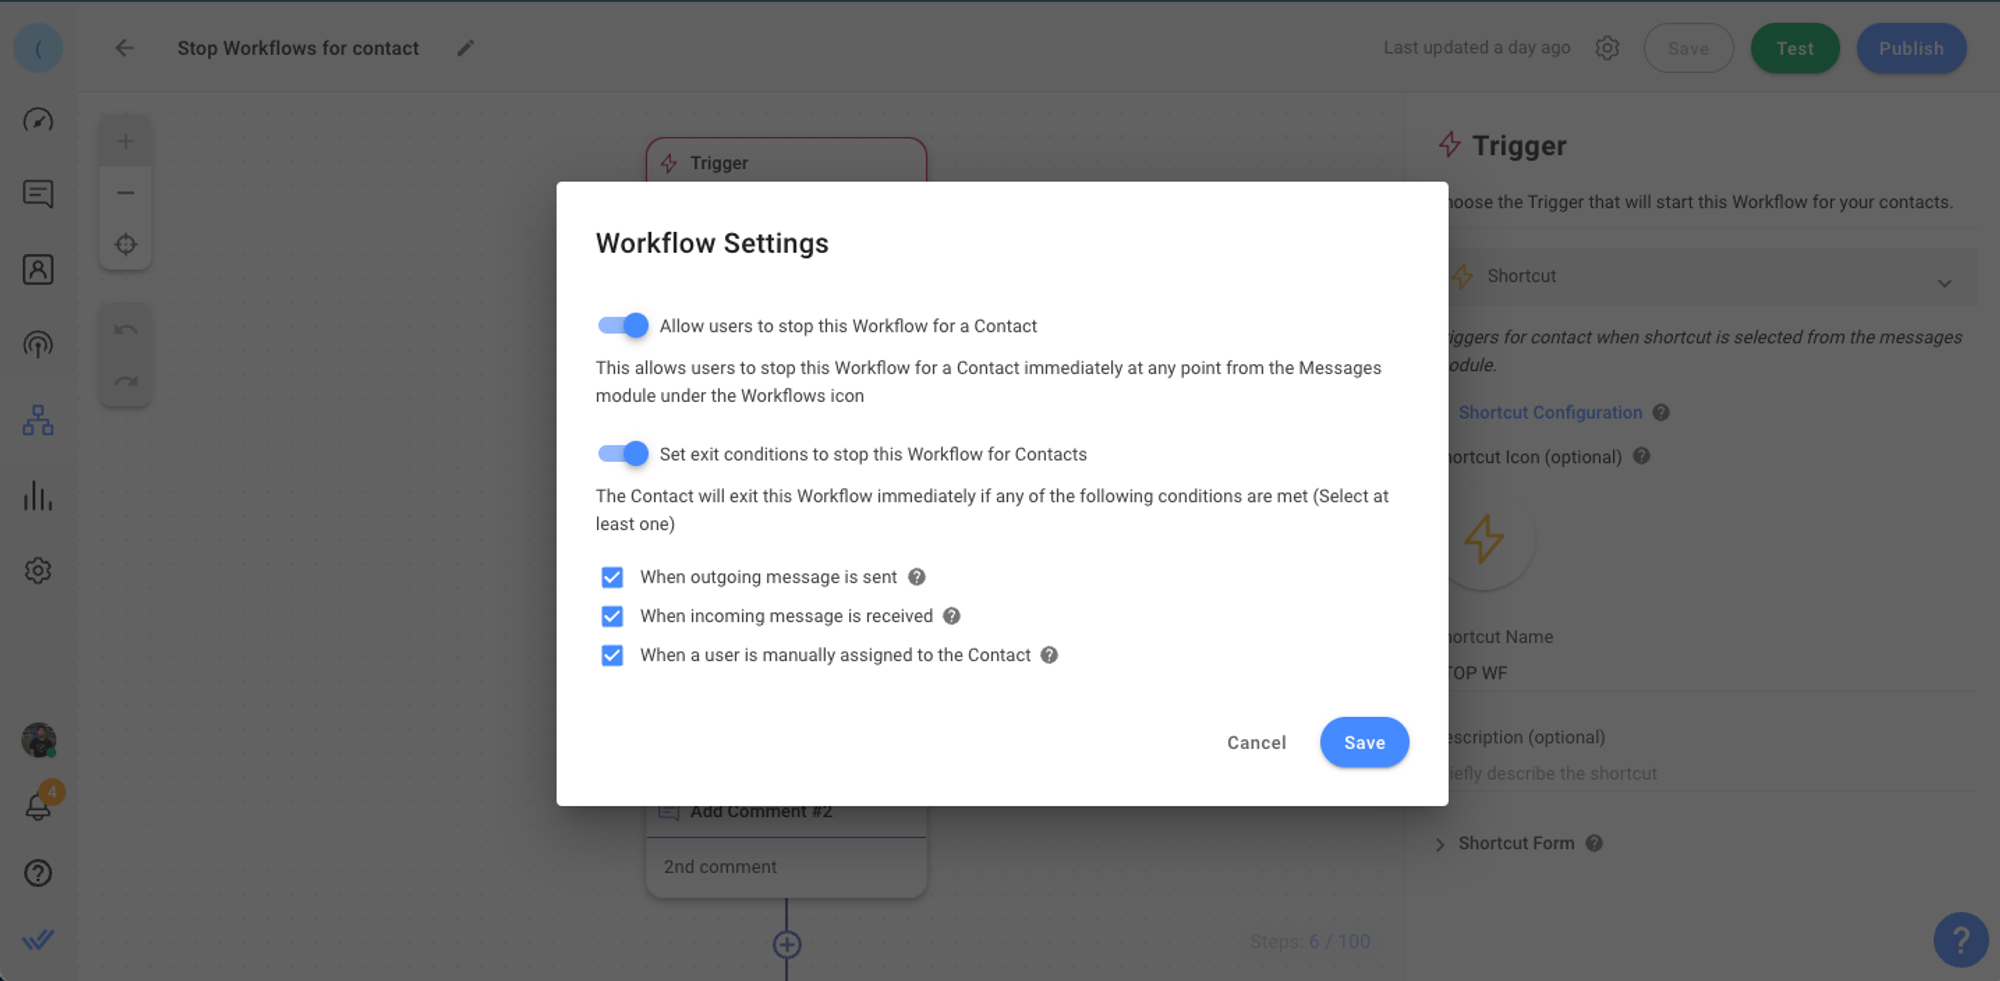
Allow users to stop Workflow for Contact
- Toggle on to allow users to stop Workflow for Contact immediately at any point from the Inbox module. You can enable this setting without stopping the workflow.
Set exit conditions to stop this Workflow for a Contact
- Toggle on to stop Workflow for Contact:
- When outgoing message is sent
- When incoming message is received
- When a user is manually assigned to a Contact
Ongoing Workflows need to be enabled from Workflow Settings to work. Make sure this option is switched on before using this feature.
Exit Conditions | Function | Exceptions |
Outgoing Message | When this exit condition is checked for the selected Workflow, any outgoing messages sent by the user will stop the Workflow for any Contact in the selected Workflow. | - When the message is sent within the Workflow: This condition won't trigger if a "Send Message" step is part of the Workflow. - Broadcast messages: This condition won't work for Broadcasts. - Any integrations, such as Developer API, Zapier, Make.com, Google Sheets, Dialogflow, etc., are not considered when this condition is triggered. |
Incoming Message | When this exit condition is checked for the selected Workflow, any incoming messages received by the user will stop the Workflow for any Contact in the selected Workflow. | - When a contact responds to a question within the chosen Workflow (e.g., an 'Ask a Question' step), this condition won't be triggered. |
Manual Assignment | When this exit condition is checked for the selected Workflow, manually assigning a user on the Inbox module will stop the Workflow for any Contact in the selected Workflow. | - When the assignment occurs via Workflows or APIs. |
Assistive Tools
The five Assistive Tools are designed to help you navigate the Canvas:
- Zoom In
- Zoom Out
- Center
- Undo
- Redo
Canvas
Canvas is the drag-and-drop interface that provides an overview of the Workflow. It allows the user to observe the logic and sequence of a Contact's journey during an event. Actions such as building new Steps, dragging or dropping Steps and connecting Steps take place here.
Configuration Drawer
To configure a Trigger or Step, click on the Trigger or Step block to open its configuration drawer. The actions possible in the configuration drawer include:
- Edit the Step name
- Define the action of the trigger event or Step
FAQ and Troubleshooting
What will happen to my Contacts if I stop a published Workflow?
If a Workflow is stopped, all enrolled Contacts will be immediately ejected from the Workflow. They will not be re-enrolled into the Workflow if it is re-published.
Why did my Workflow end before it was completed?
A Workflow may end prematurely for the following reasons:
- The Workflow was stopped - If a Workflow is stopped, all enrolled Contacts will be immediately ejected from the Workflow.
- The Contact fell under the Failure Branch and there was no continuing journey - Contacts may fall under a Failure Branch if they provide invalid responses or do not meet specified conditions. If there are no steps configured under the Failure Branch, the Workflow will end. It is advisable to configure steps under the Failure Branch so Contacts may continue their journey if they land here.
- Ask a Question - Timeout - The Ask a Question Step has a default timeout period of 7 days. If Contacts do not respond within the defined or default timeout period, the Workflow will end. It is advisable to create a Timeout Branch and add Steps for Contacts to continue their journey in the event of a timeout. Read more about the Ask a Question Step here.
- Assign to - Timeout - The Assign To Step has a default timeout period of 7 days. If an assignee who fulfills the assignment logic cannot be found within the defined or default timeout period, the Workflow will end. It is advisable to create a Timeout Branch and add Steps for Contacts to continue their journey in the event of a timeout. Read more about the Assign To Step here.
- Branch Condition - Else - Contacts who do not meet the required conditions of a branch will fall under the Else branch. If no steps are configured under this branch, the Workflow will end. It is advisable to configure Steps under the Else branch so Contacts may continue their journey if they land here. Read more about Branch Steps here.
- Send a Message - Fail - If a message is not sent for any reason (e.g., messaging window closed, network connection issues), the Contact will exit the Workflow.
If I manually close an ongoing conversation with an enrolled Contact on the platform, will the Workflow end?
No, the Workflow will continue even if the conversation is manually closed on the platform. The Workflow will only end if the conversation closes in the Workflows Module.
Can a Contact re-enter the same Workflow they are currently enrolled in it?
A Contact cannot re-enter a Workflow they are currently enrolled in. The Contact has to exit the Workflow and meet the criteria for the trigger event again to repeat or re-enter a Workflow.
What if a Contact triggers more than one Workflow at the same time?
Both Workflows will be executed concurrently.
I have updated a Contact Field value but the old value is still being applied. Why is Workflows not applying the updated value?
All Contact information will be cached or stored for three (3) minutes once the Workflow is triggered to allow for faster data access. If a Contact Field is being updated manually or programmatically while the Contact is still in a Workflow journey, the information will take up to three (3) minutes to be reflected in the Workflow. Until then, the previous value will be shown.
Why is the reply from the Contact not being saved in the Contact Field that I have selected?
It could be because the Contact Field chosen under the Save Response setting does not match the Question Type. Please make sure you select the correct Contact Field for the Question Type when saving a response. For instance, if the Question Type is a date, then the response cannot be saved as a different Contact Field, such as email address or phone number.
How do I turn off the Dialogflow Bot?
To turn off Dialogflow Bot, you need to:
- Add the Update Contact Field Step
- In the Step configuration, select Bot Status in the Contact Field dropdown list
- Set the Bot Status value as On/Off as required
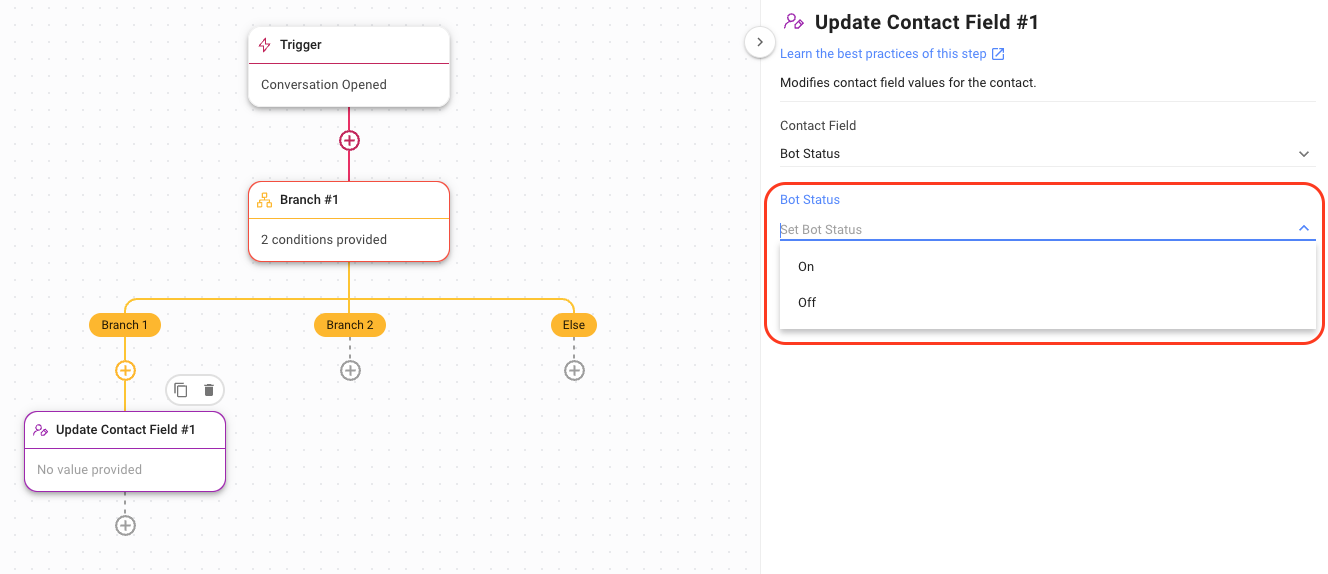
Choose this method to turn off your Dialogflow Bot in any of the following cases:
- To automate turning off the bot
- To ensure any replies from customers do not trigger Dialogflow for specific scenarios while the Workflow is running
Why am I encountering the "Workflow loop detected" error when trying to publish my Workflow?
The "Workflow loop detected" error occurs when a workflow includes a step that can trigger itself or another workflow that in turn triggers the original workflow, resulting in an infinite loop. Prevent this error from occurring and ensure that your workflow functions as intended by checking your workflow with these steps:
- Duplicate triggers in a workflow: Check if any steps in your workflow are identical to the workflow trigger. If the workflow trigger and any step in the workflow are the same, it can cause a loop to occur. Ensure that the workflow trigger is unique and does not match any other steps in the workflow.
- Steps that can trigger other workflows: Check if your workflow has any steps that can trigger another workflow. For example, if workflow A has a step that can trigger workflow B, and workflow B also has a step that can trigger workflow A, a loop can occur. Ensure that workflows do not contain any steps that can trigger each other.
Why can't I stop a Workflow from the Inbox module?
To stop a Workflow from the Inbox module:
- Navigate to the Workflows module and to your desired Workflow.
- Access the Workflow Settings from the Action Menu in the Workflow overview page or within the Workflow builder by clicking the settings icon.
- Toggle on "Allow users to stop this Workflow for a Contact".
What is the Workflow limitation for the Business plan on respond.io?
For the Business plan, the limitation is a maximum of 100 Workflows per Workspace. To understand more about the features available for each plan, including the Business plan, please visit our detailed comparison page at respond.io Pricing and Features.
Why did I encounter the error "Invalid JSON schema, please submit a valid JSON file" when importing a Workflow?
You will encounter this error in any of the following scenarios:
- if your Workflow contains a trigger but no Step.
- if your Workflow contains multiple triggers, with or without a Step.