Table of Contents
Step: Branch
 Updated
by Shing-Yi Tan
Updated
by Shing-Yi Tan
This Step defines the Contact's journey in the Workflow based on certain conditions. You can configure the Branch Step using various combinations of Categories and Operators.
Configuration
Creating Branches
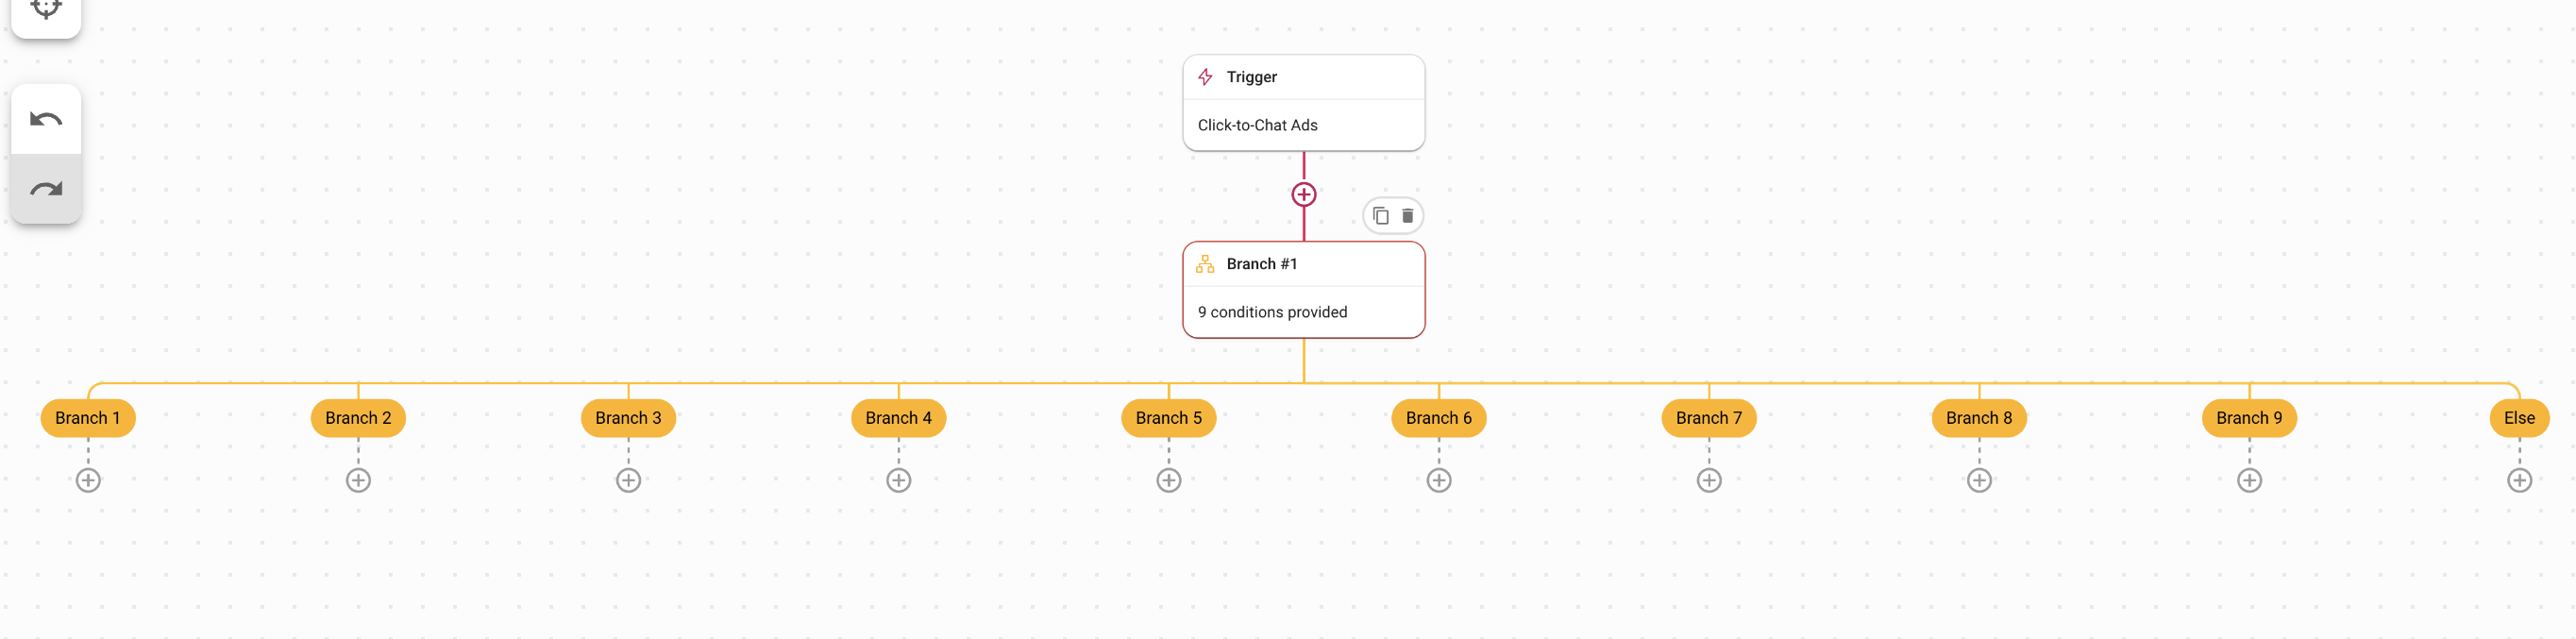
Click Add Branch to create up to 9 Branches with one Else Branch.
Branch Conditions
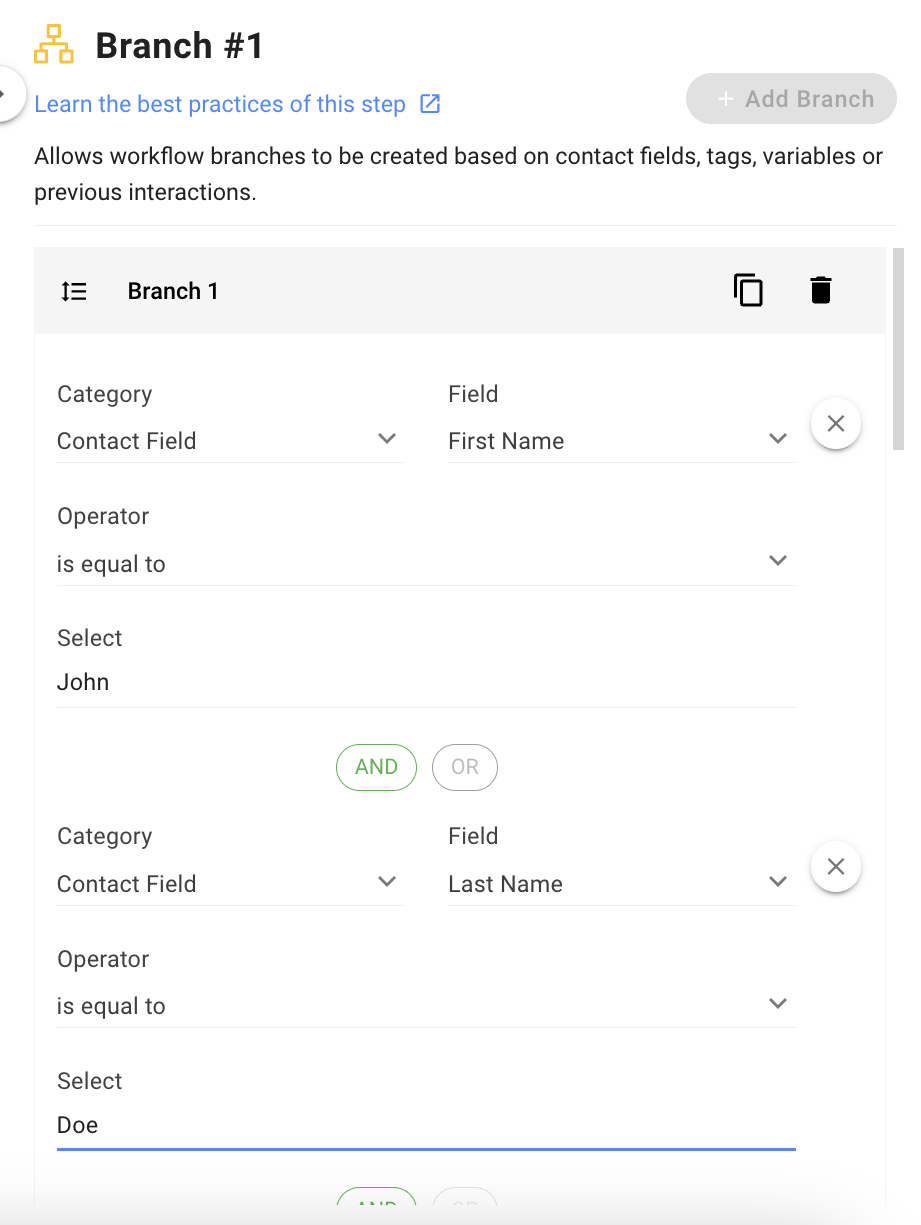
A maximum of 10 conditions that are connecting using either AND or OR logical operators are allowed per branch. Each condition needs a defined category, operator and value.
In the example below, the branch condition checks if the Contact's First Name is equal to John AND the Last Message is equal to Doe.
Selecting a Branch Category
The Category field allows you to select the fields that need to be verified. The available categories include:
Categories | Description | Example |
Contact Field (inclusive of all Custom Fields) | Specifies that the value in the selected Contact field needs to be checked. The Field drop-down list displays so you can select the Contact field you want to check. | Check the Contact's First Name. |
Contact Tags | Specifies that the value in the selected Contact tags needs to be checked. The Operator drop-down list displays so you can select the operator you want to use. | Check the Contact Tag. |
Variables (inclusive of trigger variables and output variables from the Shortcut form) | Specifies that the value of a variable needs to be checked. The Field drop-down list displays so you can select the variable you want to check. | Check the variable called clicktochat.ads_status. |
Assignee Status | Specifies that the assignee status needs to be checked. The Operator drop-down list displays so you can select the operator you want to use. | Check the Assignee Status. |
Last Interacted Channel | Specifies that the last interacted channel needs to be checked. The Operator drop-down list displays so you can select the operator you want to use. | Check if there is a Last Interacted Channel. |
Last Incoming Message | Specifies that the last incoming message needs to be checked. The Operator drop-down list displays so you can select the operator you want to use. | Check if the Last Incoming Message has the word "Help". |
Last Outgoing Message | Specified that the last outgoing message needs to be checked. The Operator drop-down list displays so you can select the operator you want to use. | Check if the Last Outgoing Message has the word "Satisfied". |
Last Outgoing Message Source | Specifies that the last outgoing message source needs to be checked. The Operator drop-down list displays so you can select the operator you want to use. | Check if the Last Outgoing Message Source is broadcasts. |
Time Since Last Incoming Message | Specifies that the time since the last incoming message needs to be checked. The Operator drop-down list displays so you can select the operator you want to use. | Check if last incoming message was sent between Jan 15 - Jan 17. |
Time Since Last Outgoing Message | Specifies that the time since the last outgoing message needs to be checked. The Operator drop-down list displays so you can select the operator you want to use. | Check if last outgoing message was sent between Jan 15 - Jan 17. |
Assignee Status | Specifies that the assignee status needs to be checked. The Operator drop-down list displays so you can select the operator you want to use. | Check if the Assignee Status is Online. |
Selecting a Branch Operator
In a Branch Step, the branch operator is used to evaluate conditions and decide which branch to follow. When setting up the Branch Step, you select the branch operator, which is used to compare a variable or value with a specific condition. The choice of branch operator depends on the condition you want to evaluate in the Branch Step.
Here's a table to guide you in choosing the right operator for evaluating conditions.
Operators | Description | Example |
Is equal to | Check if two values or expressions are equal to each other. | 3 is equal to 3 (returns true) |
Is not equal to | Check if two values or expressions are not equal to each other. | 3 is not equal to 4 (returns true) |
Is greater than | Check if one value or expression is greater than another value or expression. | 5 is greater than 3 (returns true) |
Is less than | Check if one value or expression is less than another value or expression. | 3 is less than 5 (returns true) |
Is between | Check if a value or expression is within a certain range of values. | 5 is between 1 and 10 (returns true) |
Exist | Check if a value or expression exists. | The variable x exists (returns true) |
Does not exist | Check if a value or expression does not exist. | The variable y does not exist (returns true) |
Contains | Check if a string or collection of items contains a certain value. | "Hello world" contains "world" (returns true) |
Does not contain | Check if a string or collection of items does not contain a certain value. | "Hello world" does not contain "universe" (returns true) |
Has none of | Check if a collection of items has none of the specified values. | [1, 2, 3] has none of [4, 5, 6] (returns true) |
Has all of | Check if a collection of items has all of the specified values. | [1, 2, 3] has all of [2, 3] (returns true) |
Has any of | Check if a collection of items has any of the specified values. | [1, 2, 3] has any of [2, 4, 6] (returns true) |
Is timestamp after | Check if the timestamp is after a specific date. | Set a reminder for a submission in 3 days. |
Is timestamp before | Check if the timestamp is before a specific date. | Set a reminder for a Contact's birthday. |
Is timestamp between | Check if the timestamp is between two dates. | A Contact field was updated between April 22 - June 23. |
Is greater than (time) | Check if the timestamp is greater than a certain measure of time. | Check if the last interacted time with a Contact was more than 30 minutes ago. |
Is less than (time) | Check if the timestamp is less than a certain measure of time. | Check if the Contact sent a message less than 30 minutes ago. |
is between (time) | Check if the timestamp is between a certain time frame. | Check if an appointment was set between certain dates. |
Branch Cloning
Once a branch has been added and configured, you may clone it by selecting the Clone icon. The cloned branch is a duplicate sibling branch that includes the categories and conditions selected in the original branch. However, you can further edit the branch as required. The cloning feature saves the time and effort required to recreate branches from scratch.
How It Works
The Branch Step in a Workflow acts as decision points within a Workflow and determines the Contact's journey. If none of the conditions in the Step are met, Contacts will be re-directed to the Else Branch.
Best Practices
Here’s a best practice for this step you can follow to optimize your workflow:
- Give your Branch a name to help you visualize the Step better without having to open the configuration of the Step.
Suggested Use Cases
Here are some ways you can use the Branch Step:
- Route New and Returning Contacts: Differentiate and manage new and returning Contacts separately to address their unique needs and expectations. This provides a personalized customer experience for returning Contacts and helps capture new Contacts’ attention, turning them into loyal patrons.
- Route VIP Contacts: Identify VIP Contacts for a personalized customer experience and distinguish them from non-VIP Contacts. This allows highly skilled agents to address VIP customers’ specific needs, leading to improved customer satisfaction and loyalty.