Quick Start
What is respond.io?
Setting Up an Account
Connecting Channels
Inviting Your Teammates
Getting Contacts to Message You
Automated Welcome and Away Messages
Responding to Messages
Glossary of Terms
Channels
WhatsApp Business Platform (API) Quick Start
Getting Ready for Inbound Conversations
Getting Ready for Promotional Messaging
WhatsApp Official Business Account (Green Tick)
Grow your WhatsApp Audience by Maximizing Entry Points
Get WhatsApp API Account for Government Agencies
Meta Business Verification
WhatsApp Message Templates
WhatsApp Pricing
WhatsApp Business Platform (API) Channel Configuration
WhatsApp Messaging Limits
Change Your WhatsApp Business Display Name
Migrating from WhatsApp Personal or WhatsApp Business App
Phone Number Migration to respond.io WhatsApp Business Platform (API)
Turn-off WhatsApp Number Two-Step Verification
WhatsApp Cloud API
360dialog WhatsApp
Twilio WhatsApp
MessageBird WhatsApp
Vonage WhatsApp
Phone Number Migration to WhatsApp Cloud API
Facebook Messenger
Facebook Messenger Overview
Facebook Messenger Quick Start
Facebook Chat Plugin
Facebook Private Replies
Facebook Message Tag
LINE
Viber
Telegram
Google Business Messages
Website Chat Widget
Website Chat Widget Overview
Website Chat Widget Quick Start
Install Website Chat Widget on WordPress
Install Website Chat Widget on Shopify
Install Website Chat Widget on Wix
Install Website Chat Widget on Joomla
Install Website Chat Widget on Squarespace
SMS
Custom Channel
Channels Overview
Product
Dashboard & Reporting
Dashboard
Reports Overview
Reports: Conversations
Reports: Responses
Reports: Resolutions
Reports: Messages
Reports: Contacts
Reports: Assignments
Reports: Leaderboard
Reports: Users
Reports: Broadcasts
Messages
Messages Overview
Assignment and Closing a Conversation
Custom Inboxes
Interacting with Respond AI
Using AI Assist
Contacts
Contacts Overview
Contact Details
Merge Suggestions
Contact Activity
Contact Channels
Contact Import
Segments
Broadcasts Module
Workflows
Workflows Overview
Workflow Triggers
Workflow Steps Overview
Step: Send a Message
Step: Ask a Question
Step: Assign To
Step: Branch
Step: Update Contact Tag
Step: Update Contact Field
Step: Open Conversation
Step: Close Conversation
Step: Add Comment
Step: Jump To
Step: Wait
Step: Date & Time
Step: HTTP Request
Step: Add Google Sheets Row
Dynamic Variables
Workspace Settings
Managing a Workspace
Workspace Settings: General
Workspace Settings: Users
Workspace Settings: Teams
Workspace Settings: Channels
Workspace Settings: Contact Fields
Workspace Settings: Integrations
Workspace Settings: Closing Notes
Workspace Settings: Snippets
Workspace Settings: Files
Workspace Settings: Data Export
Workspace Settings: Data Import
Workspace Setting: Respond AI
Workspace Settings: Growth Widgets
Organization Settings
Organization Overview
Organization Settings: General
Organization Settings: Users
Organization Settings: Workspaces
Organization Settings: WhatsApp Fees
Organization Settings: Billing & Usage
User Account
Mobile App
Installing respond.io Mobile App
Messaging From Your Mobile
Managing Notifications On Your Mobile
Configuring Mobile App Settings
Help Menu
Handling Inbound Conversations
Managing Spam
Create Automated Welcome and Away Messages
Get Contacts’ Consent for Personal Data Collection
Create Automated Chat Menus
Collect Contacts’ Emails and Phone Numbers
Route Contacts by Shifts
Route Contacts by Team Functions
Route New & Returning Contacts
Route VIP Contacts
Assignment Strategy: Automatic Contact Distribution & Load Balancing
Assignment Strategy: Unassign Agents after Conversations Closed
Converse with Customers
Understand the Individual: Get a Complete View of the Customers
Collaborate Internally: Simplify Customer Escalation with Automation
Collaborate Internally: Transfer Contacts to the Next Shift Automatically
Respond Intelligently: Optimize Agents’ Productivity in the Messages Module
Support Use Cases
Inbound Support: Identify Contacts by Email and Phone Number
Inbound Support: Enrich Customer Data from a CRM or other Business Software
Inbound Support: Route Customers to the Right Team Automatically
Inbound Support: Auto-Assign Customers to a Team or Dedicated Agent
Send Outbound Support Messages
Support: Closing Conversations
Supervising Your Support Agents
Reporting for Support
Send CSAT to Customer and Save Data in Google Sheets or CRMs
Sales Use Cases
Inbound Sales: Collect Leads' Email and Phone Number
Inbound Sales: Enrich Contact Data and Qualify Leads
Inbound Sales: Routing Leads
Inbound Sales: Auto-Assign Leads to Sales Agents
Sending Outbound Sales Messages
Track Productivity by Closing Conversations
Supervising Sales Agents
Reporting for Sales
Broadcasts Use Cases
Sending a Simple Broadcast
Start a Workflow Based on Broadcast Response
Troubleshooting a Failed Broadcast
Integrations
Dialogflow
Dialogflow Overview
Dialogflow: Connecting to Dialogflow
Dialogflow: Creating a Chatbot
Dialogflow: Managing Intents
Dialogflow: Parameters
Dialogflow: Events
Dialogflow: Response Templates
Dialogflow: Custom Payloads
Dialogflow: Fulfillment Webhook Request
E-Commerce & CRM Integrations
E-Commerce Integration: Shopify
E-Commerce Integration: BigCommerce
E-Commerce Integration: WooCommerce
E-Commerce Integration: Magento
CRM Integration: HubSpot
CRM Integration: Salesforce
CRM Integration: Pipedrive
CRM Integration: ActiveCampaign
Zapier
Make (formerly Integromat)
Developer API
Webhooks
Partnership
We love to hear from you!
Table of Contents
- Home
- Channels
- Website Chat Widget
- Website Chat Widget Overview
Website Chat Widget Overview
Updated
by Joshua Lim
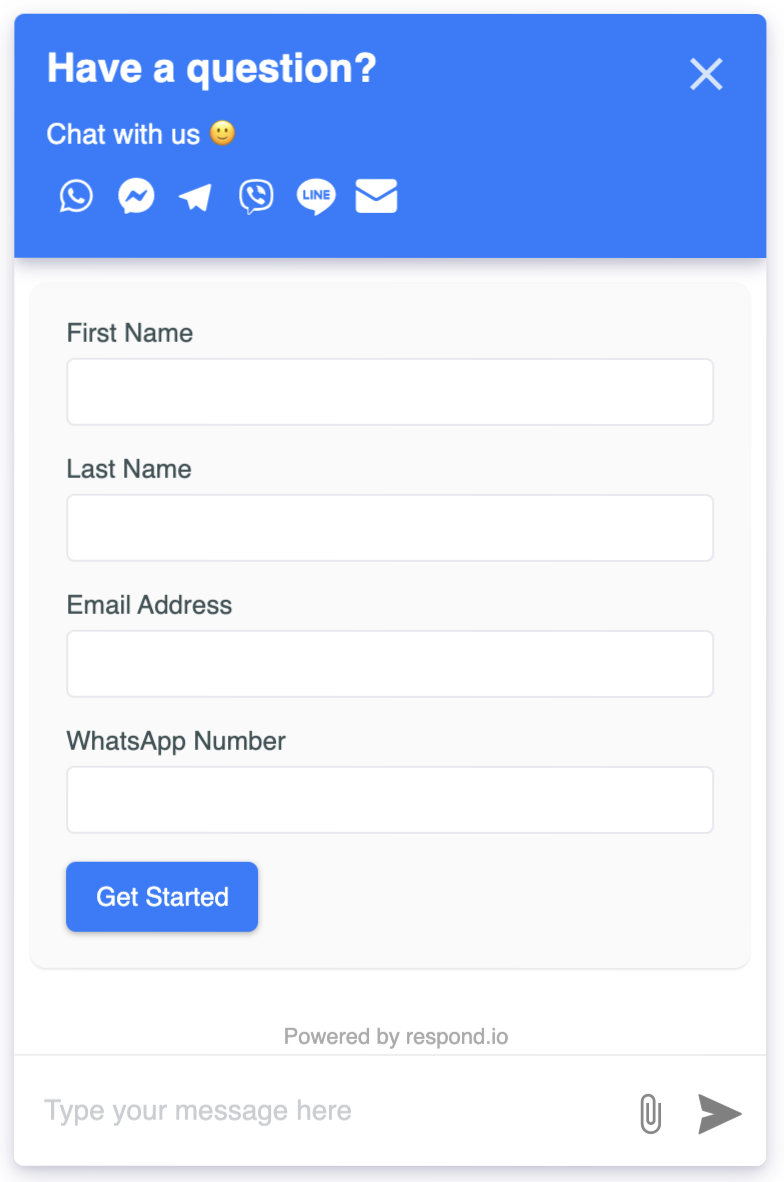
Respond.io’s Website Chat Widget unifies website chat and messaging channels in a single widget. This widget appears as a pop-up window on your website, allowing customers to choose between starting a chat with you via live chat or through other Messaging Channels you have connected to on the widget header.

Website Chat Widget vs Growth Widget
Website Chat Widget
A Website Chat Widget focuses on enabling quick communication and support between customers and your business. The live chat is a session-based conversation, which means it has no messaging window and your business will not be able to contact your customers once the chat has ended.
Learn how to add a Website Chat Widget to your website using respond.io here.
Growth Widget
A Growth Widget allows you to embed a single channel or multichannel widget on your website so customers can connect with you via their preferred messaging apps. A Growth Widget can incorporate a Website Chat Widget as one of its components and it has a wider scope of usage which includes:
- Generating leads by collecting customers’ details such as email addresses and phone numbers.
- Engaging users by encouraging customers to follow or engage with your business on various social media platforms.
Learn more about Growth Widget here.
Pricing
You can set up a Website Chat Widget using respond.io. Refer here for the available plans.
Capturing Conversation
Customers have to send your business the first message to start a conversation.
There are a couple of ways to encourage customers to visit your website to initiate a chat:
- Chat links: Add a URL in emails, newsletters or business cards that directs customers to your website to start a chat with you.
- QR codes: A QR code can be placed in physical locations, such as hotels, restaurants or malls. When customers scan the code, they will be directed to your website to start a chat with you.
- Live chat: The live chat option allows your customers to receive assistance and answers in real time. However, to ensure you can reach out to your customers even after the live chat has ended, you will need to collect Contact details from live chat conversations. There are three ways to do this:
- Pre-chat form: Set up a form before the chat starts. This will require your customers to fill out their contact details before they can start chatting with you.
- Dialogflow chatbot: Utilize a Dialogflow chatbot to interact with visitors and collect their information.
- Workflow: Create a Workflow that prompts Contacts to provide their email or phone number for identification purposes.
Channel Capabilities
These are the capabilities of Website Chat Widget:
Supported File Types
The file types supported by Website Chat Widget and the maximum file size for each type are as follows:
- Image (20 MB)
- Audio (20 MB)
- Video (20 MB)
- File (20 MB)
Message Status Availability
The table outlines the availability of message statuses in Website Chat Widget.
Message Status | Availability |
Sent | ✅ |
Delivered | ✅ |
Read | ✅ |
Failed | ✅ |
FAQ and Troubleshooting
Messages failed to be sent to Contact
There could be a few reasons why the messages failed:
- Contact has left the website or closed the browser with the Website Chat present.
- Contact's inactivity may exceed the timeout period.
- Contact's client may have internet connection issues.
How do I reach out to Contacts who have left my website?
To stay in touch with Contacts who have left your website, collect their phone numbers or emails before chatting on live chat. If they leave your website, you can still continue the conversation on other Channels like WhatsApp, email or SMS. When connecting with Contacts on the respond.io platform, you can switch between Channels using the Channel switcher in the messaging console.
Feeling stuck? Do not fear.
Need assistance? Contact us for support. Help is here!This is the text block that will appear when the button is clicked.
Website Chat Widget Quick Start
Related Articles
Website Chat Widget Quick Start
Add the respond.io Website Chat Widget to your site.
Install Website Chat Widget on Squarespace
Learn how to install a web chat widget on your Squarespace website.
Install Website Chat Widget on Joomla
Learn how to install a web chat widget on your Joomla website.