Table of Contents
How to Send a Simple Broadcast

Creating a New Broadcast
Step 1: From the side navigation menu, select the Broadcasts module.
Step 2: Click + Add Broadcast.
Step 3: Enter your Broadcast Name and Labels > Click Create.

Configuring a Broadcast
Step 4: Select a Segment to target specific group(s) for your broadcasts by clicking the drop-down menu:
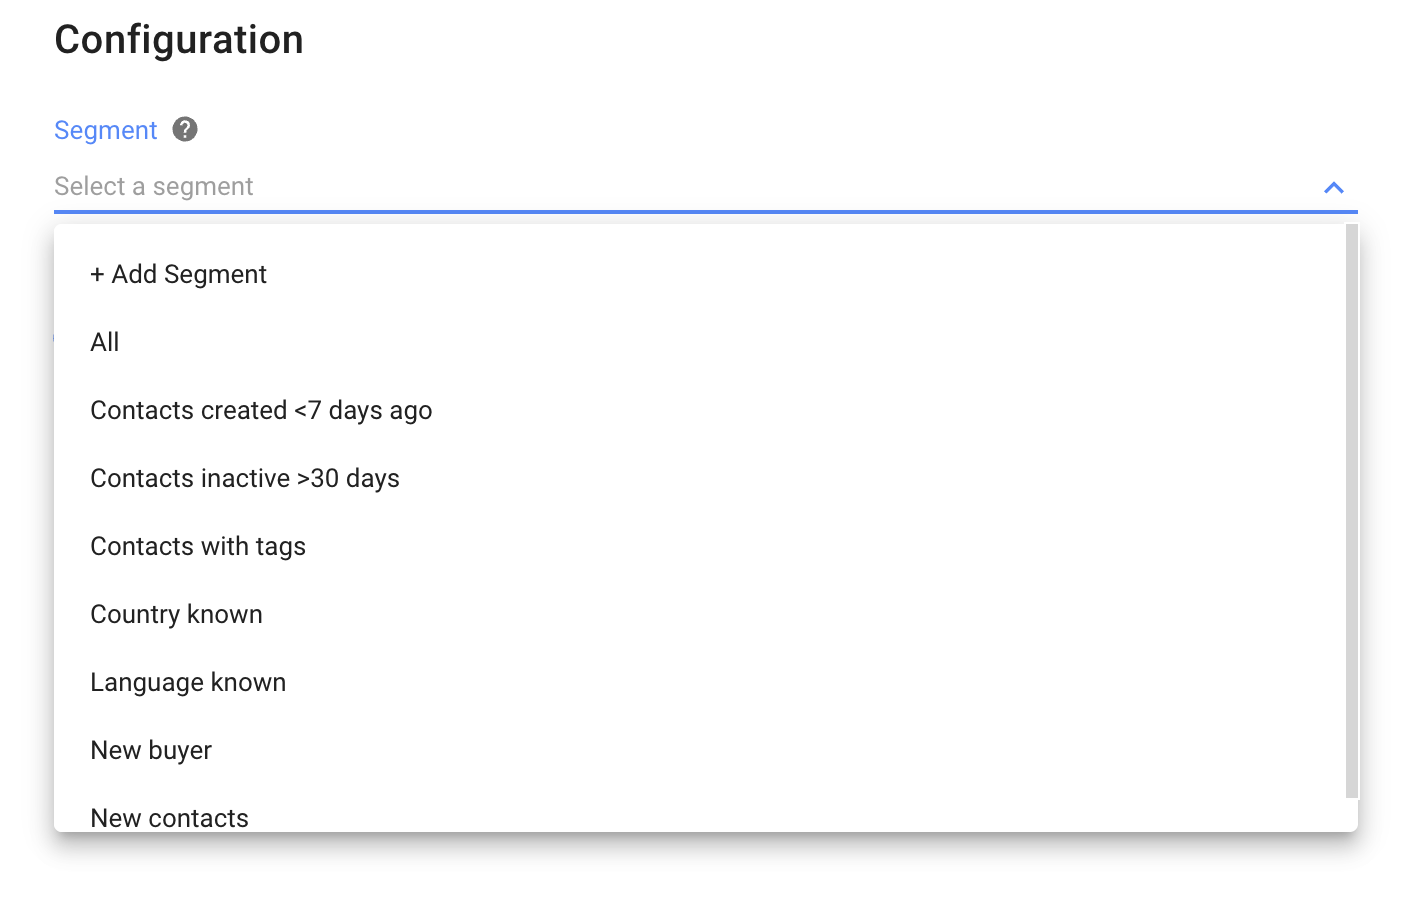
To use an existing Segment, select the Segment.
To create a Segment:
- Click the drop-down menu > Click + Add Segment.
- Enter a name for your new Segment > Click Save.
- Filter your Segment by adding conditions or groups. Use Category and Operator fields based on your criteria. Contacts that fulfill the criteria will appear in the Contact list.
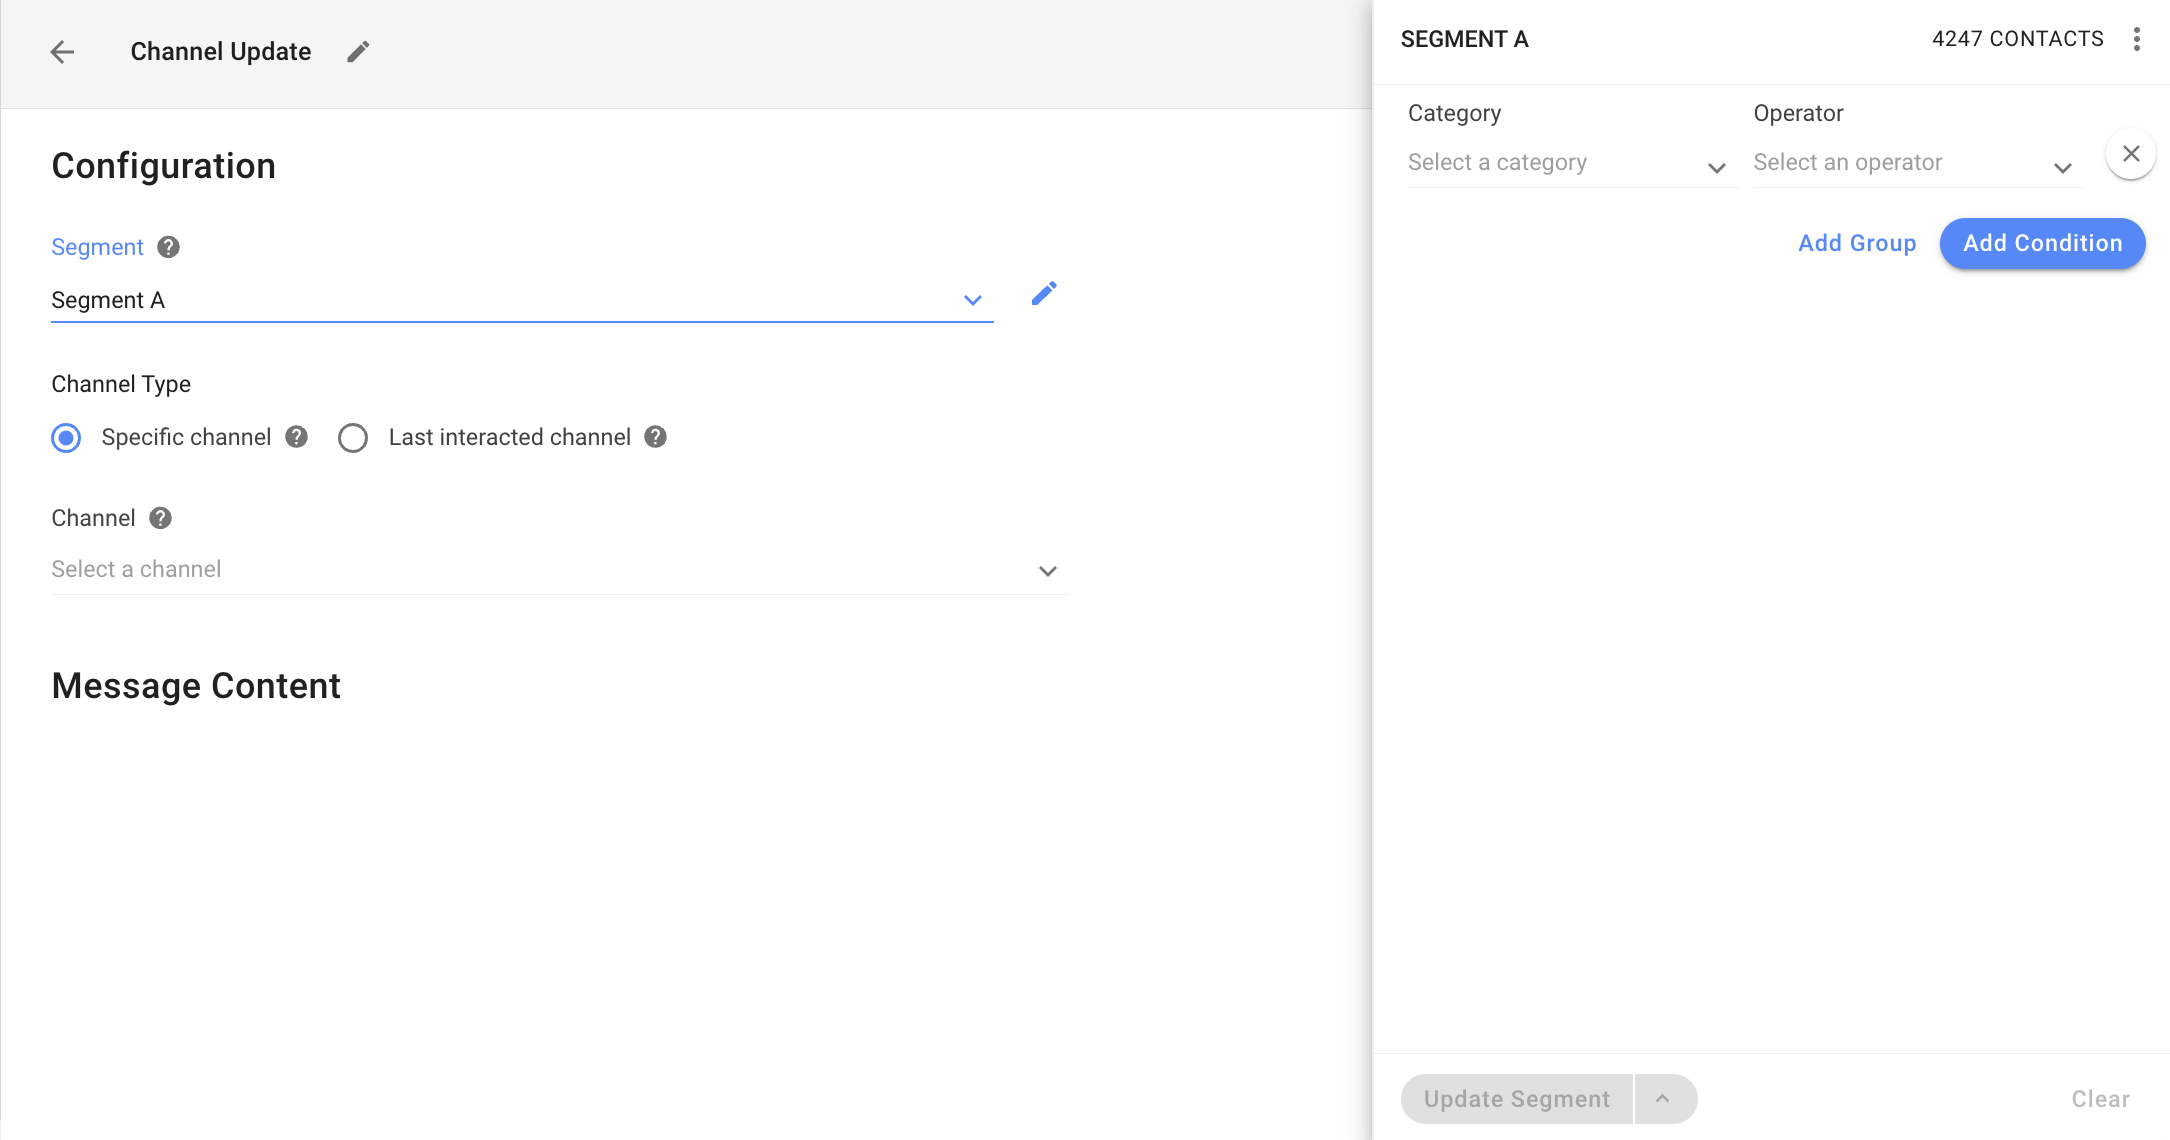
- Click Update Segment to save the segment.
Step 5: At Channel Type, select an option to send your broadcast:
- Specific channel: This allows you to send the broadcast to Contacts in that Channel. Any Contacts in your selected Segment without that Channel will be excluded from the broadcast.
- Last interacted channel: This allows you to send the broadcast to the Contacts’ last interacted Channel with the platform.
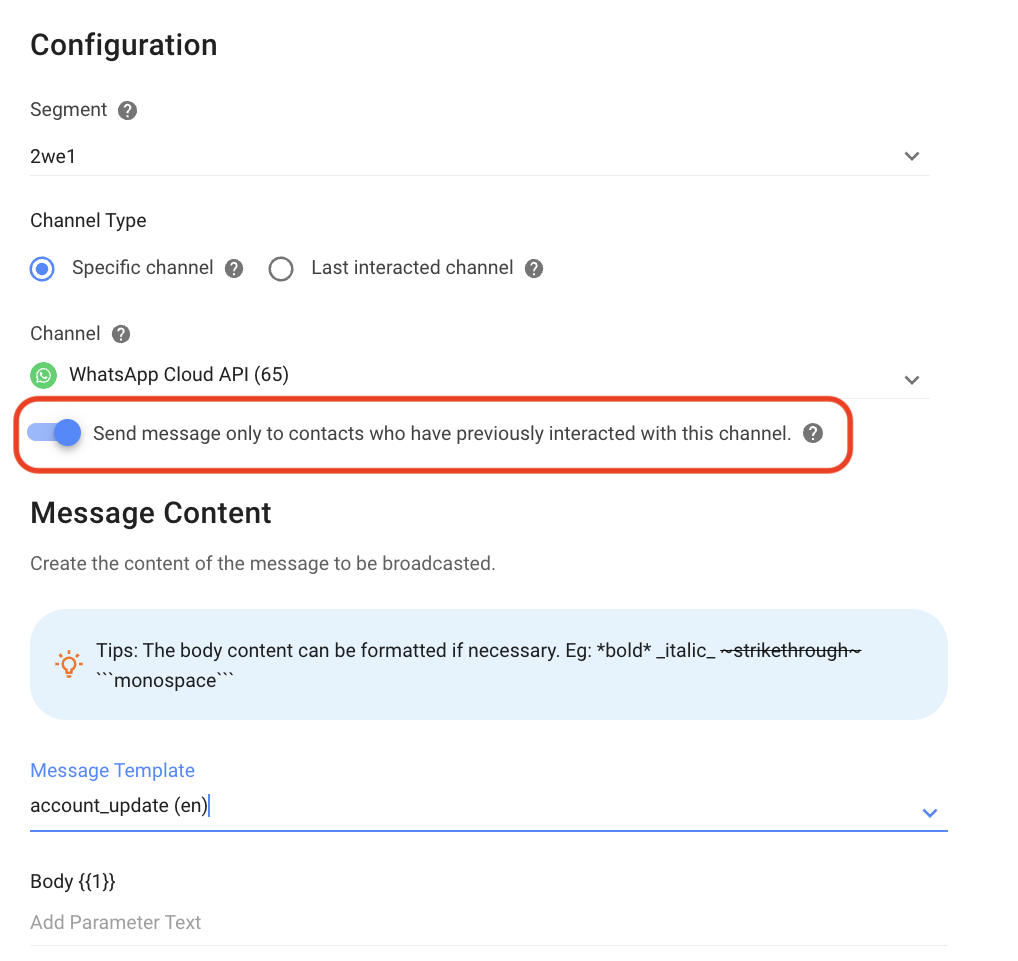
Step 6: At Channel, select the Channel that will be used to send the broadcast message. All channels that are connected and support broadcasts will be available for selection.
Step 7: Configure the message content for the broadcast. The availability of broadcast contents differ depending on the channel selected:
- For WhatsApp Business API Channels, you can only select WhatsApp Message Templates for the content.
- For Facebook Messenger Channels, you can only select Facebook Message Tag for the content.
- For channels other than WhatsApp and Facebook Messenger Channels, you can choose to send Text Message, Multiple Choice, Survey, File or Image.
Sending a broadcast to a Specific Channel
The content you want to broadcast should be added based on the requirements of the chosen Channel.
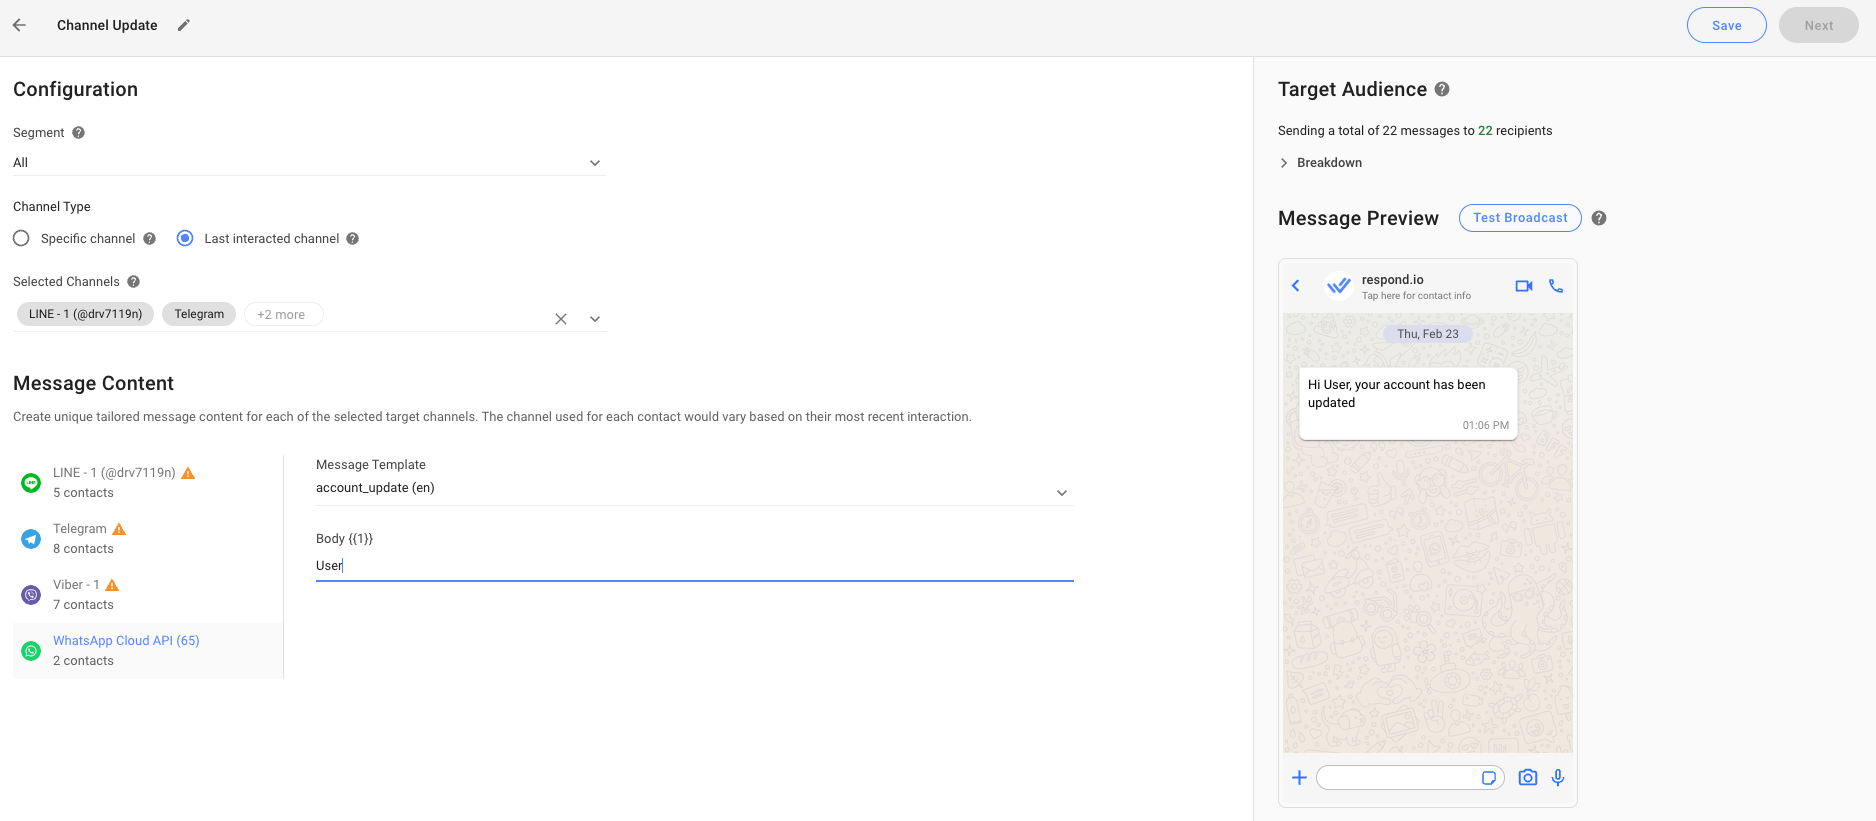
Sending a broadcast to Contacts’ Last Interacted Channel
You need to define message content for each Channel, as each Channel has its own limitations for the broadcast content.
By default, all Channels that are supported for broadcasts will be selected in the Selected Channels section. If you want to exclude certain Channels from the broadcast, simply deselect them from the list. Deselecting a Channel means the Contacts associated with it will not receive the broadcast message.
Preview and Send a Test Broadcast
Step 8: Preview your Messages in the Message Preview section before sending them.
Step 9: Send a test broadcast before sending the actual broadcast. Check how your content will appear to your Contacts. Search for a Contact by name or phone number to receive the test broadcast content. You can search for a Contact as long as they have the Channel available.
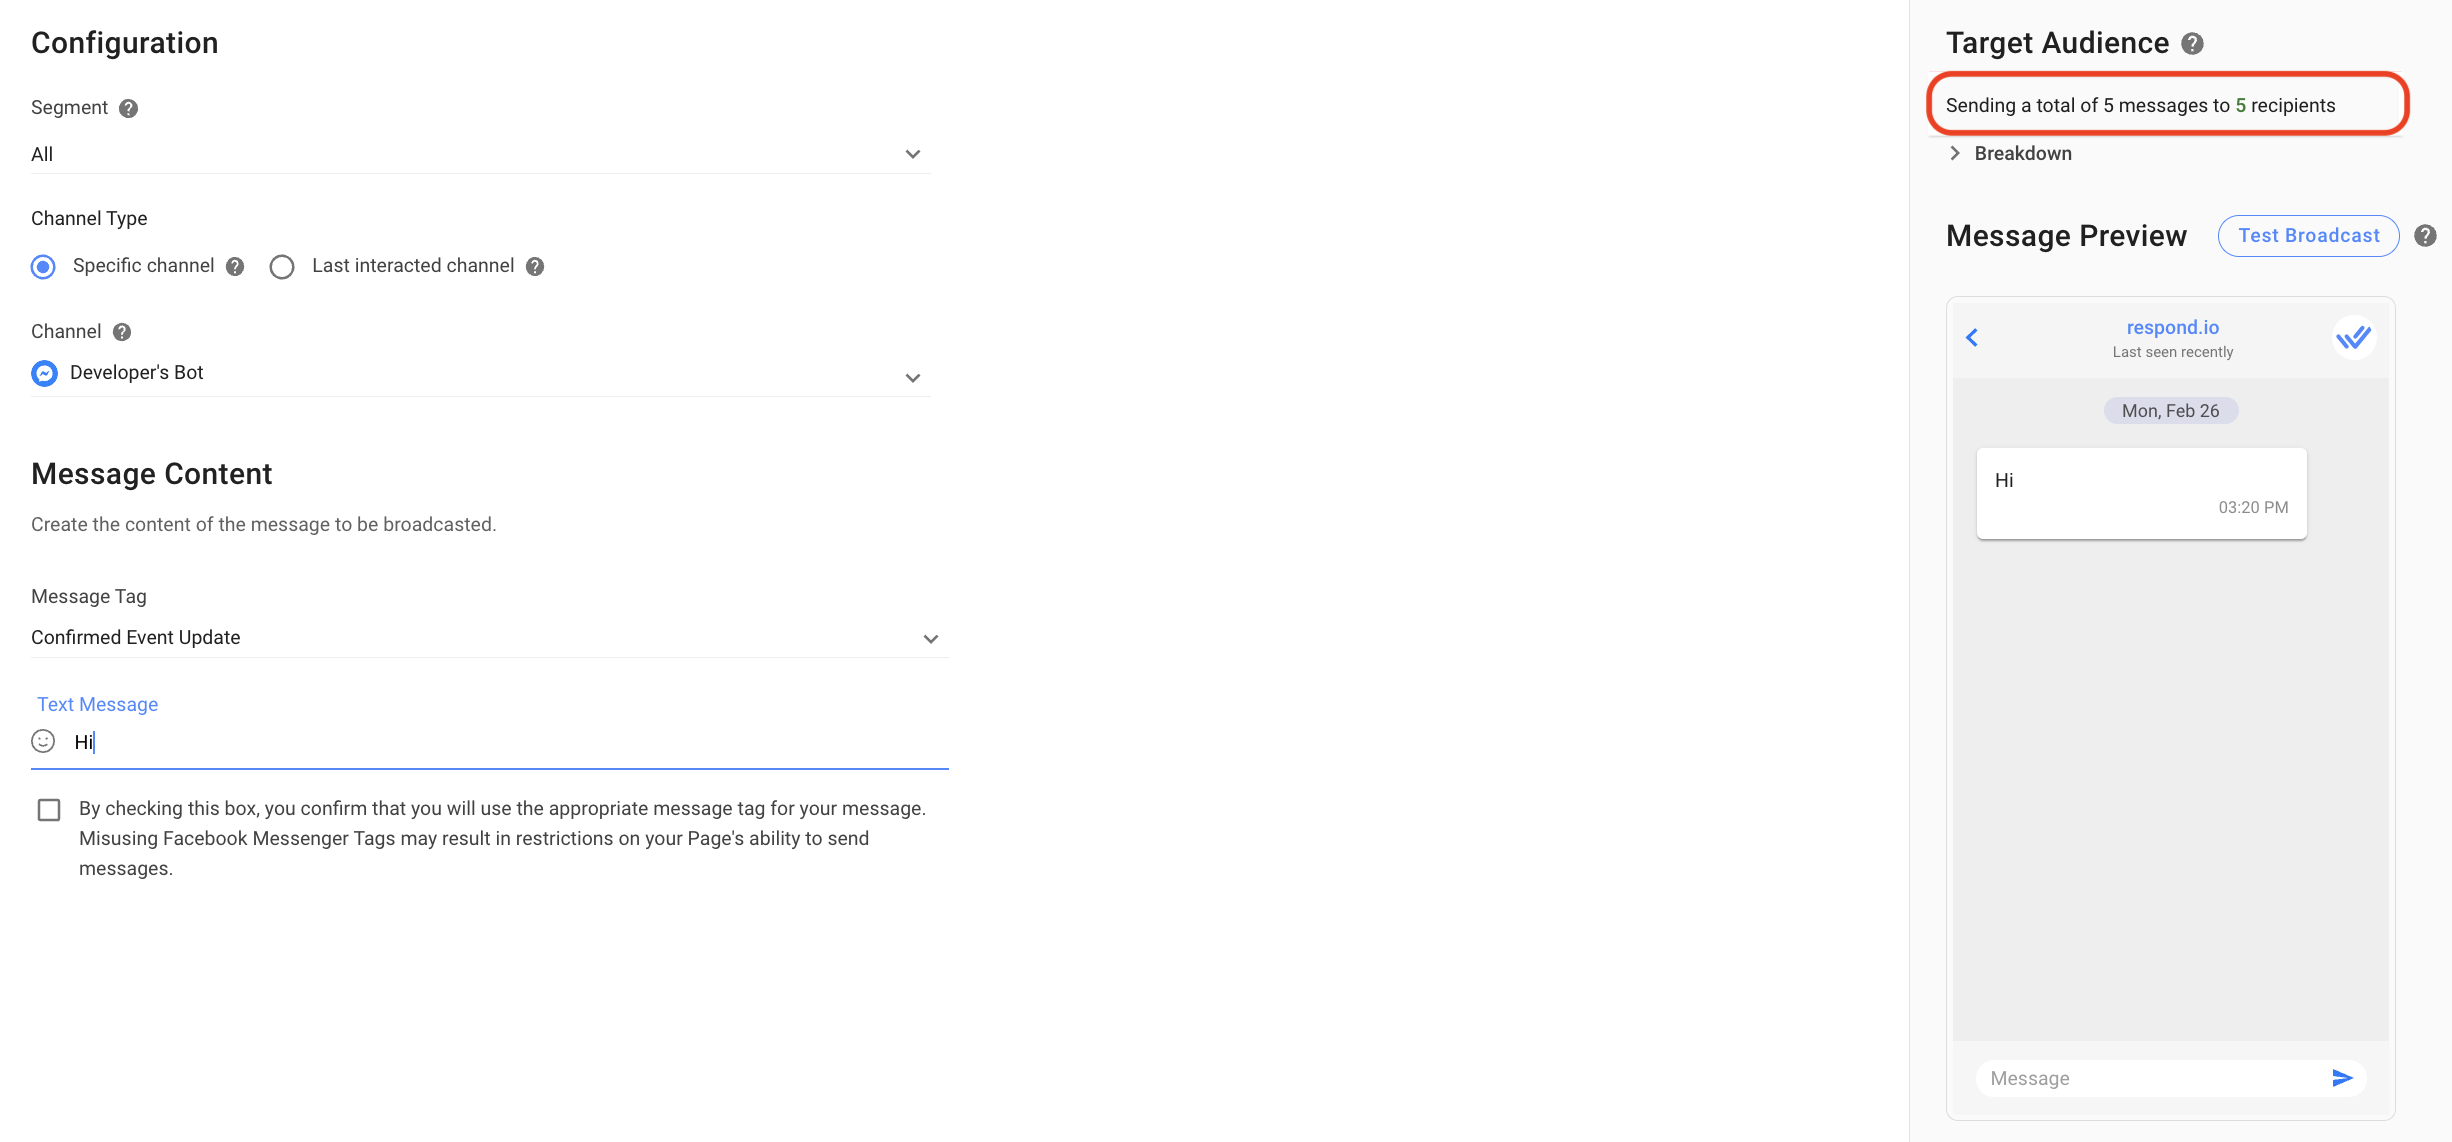
Check Target Audience for a Broadcast
Step 10: Check the Target Audience to see the breakdown of the number of messages being sent and the number of recipients who will receive the broadcast.
Target Audience Breakdowns for different Channels
Facebook, LINE, Viber, Telegram and Twitter
Here are the details of the Target Audience Breakdown for Facebook, Line, Viber, Telegram, and Twitter.
Item | Description |
Total Contacts in the Segment | The number of Contacts that are currently in the selected Segment. |
Contacts not available on the selected Channel(s) | The number of Contacts in the selected Segment who do not have the selected Channel. |
Total broadcast recipients | The total number of Contacts that this broadcast will be sent to. Total broadcast recipients = Total Contacts in the Segment - Contacts not available on the selected Channel(s) |
WhatsApp, SMS and Custom Channel
Toggle ON: Send message only to Contacts who have previously interacted with this channel
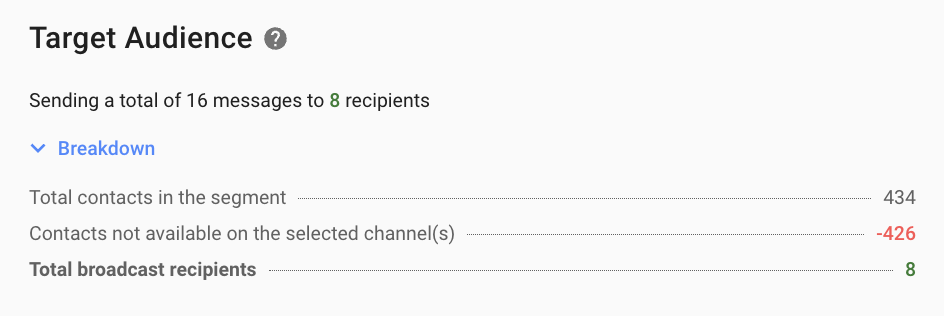
Here are the details displayed in the Target Audience Breakdown for WhatsApp, SMS and Custom Channel when the Toggle is ON.
Item | Description |
Total Contacts in the Segment | The number of Contacts that are currently in the selected Segment. |
Contacts not available on the selected Channel(s) | The number of Contacts that are in the selected Segment who do not have the selected Channel(s). |
Contacts that have never interacted on the selected Channel(s) | The number of Contacts in the Segment who have never interacted with the selected Channel(s). |
Total broadcast recipients | Total number of Contacts that this broadcast will be sent to. Total broadcast recipients = Total Contacts in the Segment - Contacts not available on the selected Channel(s) - Contacts that never interacted with the selected Channel |
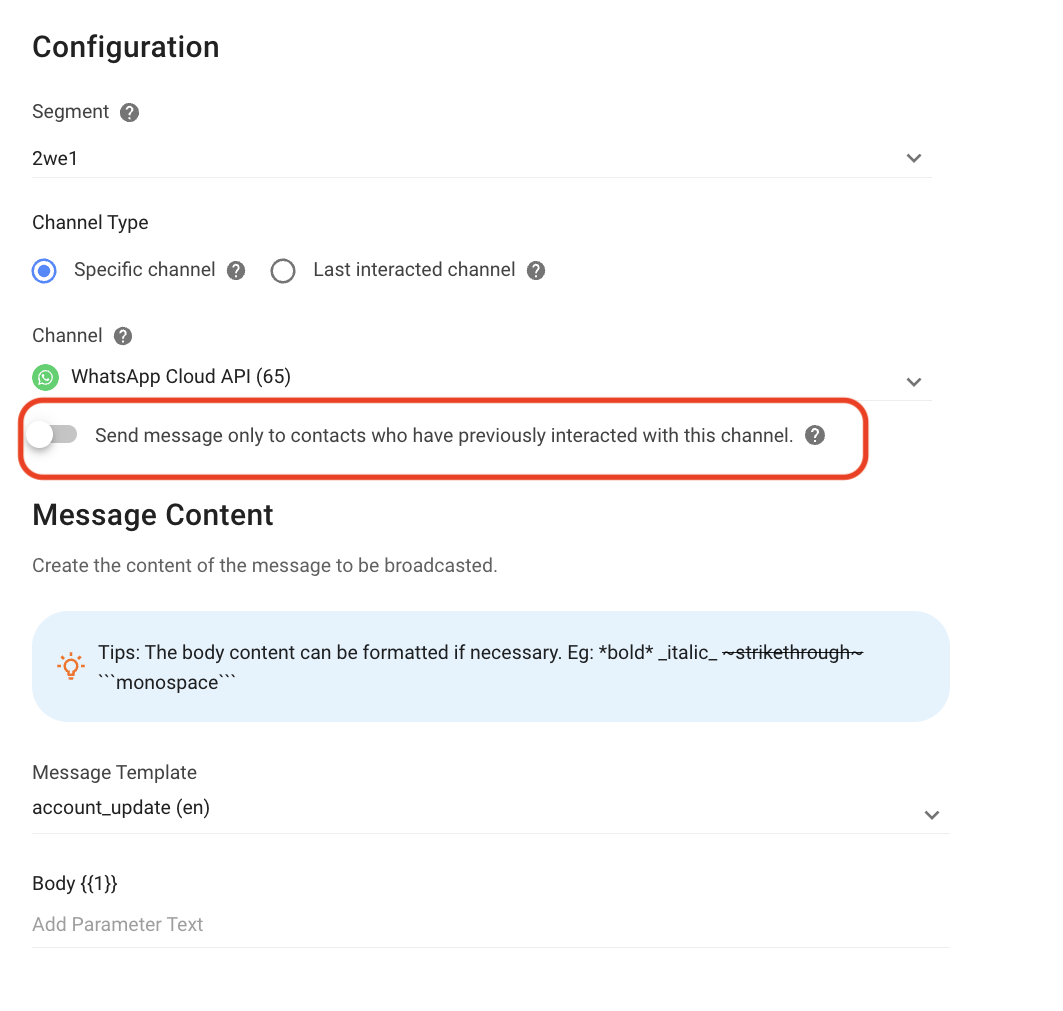
Toggle OFF: Send message only to Contacts who have previously interacted with this Channel
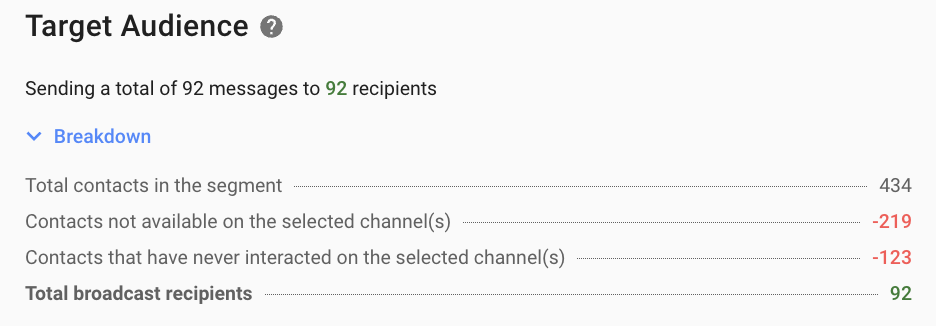
Here are the details displayed in the Target Audience Breakdown for WhatsApp, SMS and Custom Channel when the Toggle is OFF.
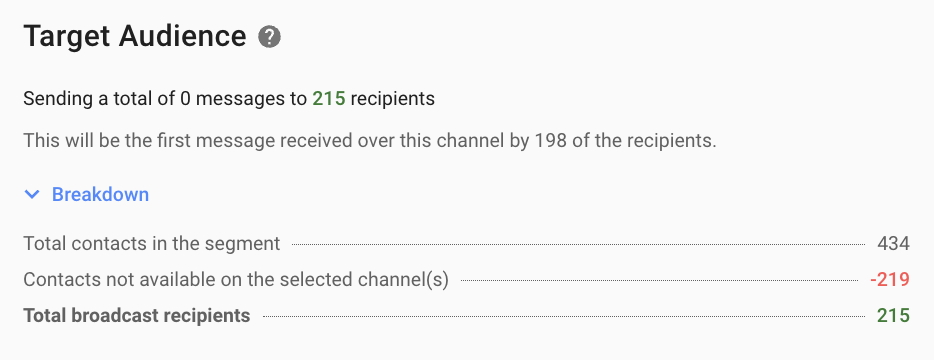
Item | Description |
This will be the first message received over this Channel by {n} of the recipients. | The number of Contacts that will receive this broadcast as their first message. |
Total Contacts in the Segment | The number of Contacts that are currently in the selected Segment. |
Contacts not available on the selected Channel(s) | The number of Contacts that are in the selected Segment who do not have the selected Channel(s). |
Total broadcast recipients | The total number of Contacts that this broadcast will be sent to. Total broadcast recipients = Total Contacts in the Segment - Contacts not available on the selected Channel(s). |
Last Interacted Channel
Here are the details displayed in the Target Audience Breakdown for Last Interacted Channel.
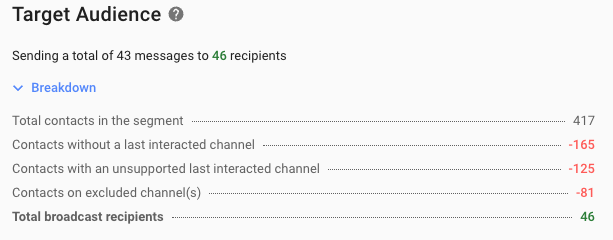
Item | Description |
Total Contacts in the Segment | The number of Contacts that are currently in the selected Segment. |
Contacts without a Last Interacted Channel | The number of Contacts who never send or receive a message. |
Contacts with an unsupported Last Interacted Channel | The number of Contacts who the Last Interacted Channel does not support Broadcasts (for e.g. email). |
Contacts on excluded Channel(s) | The number of Contacts in the Last Interacted Channel that have been excluded from the Selected Channels. |
Total broadcast recipients | The total number of Contacts that this broadcast will be sent to. Total broadcast recipients = Total Contacts in the Segment - Contacts without a Last Interacted Channel - Contacts on excluded Channel(s). |
Schedule Broadcast and Customize Send Rates
Step 11: Decide when to send the broadcast. You may send a broadcast immediately, or schedule it for a later date and time.
Step 12: You may customize your send rate based on a maximum limit of the total number of messages sent per second, minute, or hour. However, the rate to send messages cannot exceed 7 days. Should the speed exceed the channel limit, broadcast messages may fail to send, as the channels may block them, which counts towards broadcast usage.
- If send rate is not configured or not available, the broadcast will be sent as soon as possible with a limit for each Channel.
Send Broadcast
Step 13: Confirm and verify the recipients and broadcast content > click Send Broadcast.