Table of Contents
Make
Connect respond.io to Make and unlock the possibilities through thousands of integrations.
You can integrate your Contact information from the respond.io platform to thousands of CRMs, email providers, CMS, analytics tools, ads, and more. Let's have a quick look at this integration.
Getting Started
In order to get started with the respond.io - Make integration, you will need the following:
- A respond.io account
- A Make account
For most scenarios (same as Zaps in Zapier), you’ll need to use a contact identifier, either email or phone number. If you don't have a record of a Contact’s email or phone number in respond.io, you may not be able to complete a scenario.
Creating Scenarios
There are two ways you can create scenarios:
Create a Scenario from Template
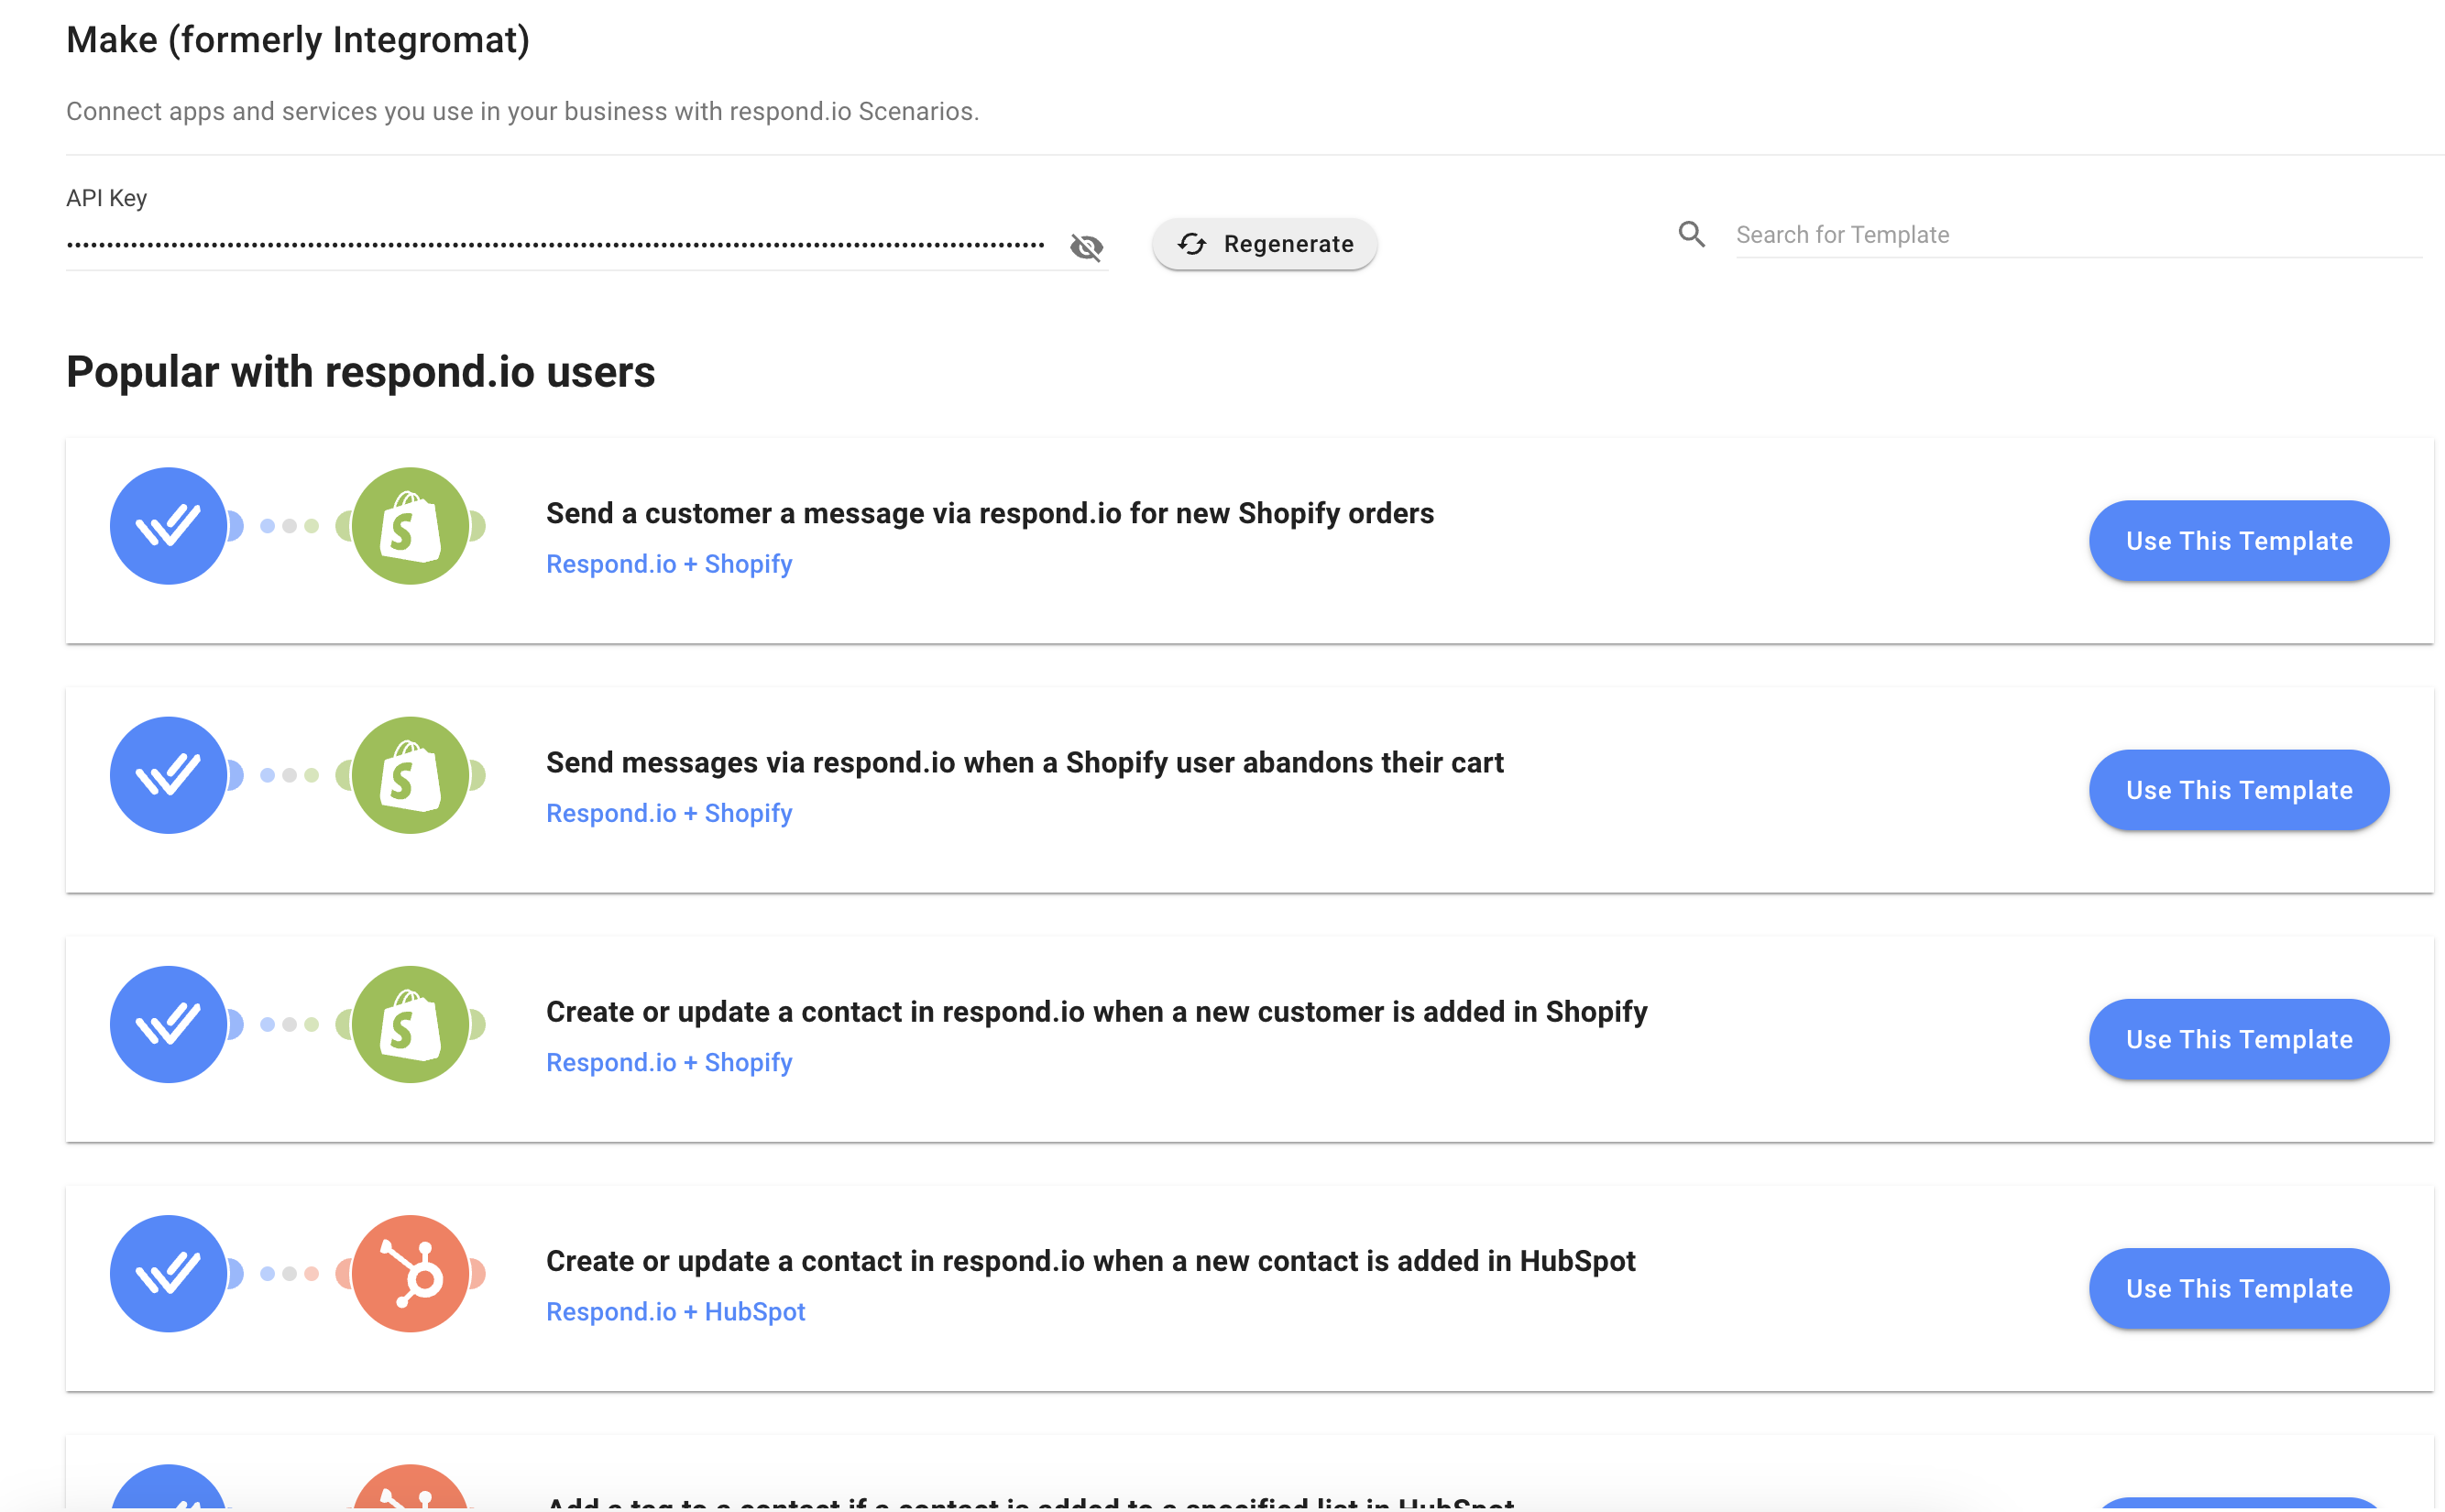
Templates are predefined scenarios that you can expand and customize to create scenarios. We have created some templates connecting respond.io to some popular CRM and e-commerce platforms. You can then share these with friends and colleagues.
To use a scenario template, follow these steps:
Step 1: Log in to respond.io > go to the Settings module > click Integrations.
Step 2: Click Edit next to the Make option > select a template from the list.
Create a Scenario from Scratch
To create a scenario from scratch, follow these steps:
Step 1: From your Make account, click Scenario on the left menu > click + Create a new scenario.
Step 2: Our integration with Make requires the usage of 3 modules: Triggers, Actions and Searches.
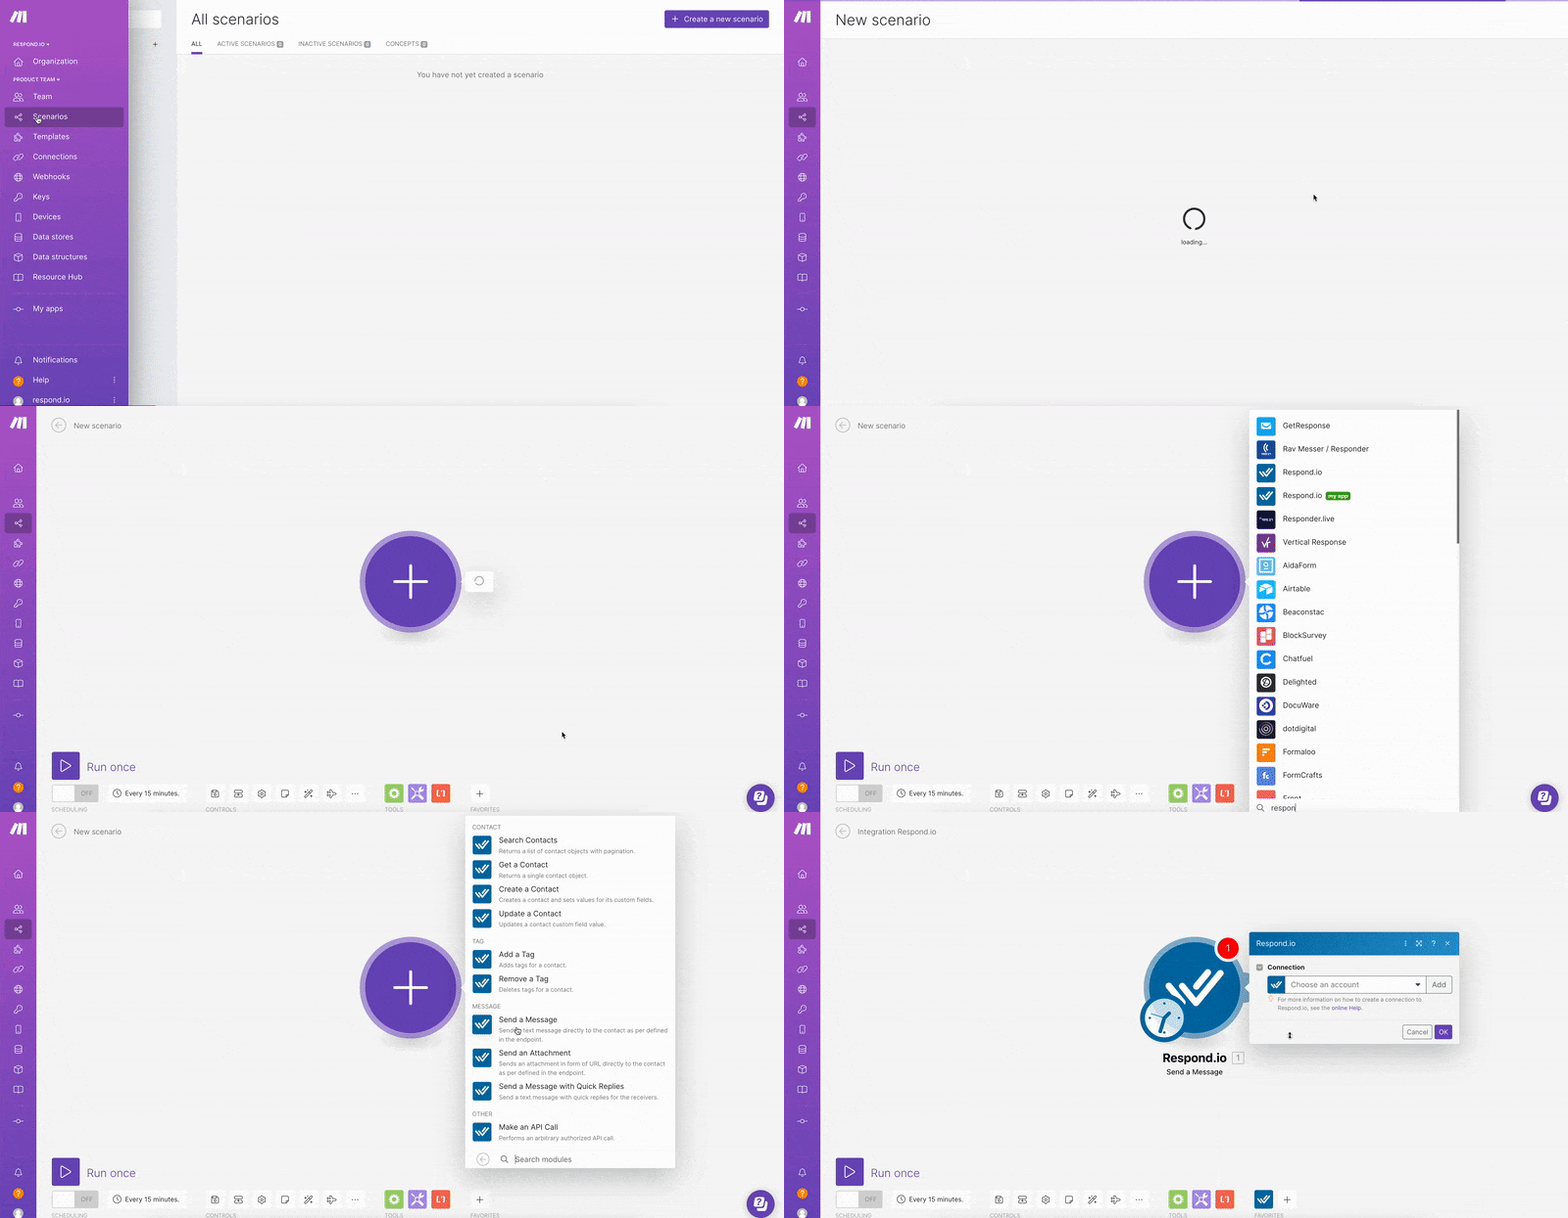
- Choose your trigger or action app: The scenario will be triggered by an event that occurs or has occurred in this app.
If you’re using respond.io as the trigger, click on the big plus sign > search respond.io in the search bar > select the Respond.io app. - Select your event: This will be the event that occurs or has occurred in the selected app that triggers the scenario.View the full list of trigger events available for respond.io here.
- Select or connect your app account: Select or connect the specific app account to use in the Scenario trigger or action.To connect respond.io in Make, follow the instructions here.
- Set up and test your trigger: Set up the options to fit your needs and test your trigger to see if it pulls in the right data.Learn more about setting up your scenario trigger or action here.
Step 3: Follow these steps to add and set up an Actions module:
- Choose your action app: The scenario will perform an action in this app when it is triggered. To use respond.io for the action, click + add another module > search respond.io in the search bar > select the Respond.io app.
- Select your event: This will be the event that the scenario will perform in the selected app when the trigger app sends data to the action app to proceed.View the full list of action events available for respond.io here.
- Select or connect your app account: To connect respond.io to Make, follow the instructions here.
- Set up and test your action module: Set up the data that you want to send over to your action app and test if it's working as expected.Learn more about setting up your scenario action here.
Step 4: When your scenario is ready, you can do the following:
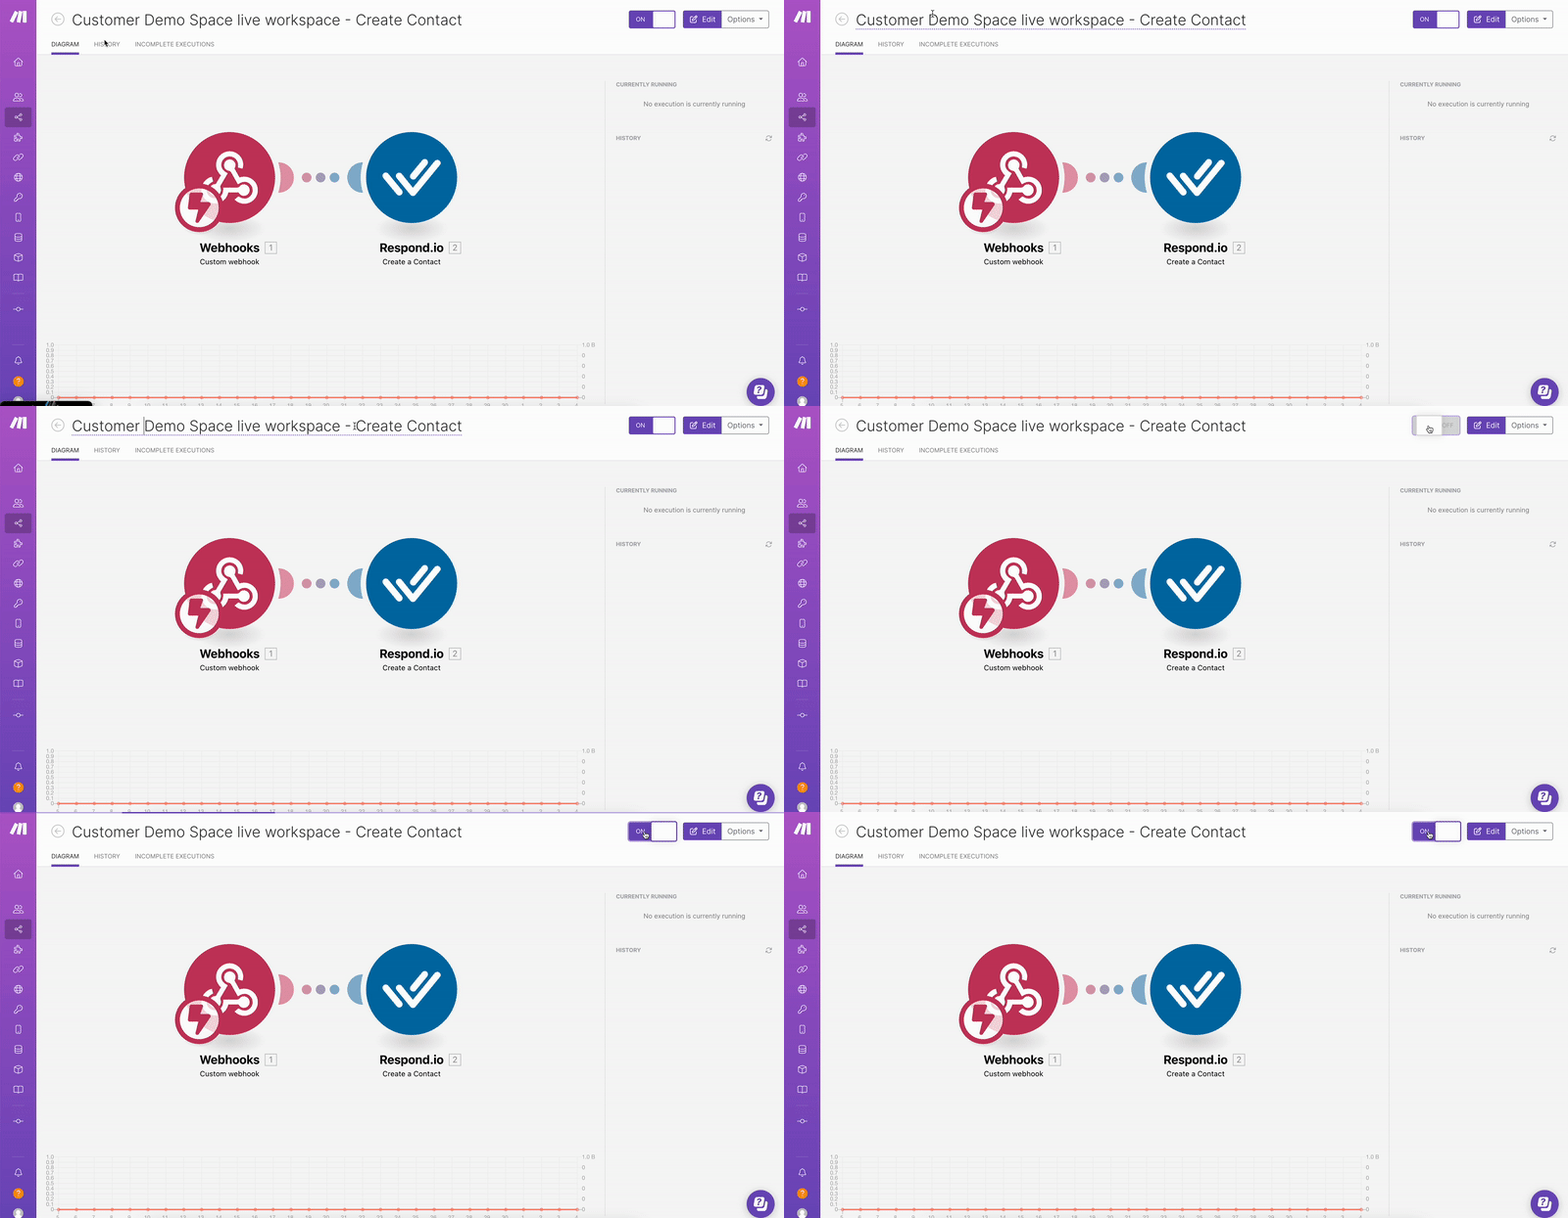
- Schedule your scenario to run: Schedule the time interval in which a scenario should run by clicking Scheduling settings and making your desired changes.Note that only trigger modules that are instant triggers can run immediately.
- Rename your scenario: If required, rename your scenario by clicking the scenario's name at the top left.
- Activate your scenario: Exit the scenario editor by hitting the arrow icon at the top left > switch the toggle to ON.
Connect respond.io to Make
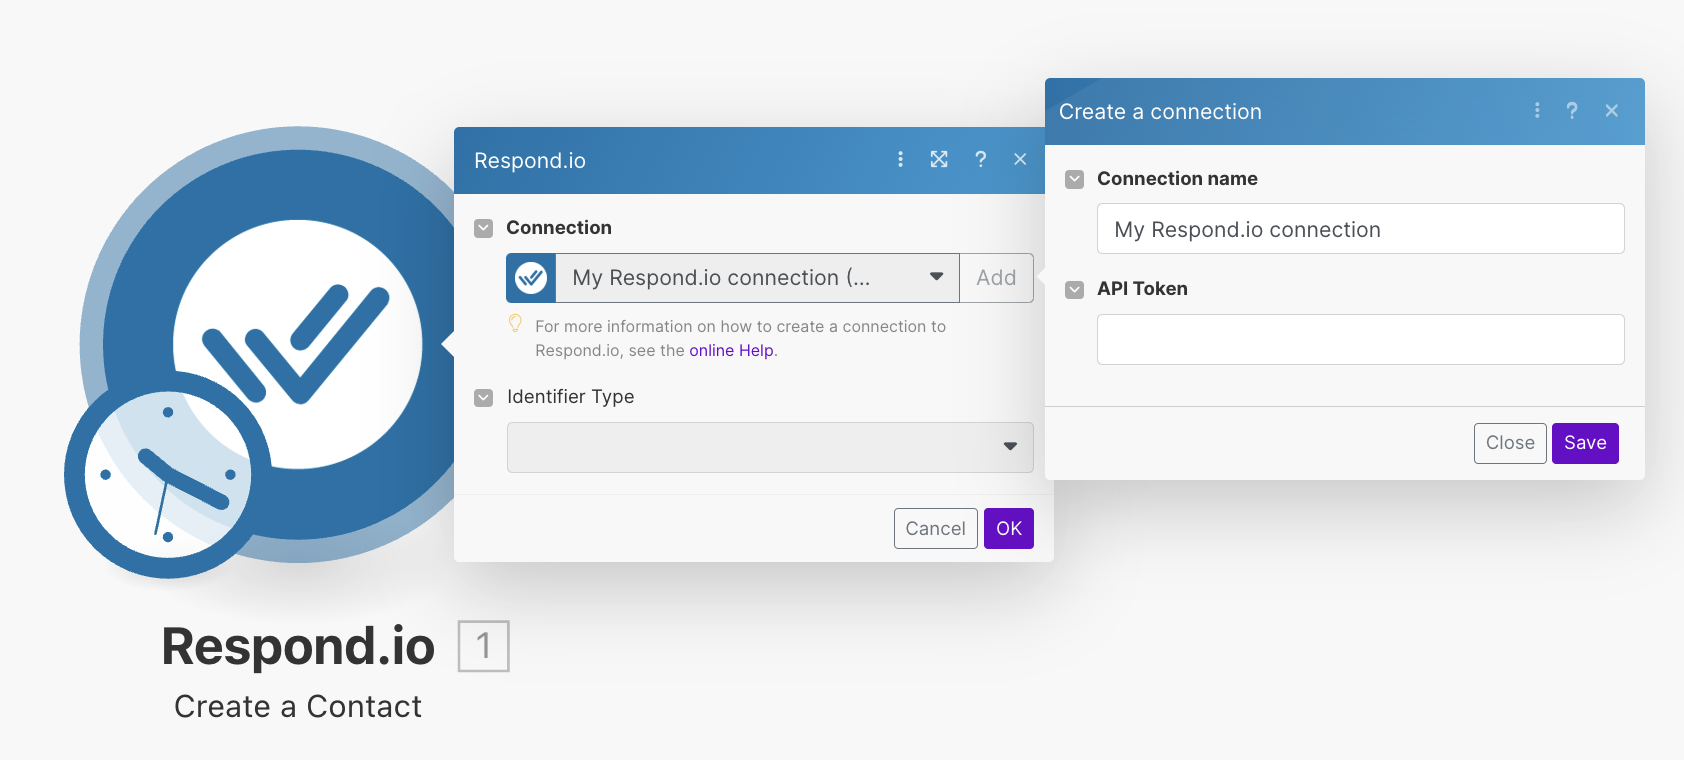
When connecting Respond.io app in Make for the first time, you are required to sign in and add an API Key. Follow the steps below:
Step 1: Log in to the respond.io Workspace you wish to connect > go to the Settings module > click Integrations under Workspace Settings > click Connect next to Make option. You will be directed to the Make page in respond.io.

Step 2: To copy the API Key, click the unhide icon > click the API Key.
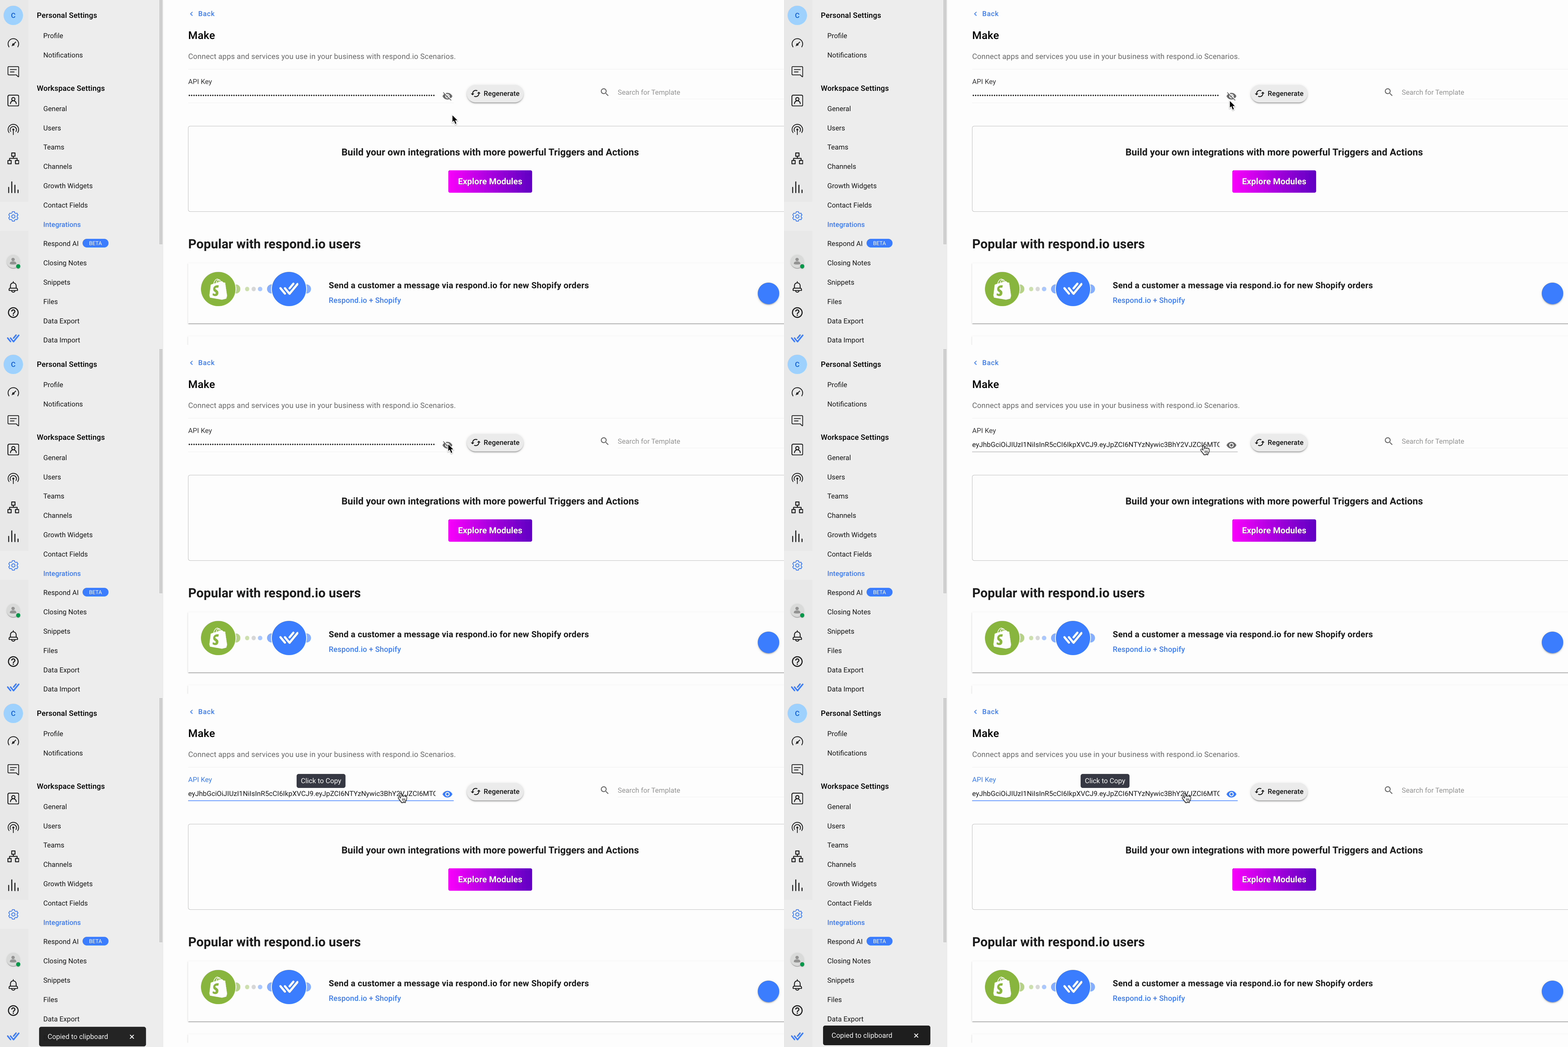
Step 3: On Make, click the Respond.io module > click Add in the Connection drop-down menu > paste the API Key in the API Token field > click Save.
Handling Failed Message Delivery
When integrating respond.io with Make, one common issue you might face is the failed delivery of messages due to insufficient funds or other errors at the messaging channel level.
Setting Up Error Handling:
- Capture Delivery Failures: Utilize the "Get Message" module in your Make scenario to check if the message was successfully sent. This step will help in identifying messages that failed due to errors such as insufficient funds.
- Error Feedback to Make: Adjust your scenario to ensure that any error received from the messaging channel is passed back to Make. This enables the automation platform to receive accurate feedback about the message delivery status.
- Automated Retry Mechanism: Implement a mechanism within Make to retry sending failed messages automatically. This can be set up by adding conditional logic in the scenario where, if a message fails, it triggers a retry action after a specified delay.
- Notification and Logging: Optionally, include a step to log these incidents or notify team members through a comment or tagging system within the platform, enabling visibility and manual intervention if required.
Best Practices:
- Enable Auto-Top-Up: To minimize the risk of message delivery failure due to insufficient funds, enable auto-top-up features for your messaging accounts.
- Regular Monitoring: Set up regular checks or alerts for the status of your messaging fund balances and the performance of your message delivery scenarios.
- Documentation and Support: Ensure that your team members are aware of these mechanisms and understand how to troubleshoot and adjust scenarios as needed.
FAQ and Troubleshooting
Why can’t I connect my account to the respond.io module (HTTP Status → 401 error)?
Your API Token is invalid or not correct. Make sure your API Token is correct or you can regenerate it.
What happens if a trigger fails to run?
When a trigger fails, we will wait a certain amount of time before we attempt a retry. The waiting time will gradually increase between retries.
We will attempt a total of 3 retries on a failed trigger, with a waiting time of 30 seconds before the first retry, 60 seconds before the second retry, and 90 seconds before the third retry. After the 3rd retry, the trigger will not be invoked to Make.
Why can't I mention a user in a comment on Make?
To mention a user in a comment on Make, use the format $userid$ rather than @userid.
What should I do if I encounter a bug when switching message types in the Send Message module of Make?
If you experience issues when changing from Text to WhatsApp Template (or vice versa) in the Send Message step on Make, here are the steps to resolve it:
- Delete and Re-add Module: First, try deleting the entire Send Message module from your scenario and then re-adding it. This refresh can often resolve issues with module settings not updating correctly.
- Check Updates: Ensure that your module is up to date with the latest integration standards and configurations. Sometimes, updates can fix known bugs.
- Contact Support: If the problem persists after trying the above steps, please report it to the support team. Provide them with all relevant information including any error messages and steps you've already tried.
- Temporary Workaround: While waiting for a resolution, consider using an alternative method for sending messages or a different module configuration that does not trigger the bug.
Regularly updating your scenarios and modules can prevent many common issues. If you encounter similar problems frequently, keep a detailed record to help the support team diagnose and address these more efficiently.
