Table of Contents
Organization Settings: Security
 Updated
by Sana
Updated
by Sana
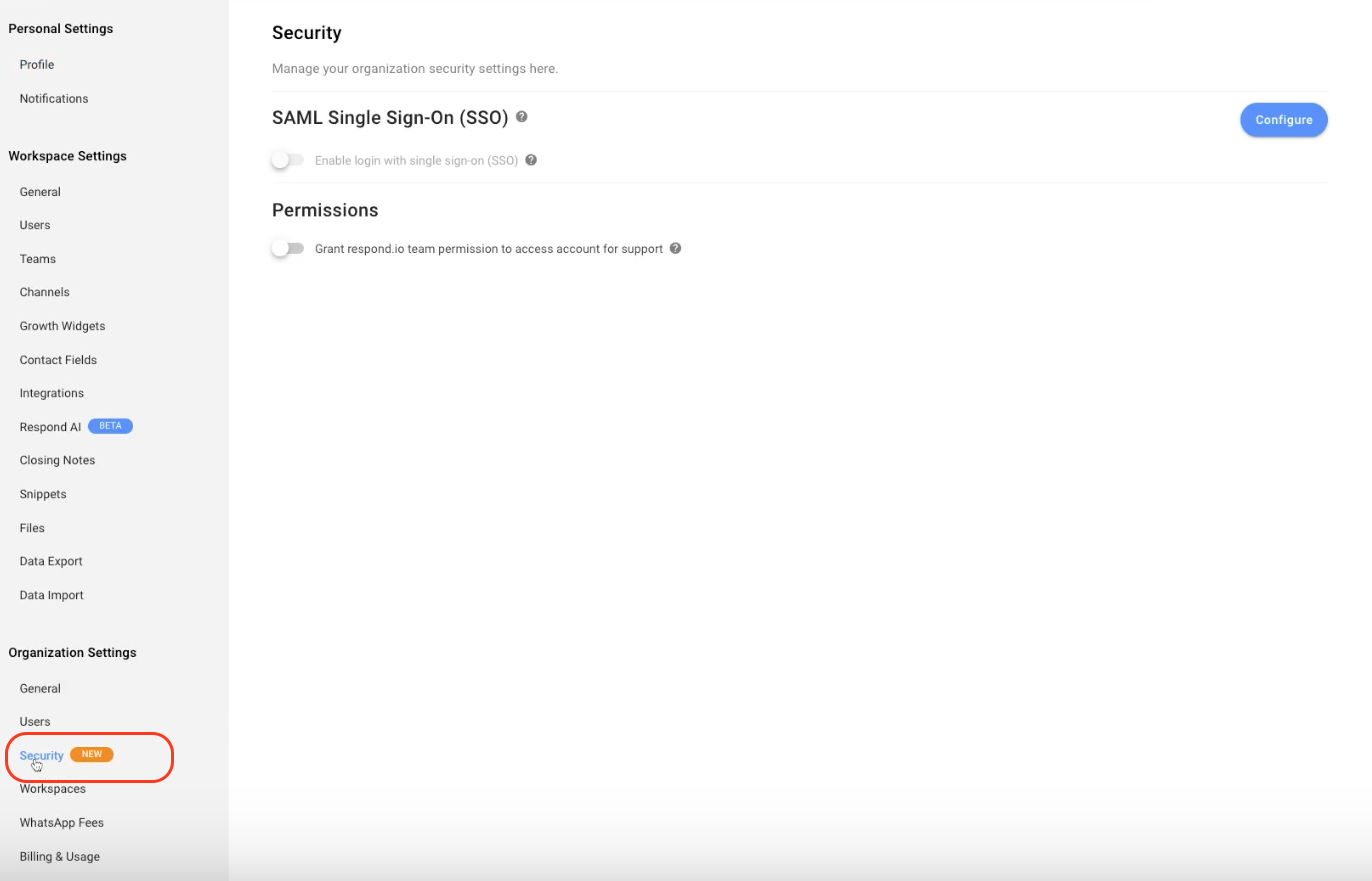
Getting Here
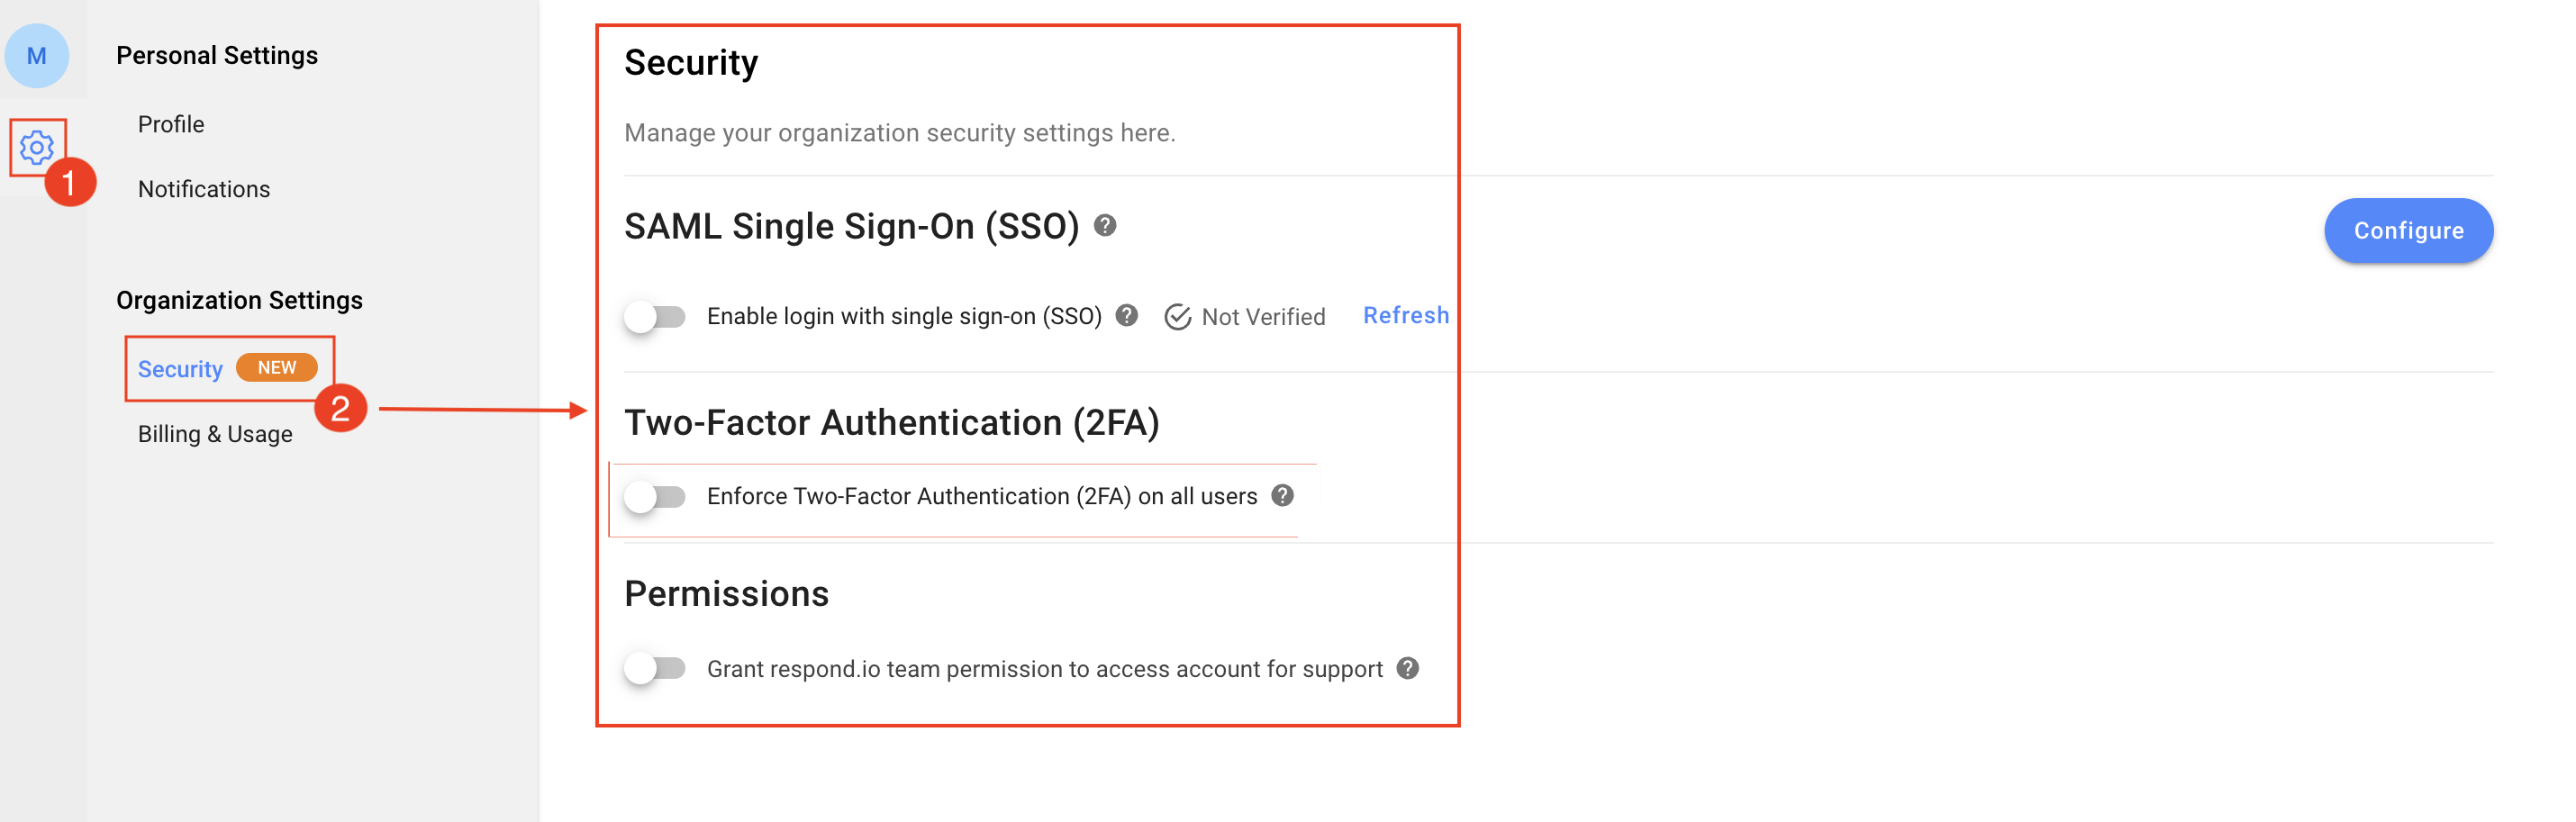
The Single Sign-On (SSO) setting for your organization can be accessed and edited from the Settings module > Organizational Settings > Security page by user admins and organizational admins. The Billing Admins can only view this page and not edit it.
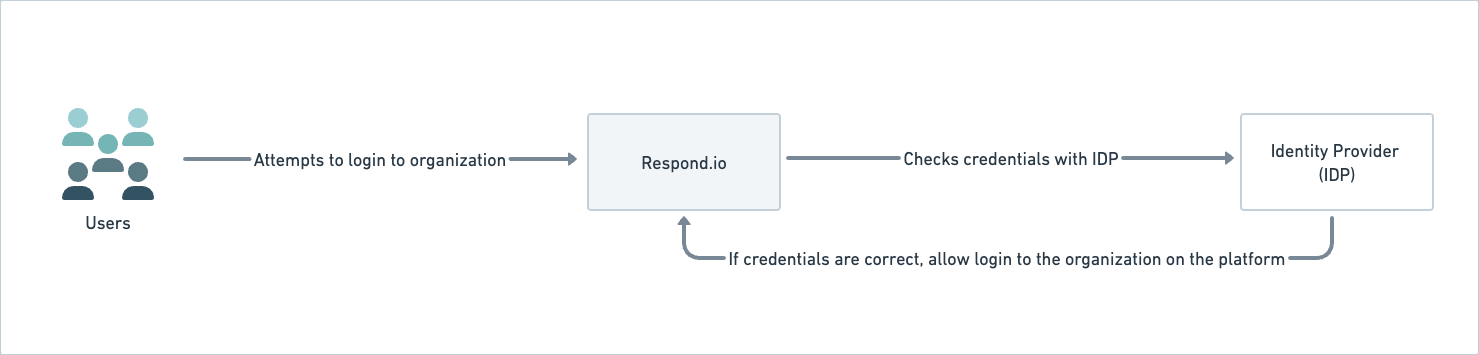
What is Single Sign-On?
Security Assertion Markup Language Single Sign-On (SAML-SSO) is a session authentication method allowing you to sign in to one or multiple organizations using a single set of login credentials. Not only does SSO enhance security and access control, but it also benefits the users by making things more seamless. This means you can sign in to or switch between SSO-enabled organizations using a single set of credentials if they use the same Identity Provider (IDP).
Learn about the platform sign in, sign out and sign up behaviour when SSO is enabled/disabled in the following table:
Feature | Admin/User Admin Users | Other Users |
Organization Sign Up | Organization Admin invites a user to the organization via email. | The user accepts the invite by clicking the link provided in email. Users can log in to the organization using their email without providing additional information. If SSO is disabled for an organization, the user is logged out automatically and they must use their email and password to login to the organization again. The password may likely require updates. |
Organization Sign In | SSO enabled org: The user can sign in using their SSO-authenticated email. | |
Non-SSO org: The user can sign in using their organizational email and password or sign in with Google. | ||
SSO Session Duration | All users will remain logged into an SSO-enabled organization for 24 hours, after which they will automatically be logged out and will be required to log in again. | |
Signing into Multiple Organization | Platform Admin allows the user access to multiple organizations. | When a user logs in using SSO and is part of several organizations with a shared IDP, the user is asked which organization they want to log into. |
Signing into a Single Organization | Platform Admin allows the user access to one organization. | Since the user is part of only one organization, they are led to it directly. |
SSO to SSO Org Swapping: When a user switches between SSO-enabled organization that shares the same Identity Provider (IDP), the user’s access will still be validated to check if it has the required authority. | ||
SSO to Non-SSO Org Swapping (and vice versa): While switching between organizations, the user is automatically logged out and must log in to the non-SSO organization with the correct set of credentials. | ||
Access Denial | Admin users or Admins can deny access to a user’s credentials by deleting or disabling the user from the IDP and/or removing them from the platform. | The user can no longer login to the organization. |
When user is removed from the IDP or Organization, they must reset their password to regain access to the other organizations they are enabled for. |
Configuring SSO Settings
SSO can be enabled on new and existing organizations; however, it must first be configured before SSO is enabled.
External Configurations for SSO
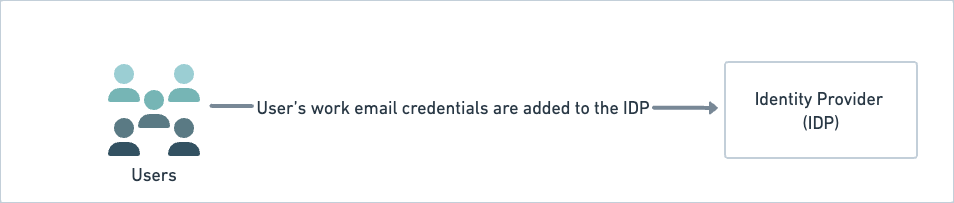
In order to use SAML SSO, you need to add the user’s work email to the IDP. This configuration is done externally, i.e., outside the respond.io platform.
Internal Configurations for SSO
On the Security page, click the Configure button to configure SSO.
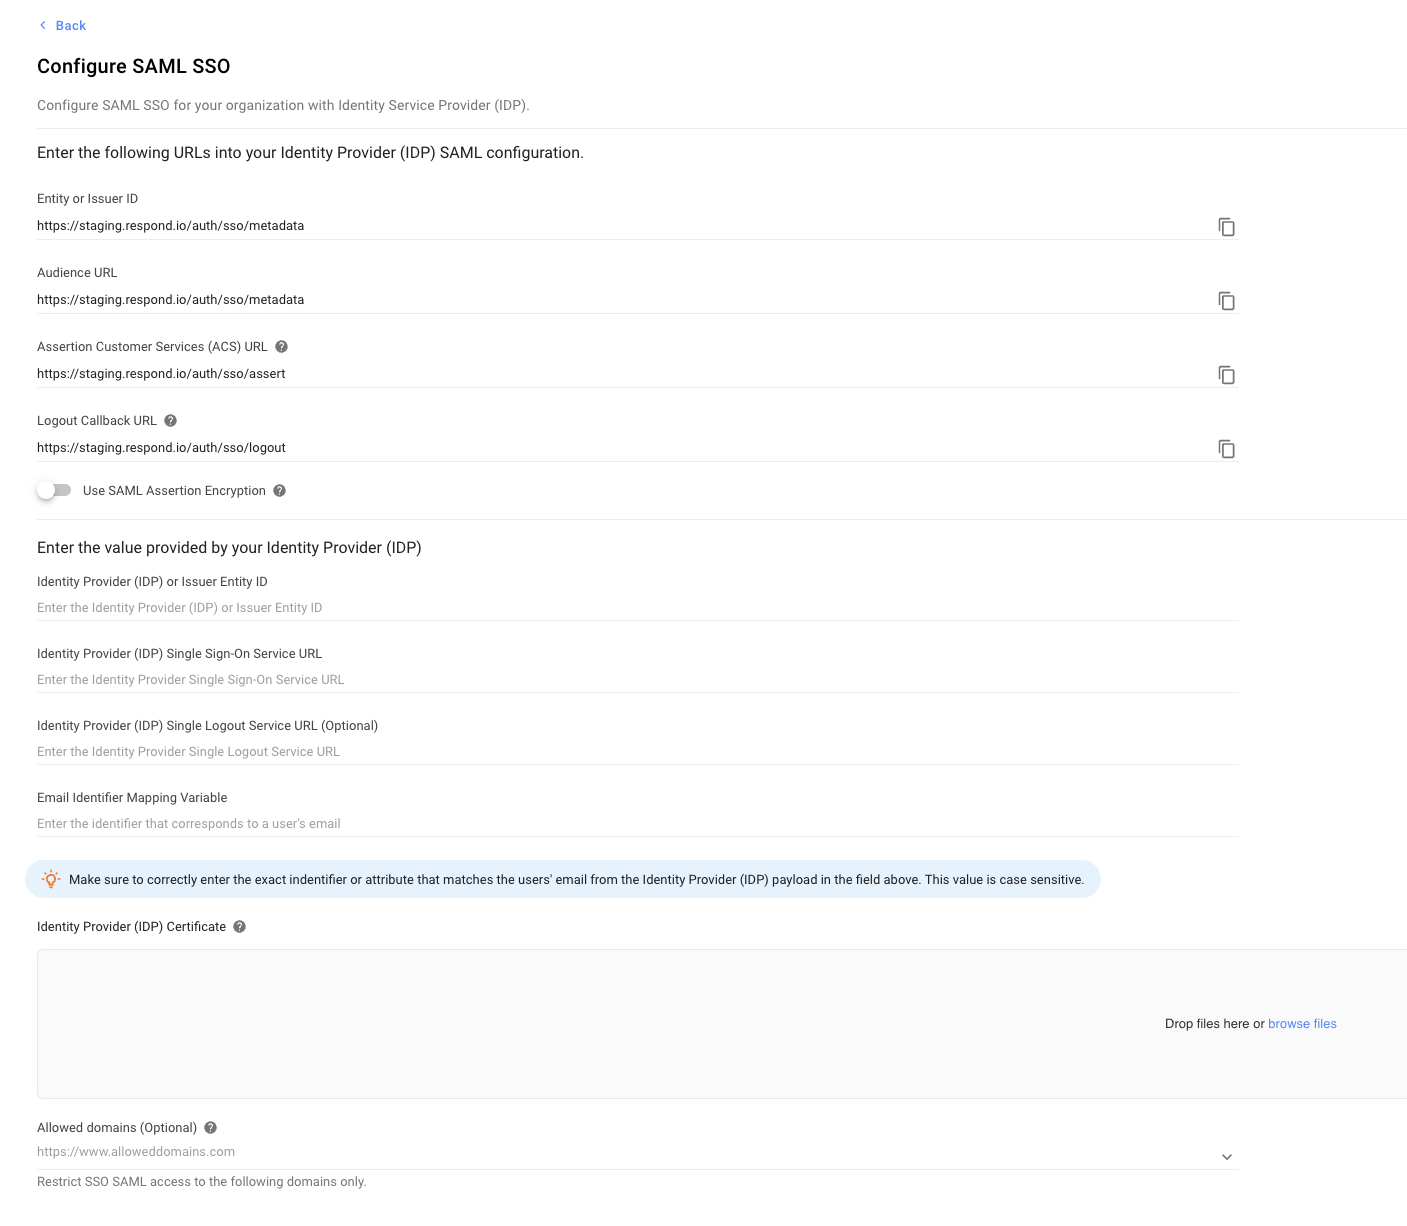
On the Configure SAML SSO dialog that opens, configure the following options:
Configuration Options | Description |
Entity or Issuer ID | The globally unique name for an Identity Provider or a Service Provider. Use the copy icon to copy this URL and paste it to your IDP. |
Audience URL | Determines the intended recipient or audience for the SAML Assertion. Use the copy icon to copy the URL to your clipboard and provide the URL in the relevant field of the Identity Provide (IDP). |
Assertion Customer Service (ACS) URL | The combination of the Secure Token Server subsystem address, its port number for handling SAML messages, the SAML binding, and any necessary information that is specific for CIC or ICWS. Use the copy icon to copy the URL to your clipboard and provide the URL in the relevant field of the IDP. |
Use SAML Assertion Encryption |
|
Download Certificate | Click Download to download the certificate and later upload it to your identity provider (IDP). |
Download Public Key | Click Download to download the key and later upload it to your identity provider (IDP). |
Identity Provider or Issuer Entity ID | Paste the Identity Provider (IDP) or Issuer Entity ID. Copy this information from the IDP and paste it here. |
Identity Provider or Issuer Entity ID | Paste the Identity Provider (IDP) or Issuer Entity ID. Copy this information from the IDP and paste it here. |
Identity Provider Single Sign-On Service URL | Paste the Identity Provider Single Sign-On Service URL. Copy this information from the IDP and paste it here. |
Identity Provider Single Logout Service URL | Paste the Identity Provider Single Logout Service URL. Copy this information from the IDP and paste it here. |
Email Identifier Mapping Variable | Paste the identifier that corresponds to a user's email. This value is case-sensitive. Copy this information from the IDP and paste it here. |
Identity Provider Certificate | Provide a list of domains you want to allow access to while restricting all others. The domains must follow the proper format, e.g.,
Leaving this field empty will not restrict any domains. |
Configure | Verifies the configuration settings and then saves the updates. |
Once SSO has been enforced, all users within the organization will receive the notification via email and the notification center.
Editing Configuration
Once you have provided SSO internal configurations, click the Edit Configuration button to edit the settings. However, if SSO is enabled, you cannot edit the configuration and must temporarily disable SSO by clicking the Disable button on the Edit SSO configuration for this organization dialog. You are automatically signed out and need to sign in again with the email and password for the (SSO disabled) organization.
Deleting Configuration
If you want to remove the configuration, click the Delete Configuration button and confirm the deletion by clicking DELETE on the pop-up that displays. This disables the users and logs them out.
Enabling/Disabling SSO for your organization
On the Security page, turn the Enable login with SSO toggle on; on the dialog that opens, click Enforce. All users are automatically logged out of the organization and can log in using the approved email address. A notification and email is sent to you informing you that you have been logged out because SSO has been enabled in your organization.
Turning the toggle off disables SSO for your organization, users are automatically logged out and can only log in using their email and password. Users who do not have a password yet will need to reset their password on the login page. A notification and email is sent to you informing you that you have been logged out because SSO has been disabled on your organization.
What is Two-Factor Authentication (2FA)
Two-Factor Authentication (2FA) addresses the issue of password vulnerability and provides an additional layer of security (in case your password is compromised), reinforcing the safety measures taken to protect sensitive data (by eliminating the chances of unauthorized access to your account). This additional layer requires your organization's users to provide an authentication code generated by an authenticator app installed on their mobile devices. Once the users provide the correct passwords, they must provide an authentication code to log in.
Enforcing Two-Factor Authentication (2FA) for All Users
It is recommended that you give them a warning ahead of time or enforce it at a time when most users are not using the platform to avoid interrupting their progress.
To enforce Two-Factor Authentication (2FA) on all users within an organization, follow the steps below:
- Turn the Enforce Two-Factor Authentication (2FA) on all users toggle on.
- On the confirmation dialog, click Enforce to confirm.
Once turned on, all the users in the organization will be sent an email and notification that they need to turn Two-Factor Authentication (2FA) on immediately.
Disabling Two-Factor Authentication (2FA) Enforcement for All Users
You can disable Two-Factor Authentication (2FA) enforcement on the users of your organization by turning the Enable Two-Factor Authentication (2FA) for all users toggle off.
When disabled, the Two-Factor Authentication (2 FA) enforcement of the organization is removed, and users don't need to enable Two-Factor Authentication (2FA) anymore. All users in the organization (including those that have not enforced Two-Factor Authentication (2FA)) can now view all modules.
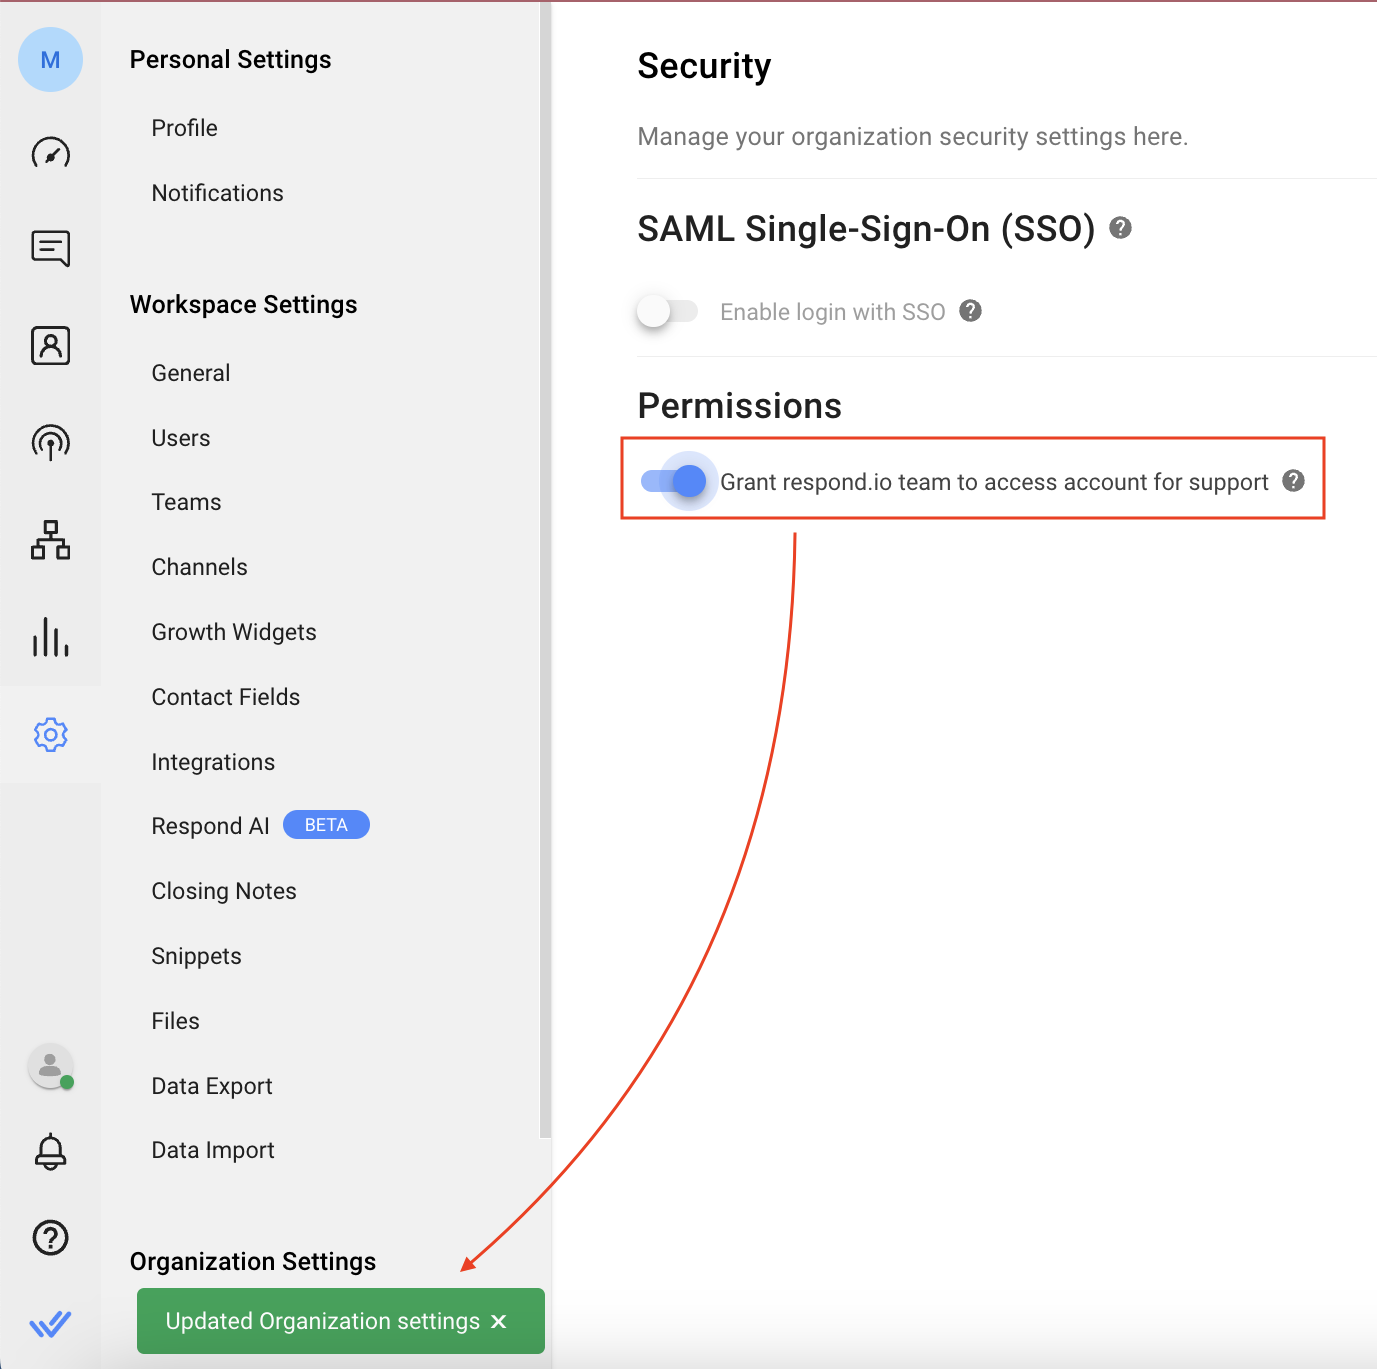
Granting the Platform Support Permission
Turn this toggle on to grant respond.io support permission to access your account and quickly resolve issues themselves. A notification pops-up when you enable this option. You can disable this option by toggling this option off.
Inviting a User to an SSO-Enabled Organization
The organization admin can invite a user to an organization from the Workspace Settings > Users page. Find more details here.
Signing Up to SSO-Enabled Organization
Users can sign up using an invitation sent to their email address. Click the link in the email, verify the email on the page that opens, and click Sign In.
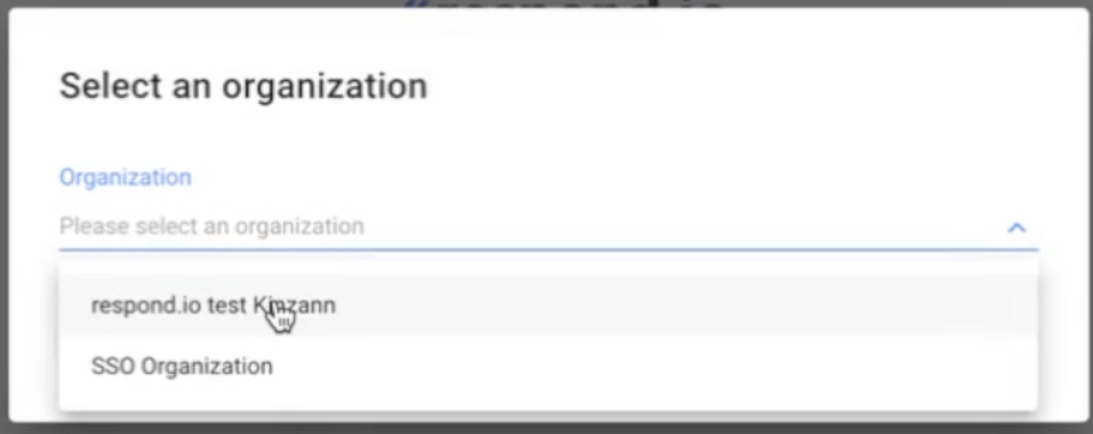
Signing in to SSO-Enabled Organizations
Users can sign in to the SSO-enabled organization using the sign-in page by providing their email address; the IDP validates the email address before logging them into the organization on respond.io.
If the user is part of multiple organizations, it can select an organization from the Organization dropdown list on the Select an Organization dialog.
Setting up SSO on respond.io for Google Workspace
Follow this step-by-step guide to add respond.io as a Custom SAML App in your Google Admin Console.
Step 1: In your Workspace, Navigate to Settings > Security
Step 2: Click Configure
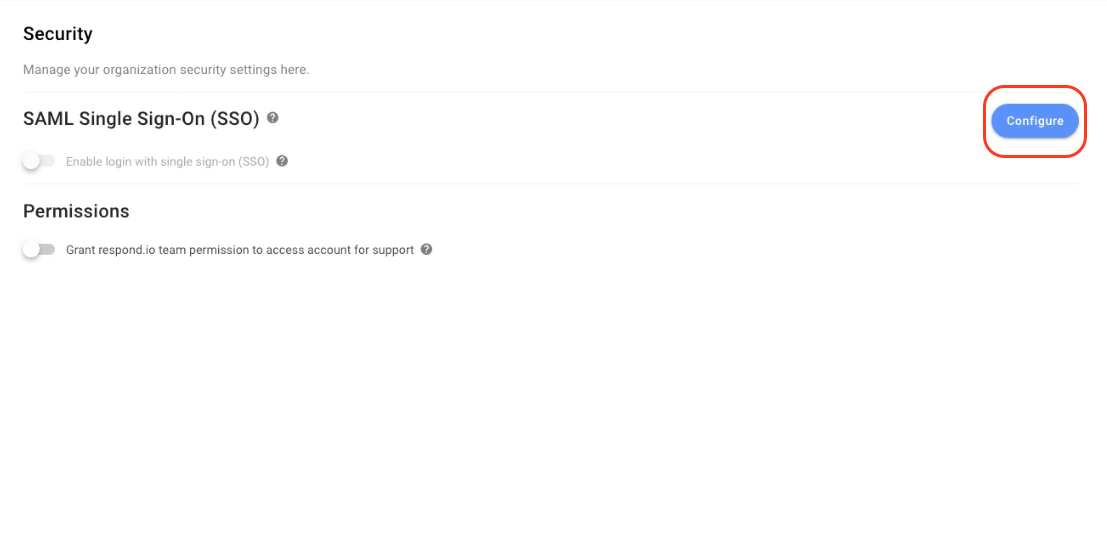
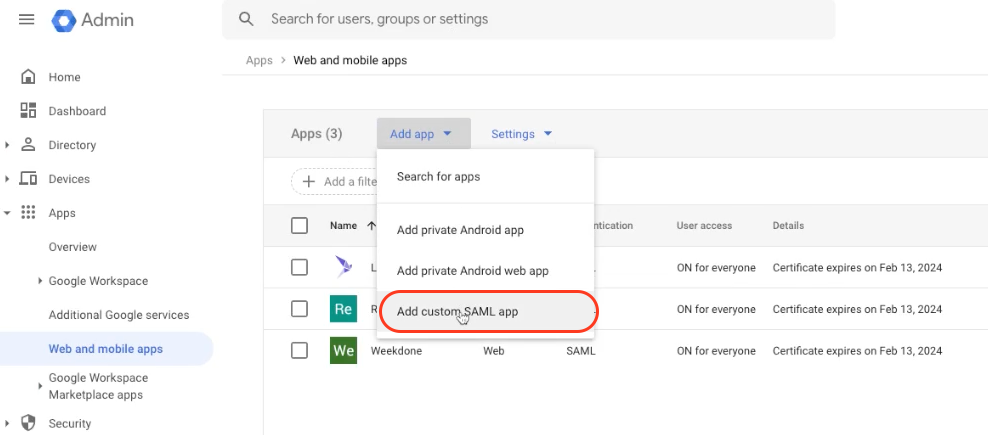
Step 3: Go to https://admin.google.com/ac/apps/unified and click Add app > Add custom SAML App
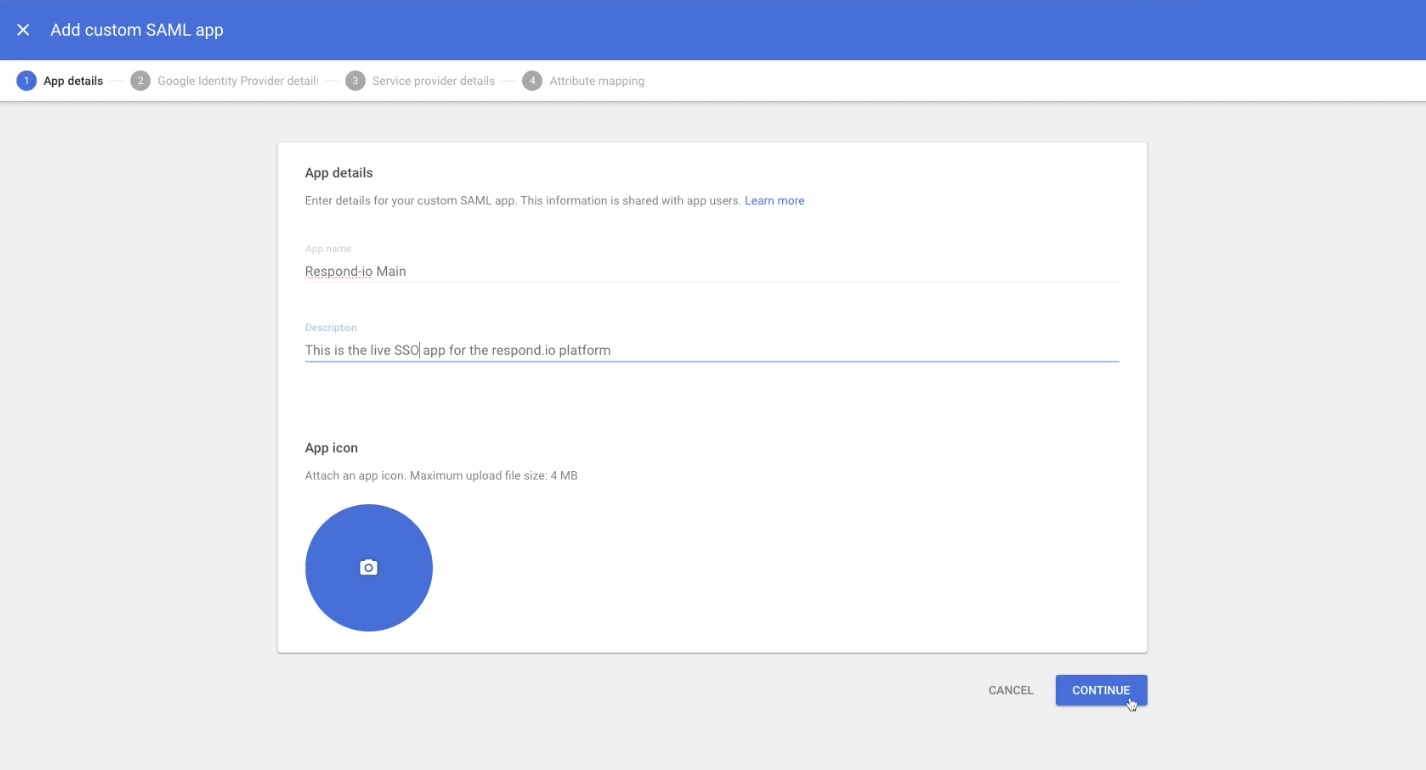
Step 4: Enter the App Name and Description and click CONTINUE
Step 5: Copy the SSO URL, Entity ID and Download the Certificate
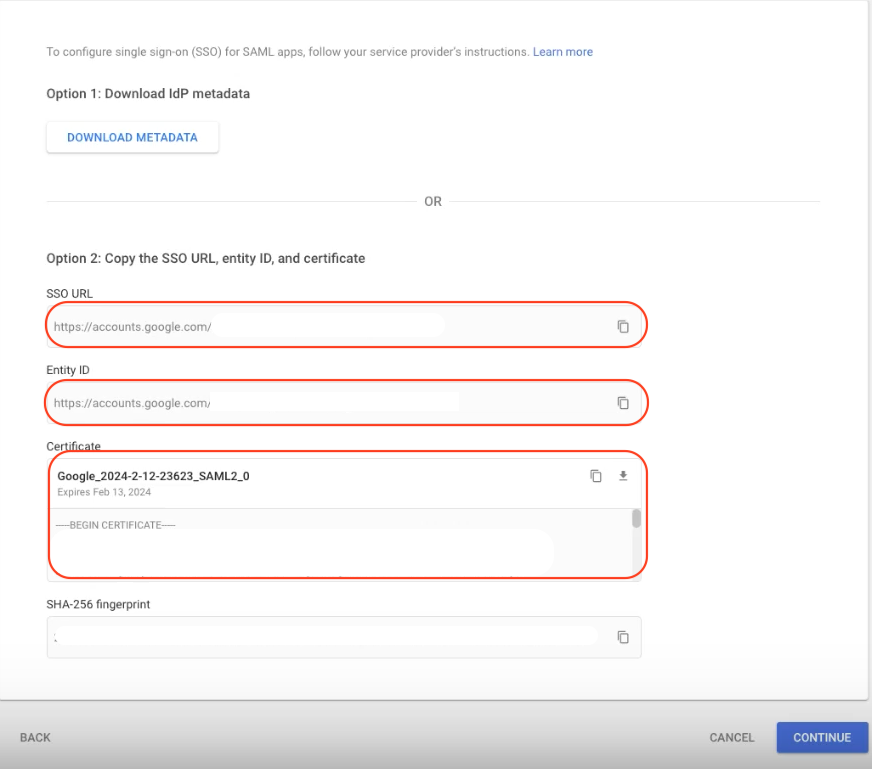
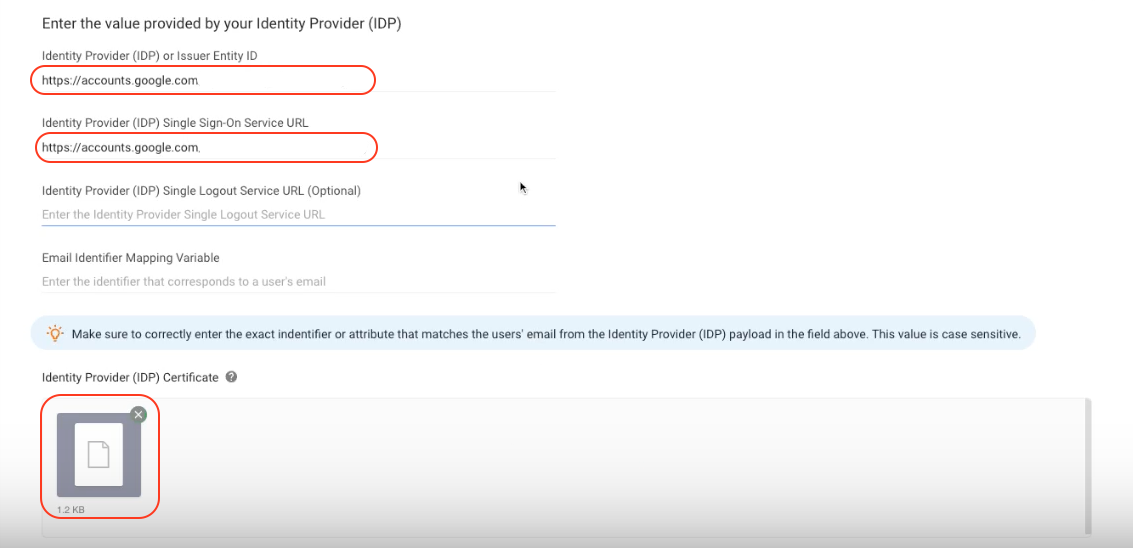
Step 6: In your Workspace:
- Paste the SSO URL to the Identity Provider (IDP) Single Sign-On Service URL field
- Paste the Entity ID to the Identity Provider (IDP) or Issuer Entity ID field
- Upload the Certificate to the Identity Provider (IDP) Certificate field
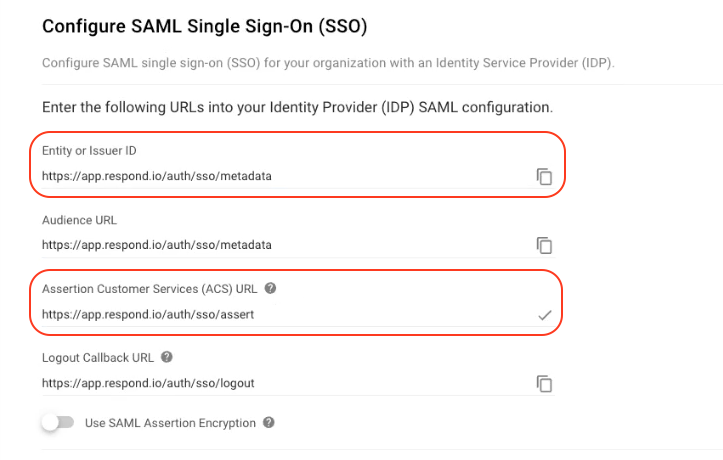
Step 7: In your Workspace, copy the Assertion Customer Services (ACS) URL and the Entity or Issuer ID
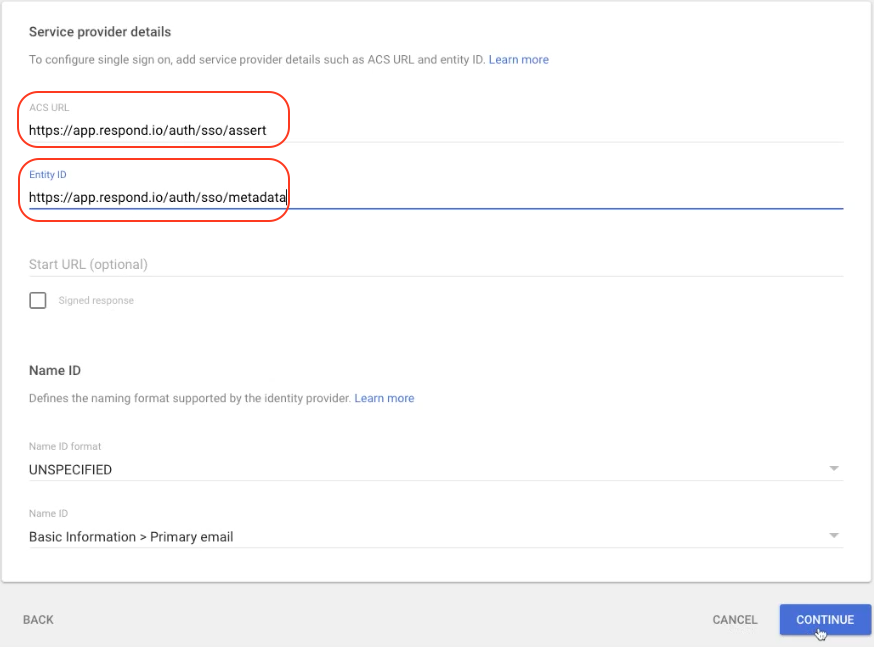
Step 8: In Google Admin:
- Paste the Assertion Customer Services (ACS) URL in the ACS URL field
- Paste the Entity or Issuer ID in the Entity ID field
Then, click CONTINUE
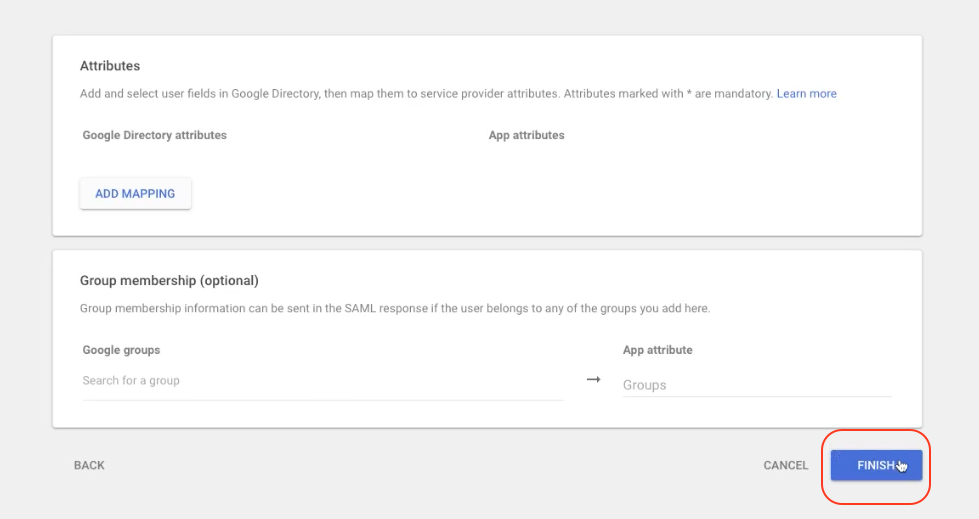
Step 9: Click FINISH
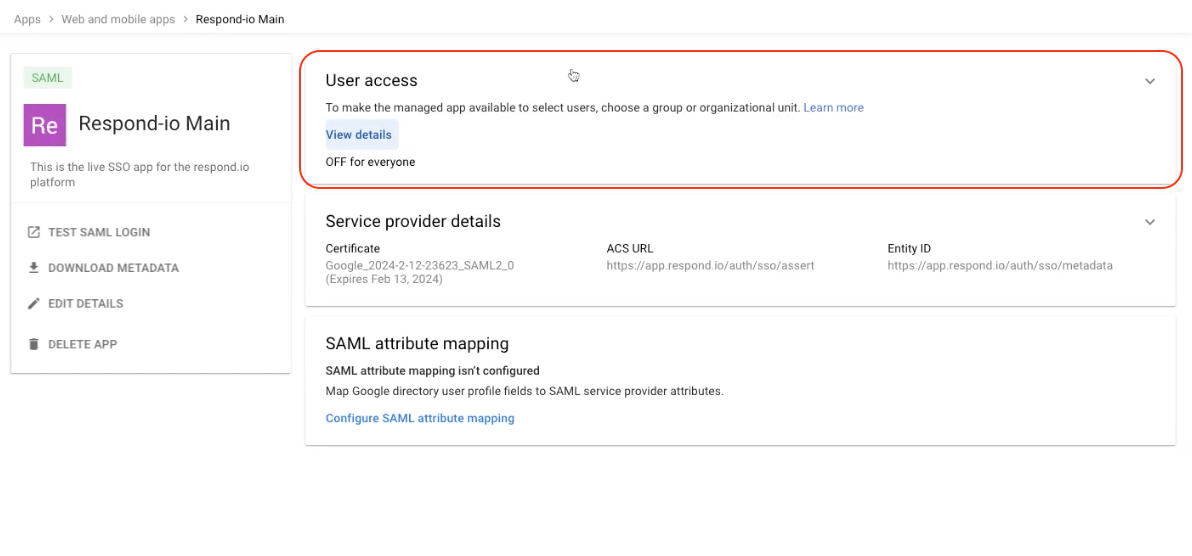
Step 10: In Google Admin, click User access
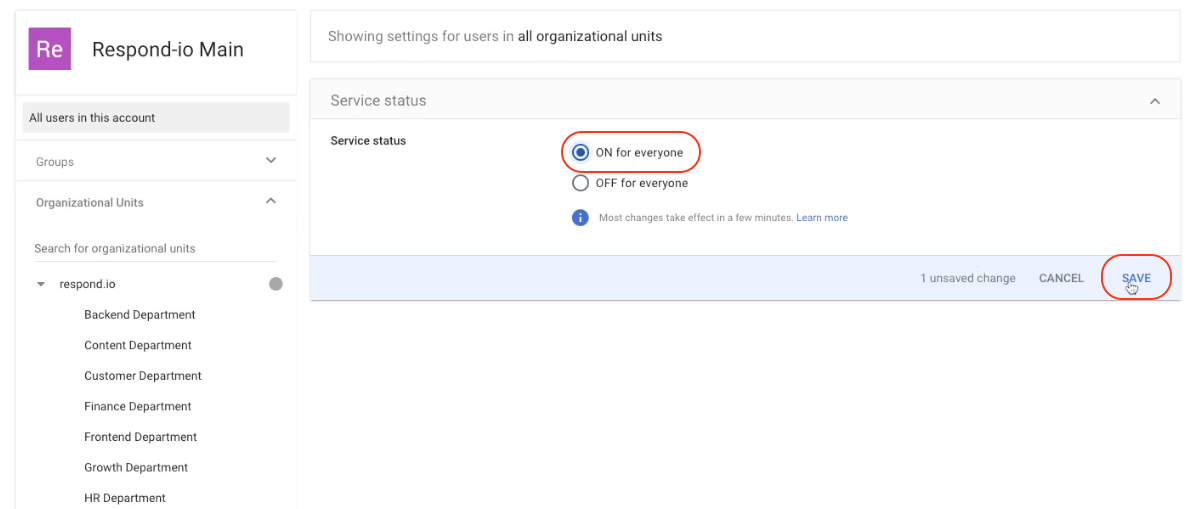
Step 11: Select the service status ON for everyone and click SAVE
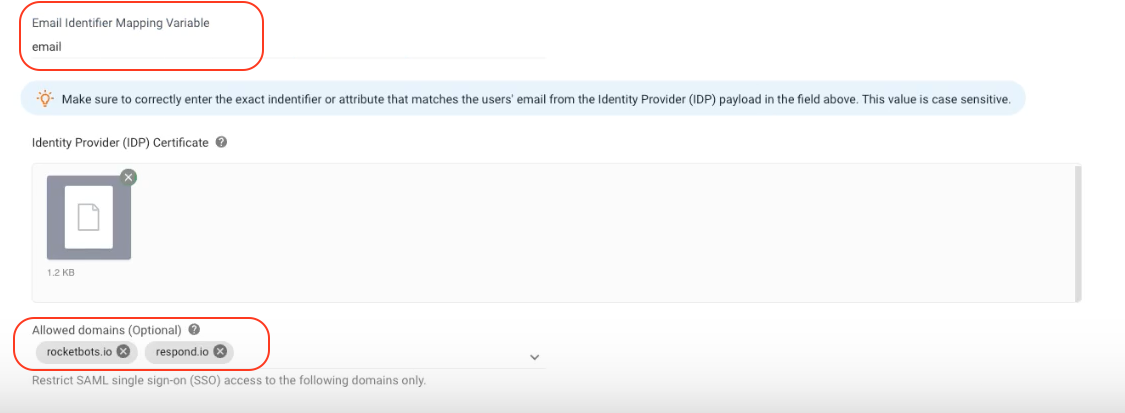
Step 12: In your Workspace, enter the Allowed domains and enter "email" in the Email Identifier Mapping Variable field
Step 13: Click Verify to complete